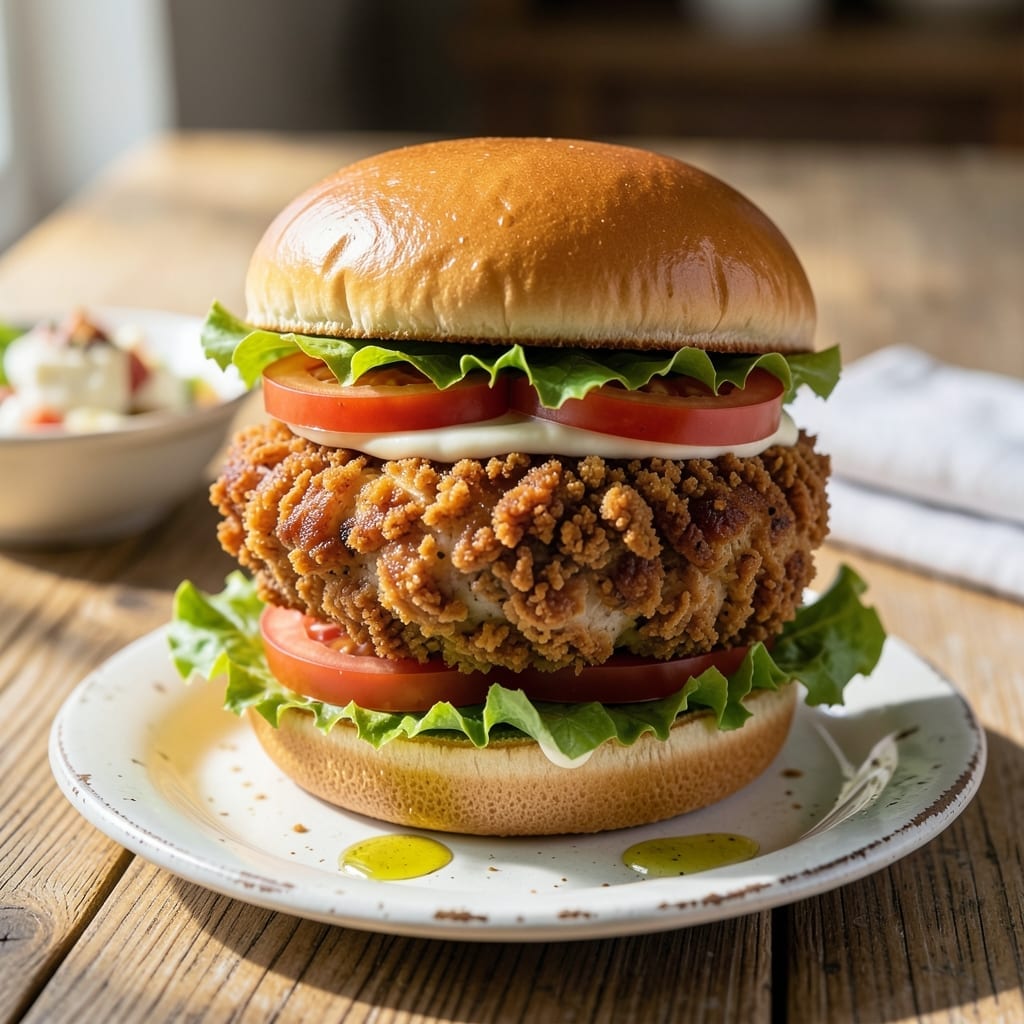
Achieving that signature crispy, golden-brown coating at home is absolutely possible with this method. The key lies in a precise combination of seasoning, resting time, and frying temperature.
This copycat version replicates the iconic sandwich by focusing on texture and flavor balance. The chicken stays juicy inside while developing a shatteringly crispy exterior that rivals the original.
Every element comes together perfectly—the seasoned coating, the tender chicken, and the right bread choice create that familiar experience. The process demands attention to detail but delivers professional results.
Follow the technique exactly for sandwiches that taste just like the restaurant version. The difference will be in the crunch.
Ingredients for Kfc Original Recipe Chicken Sandwich
Professional results demand precise ingredients and technique for this copycat crispy perfection.
| Ingredient | Amount | Notes |
|---|---|---|
| Chicken Breast Cutlets 🍗 | 1 ½ lb | Boneless, skinless, pounded to 1/2-inch thickness |
| Buttermilk 🥛 | 2 cups | Full-fat for optimal tenderness |
| All-Purpose Flour 🌾 | 2 cups | For dredging and coating |
| Cornstarch 🌾 | ½ cup | Enhances crispiness in coating |
| Large Eggs 🥚 | 2 whole | Beaten for egg wash |
| Salt 🧂 | 1 tbsp | Diamond Crystal kosher preferred |
| Black Pepper 🌶️ | 1 tsp | Freshly ground for best flavor |
| Garlic Powder 🧄 | 1 tsp | Fine grind for even distribution |
| Onion Powder 🧅 | 1 tsp | Complements the seasoning blend |
| Paprika 🌶️ | 1 tsp | Sweet or smoked variety |
| Celery Salt 🧂 | 1 tsp | Signature KFC seasoning element |
| White Pepper 🌶️ | ½ tsp | Subtle heat and aroma |
| MSG 🧂 | ½ tsp | Optional for authentic flavor (or omit) |
| Vegetable Oil 🫒 | 4 cups | For deep frying, high smoke point |
| Brioche Buns 🍞 | 4 whole | Soft, slightly sweet for authentic texture |
[recipe_ingredient_scaler]
The chicken breast cutlets are the foundation—pound them to an even 1/2-inch thickness for consistent cooking and maximum crispiness. Buttermilk (full-fat) is non-negotiable for tenderness; Whole Foods or Trader Joe’s carry high-quality options. For the coating, Diamond Crystal kosher salt dissolves evenly, while cornstarch is the secret to that shatteringly crisp texture. Most supermarkets stock all these in the baking aisle.
No buttermilk? Whole milk plus 1 tbsp vinegar per cup works in a pinch. Swap cornstarch with arrowroot powder at a 1:1 ratio. For the breading, panko plus the seasoning blend can replace all-purpose flour for extra crunch. The MSG is optional but authentic—Accent is the most common brand. If unavailable, a pinch of soy sauce powder adds umami depth.
Marinate chicken in buttermilk for 4-12 hours (overnight is ideal). Store unused flour mixture in an airtight container for up to 1 month. Fried chicken is best eaten immediately but reheats in a 350°F oven for 10-15 minutes to restore crispiness.
Why You’ll Love This Recipe
- No-Fuss Coating: I just dip the chicken in buttermilk, then the flour-cornstarch mix—no complicated steps, and the eggs help it stick perfectly.
- That KFC Crunch: The cornstarch in the coating gives it that signature crispiness, while the buttermilk keeps the chicken breast juicy inside.
- Meal Prep Hero: I make a batch on Sunday, and they reheat beautifully for quick lunches or a last-minute dinner. (Yes, even on a Tuesday night)
- Budget Friendly: Chicken breast cutlets stretch far, and the pantry staples like flour and cornstarch mean I’m not buying specialty ingredients.
Step-by-Step Instructions for KFC Style Chicken Sandwich
This method delivers the authentic crispy texture and signature flavor that defines the classic.
Step 1: Marinate the Chicken in Buttermilk
Combine the 1.5 lb chicken breast cutlets with 2 cups buttermilk in a large bowl. Ensure each piece is fully submerged for even tenderizing. Cover and refrigerate for 4-12 hours—this extended soak is non-negotiable for achieving the juicy interior that balances the crisp exterior.
The buttermilk’s acidity breaks down proteins while its fat content keeps the meat moist during frying. I always let it marinate overnight when possible, as the flavor penetration deepens significantly with time.
Step 2: Prepare the Signature Seasoned Coating
In a large shallow dish, whisk together the 2 cups all-purpose flour, 0.5 cup cornstarch, 1 tbsp salt, 1 tsp black pepper, 1 tsp garlic powder, 1 tsp onion powder, 1 tsp paprika, 1 tsp celery salt, 0.5 tsp white pepper, and 0.5 tsp MSG. The cornstarch is the secret to that extra-crispy crust that shatters with each bite.
This blend creates a complex flavor profile that mimics the original’s 11 herbs and spices. The celery salt and white pepper are particularly important—they provide the subtle earthy notes that make this coating distinctive.
Step 3: Apply Egg Wash and Double-Dredge
Beat the 2 whole large eggs in a separate shallow dish. Working with one piece at a time, remove a cutlet from the buttermilk, letting excess drip off, then dip it in the egg wash, coating completely. Allow any excess egg to drip back into the dish before transferring to the flour mixture.
Press the cutlet firmly into the flour mixture, ensuring all surfaces are coated. For maximum crispiness, I repeat this process—dip back in the egg wash, then dredge in the flour mixture a second time. This double-dredging creates a thicker, more craggly crust that stays crisp longer.
Step 4: Deep-Fry to Golden Perfection
Heat 4 cups vegetable oil in a deep, heavy-bottomed pot to 350°F. Use a deep-fry thermometer for precision, as temperature control is critical. Carefully lower the coated cutlets into the oil, working in batches to avoid overcrowding which would drop the oil temperature.
Fry for 6-8 minutes until the coating is deep golden brown and the internal temperature reaches 165°F. Turn each piece halfway through cooking to ensure even browning. The oil should bubble steadily but not violently—this indicates proper temperature.
Step 5: Drain and Assemble the Sandwich
Transfer the fried cutlets to a wire rack set over a baking sheet to drain excess oil. This prevents the coating from becoming soggy. Let rest for 2-3 minutes to allow the crust to set while maintaining crispness.
Toast the 4 whole brioche buns lightly for 30 seconds per side in a clean skillet. Assemble each sandwich with a hot cutlet on the bottom bun, adding your preferred toppings. The brioche’s buttery richness complements the savory chicken perfectly, creating that authentic balance of textures and flavors.
Pro Tips For Making Kfc Original Recipe Chicken Sandwich
- Double-Dredge the Cutlets: Dip the chicken in flour, then buttermilk, then flour again—this creates that extra-crispy coating KFC is known for. I learned this the hard way after my first few attempts came out sad and flimsy.
- Rest the Chicken: Give the breaded cutlets a 10-minute rest on a wire rack before frying. Sounds weird, but it works: the coating adheres better and doesn’t slide off in the oil.
- Use a Meat Thermometer: Pull the chicken at 165°F—no higher, or it’ll dry out. After overcooking a batch to toughness, I finally started checking the temp religiously.
- Add Cornstarch to Flour: Mix 1/4 cup cornstarch into your flour for a lighter, crunchier crust. My grandmother swore by this, and she was right: it actually changes the outcome.
Storing and Reheating This Recipe
Refrigerator Storage
Let the fried cutlets cool completely before storing to prevent condensation. Place in an airtight container with paper towels to absorb moisture. They’ll keep at 40°F or below for up to 3 days. 🔥
Freezer Method
For longer storage, freeze individual cutlets on a baking sheet first, then transfer to freezer bags. They’ll stay crisp for up to 1 month at 0°F. This prevents them from sticking together.
Oven Reheating
Preheat your oven to 375°F. Place cutlets on a wire rack over a baking sheet and heat for 10-12 minutes. This restores crispiness better than any other method.
Air Fryer Option
Reheat in a preheated air fryer at 375°F for 4-5 minutes. Check halfway and flip if needed. The circulating air revives the crust beautifully.
Assembly Tip
Toast the brioche buns separately and assemble just before serving. This keeps the bread from getting soggy. Add fresh toppings for the best texture contrast.
Avoid Microwaving
Microwaves will make the coating limp. If you must, use 50% power and a paper towel to absorb moisture. Still, the oven or air fryer is superior.
Nutrition Facts
Frequently Asked Questions
Can I use chicken thighs instead of breasts?
Yes, boneless thighs work well and stay juicier. Pound them to 1/2-inch thickness for even cooking. Adjust frying time to 7-9 minutes since dark meat cooks slower.
Why is my coating falling off?
Usually means the chicken wasn’t dry before dredging or oil temp was too low. Pat pieces dry after buttermilk soak and ensure oil hits 350°F before frying.
What’s the best oil for frying?
Use neutral oils with high smoke points like vegetable, peanut, or canola. Avoid olive oil—its low smoke point burns at frying temps.
How do I make it spicier?
Add 1/2 tsp cayenne to the flour mix or include hot sauce in the buttermilk marinade. For extra heat, sprinkle with chili flakes after frying.

Trained in classic French technique but raised on slow-cooked ribs and spicy rubs, she blends culinary skill with smoke and soul.
- Recipe for Boneless Pork Chops in Cast Iron Skillet: Sear and Baste to Juicy Perfection - October 3, 2026
- Recipe for Boneless Cross Rib Roast: Slow-Roasted Beef with Herb Crust - October 3, 2026
- Hamburgers in Sauce Recipe Crock Pot: Slow-Cooked Savory Delight - October 3, 2026