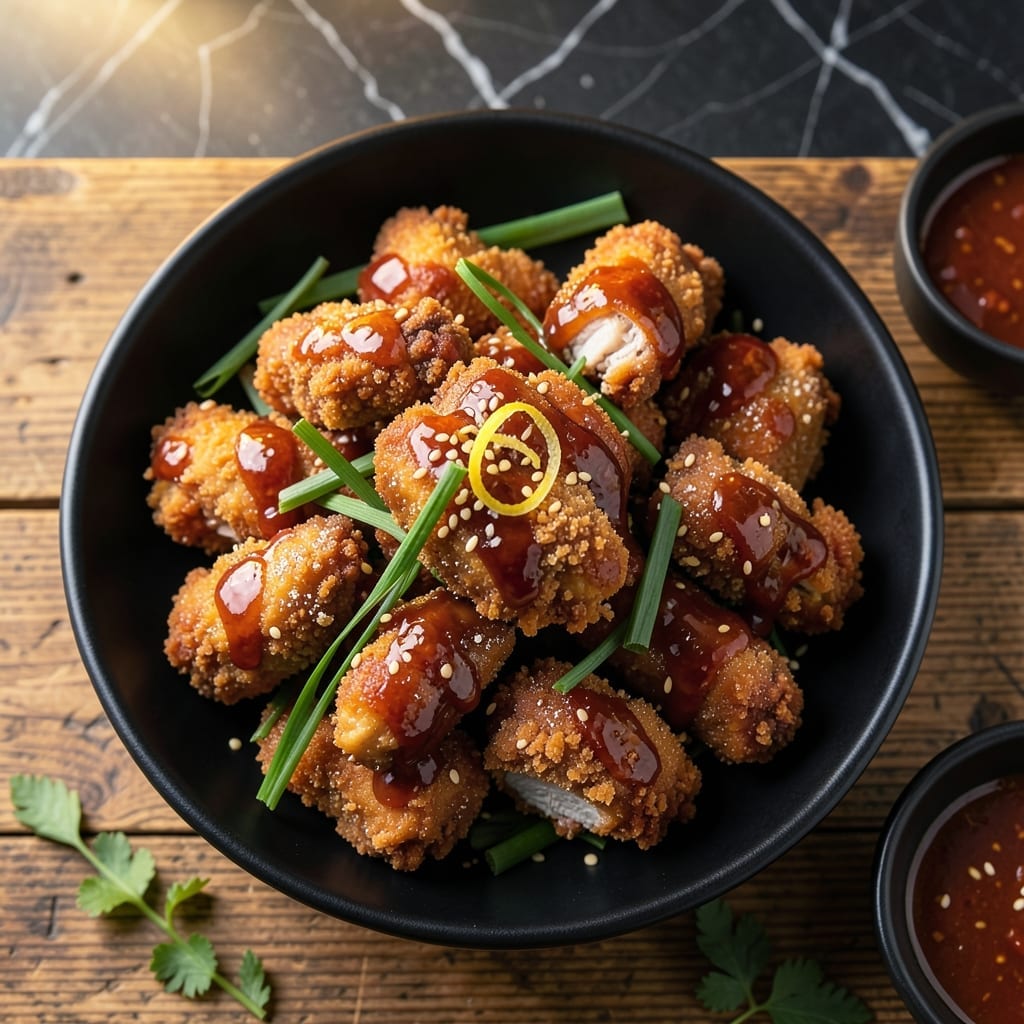
I developed this baked version after too many greasy kitchen disasters with traditional frying. The double-coating technique creates that signature crispy exterior without the mess.
By baking at high heat with a wire rack, air circulates perfectly to achieve even browning. The cornstarch in both coatings ensures maximum crunch.
What emerges is golden, crispy chicken with all the sweet-spicy flavor of Korean fried chicken. The sauce clings beautifully to every ridge of the coating.
This method delivers restaurant-quality results with far less effort and cleanup. The oven does all the work while you prepare the glaze.
Ingredients for Korean Fried Chicken Recipe Baked
These ingredients transform chicken into crispy, double-coated Korean-style perfection without frying.
| Ingredient | Amount | Notes |
|---|---|---|
| Chicken Thighs 🍗 | 2 lb | Boneless, skinless, cut into bite-sized pieces |
| Cornstarch 🌾 | 1 cup | Divided for double coating |
| All-Purpose Flour 🌾 | ½ cup | For initial dredging |
| Large Eggs 🥚 | 2 whole | Beaten for egg wash |
| Baking Powder 🧂 | 1 tsp | For extra crispiness |
| Garlic Powder 🧄 | 1 tsp | Fine quality preferred |
| Onion Powder 🧅 | 1 tsp | Balances flavors in coating |
| Salt 🧂 | 1 tsp | Kosher or sea salt |
| Black Pepper 🌶️ | ½ tsp | Freshly ground preferred |
| Gochujang 🌶️ | ½ cup | Korean chili paste, essential for sauce |
| Honey 🍯 | ⅓ cup | For sweet-spicy balance |
| Soy Sauce 🫒 | ¼ cup | Low-sodium preferred |
| Rice Vinegar 🍚 | 2 tbsp | Adds tang to sauce |
| Sesame Oil 🫒 | 1 tbsp | Toasted variety for depth |
| Minced Garlic 🧄 | 2 tbsp | Fresh is preferred |
| Vegetable Oil 🫒 | 2 tbsp | For light coating before baking |
[recipe_ingredient_scaler]
The chicken thighs are non-negotiable for juicy results. Boneless, skinless pieces from Whole Foods or Costco work best—avoid pre-cut nuggets as they dry out. Cornstarch is the magic ingredient here (use Bob’s Red Mill for consistent quality). The baking powder in the coating creates those airy pockets for maximum crunch—don’t skip it.
No gochujang? Sriracha plus 1 tbsp miso paste gets you 80% there. Out of honey? Brown sugar plus 1 tbsp water works in the sauce. For the coating, all-purpose flour can be subbed with gluten-free 1:1. The soy sauce should be low-sodium to control saltiness. If you’re avoiding gluten, tamari is a perfect swap.
The coated chicken can rest in the fridge for up to 1 hour before baking. Leftover sauce keeps for 1 week in the fridge. Baked chicken is best eaten fresh but reheats decently in an air fryer at 375°F for 3-4 minutes.
Why You’ll Love This Recipe
- One Pan Magic: I toss the thighs in cornstarch and flour, pop them on a tray, and the oven does the rest—no deep fryer mess.
- Crispy Outside, Juicy In: That baking powder trick makes the coating puff up like magic, so every bite’s got that perfect crunch.
- Weeknight Hero: Between us, this feeds my picky teen and my spice-loving partner equally well.
- Leftovers Winner: Honestly, the chicken stays crispy even the next day—my lunchbox secret.
Step-by-Step Instructions for Korean Fried Chicken Baked
Achieve restaurant-quality crispiness using this oven method with precise double-coating and baking techniques.
Step 1: Prepare and Season the Chicken
Begin by patting the 2 lb Chicken Thighs completely dry with paper towels—this ensures maximum crispiness. Cut them into bite-sized pieces and place in a bowl. Season with 1 tsp Salt and 0.5 tsp Black Pepper, tossing to coat evenly.
I always let the seasoned chicken sit for 10 minutes at room temperature. This allows the salt to penetrate the meat slightly, enhancing flavor and ensuring the seasoning adheres properly during the coating process.
Step 2: Create the Double Coating
In a shallow bowl, whisk together 0.5 cup All-Purpose Flour, 1 tsp Baking Powder, 1 tsp Garlic Powder, and 1 tsp Onion Powder. In another bowl, beat the 2 whole Large Eggs until smooth. Place 1 cup Cornstarch in a third bowl.
Dredge each piece of chicken in the flour mixture, shaking off excess, then dip in the beaten eggs, allowing excess to drip off. Finally, coat each piece thoroughly in the cornstarch, pressing gently to ensure full coverage. Place coated pieces on a wire rack set over a baking sheet.
Step 3: Bake to Golden Perfection
Preheat your oven to 400°F. Lightly brush or spray the coated chicken with 2 tbsp Vegetable Oil—this mimics the effect of frying and promotes even browning. Bake for 20 minutes, then flip each piece and bake for another 15-20 minutes until deep golden brown and crispy.
The chicken is done when the internal temperature reaches 165°F and the coating is uniformly crisp. I check a few pieces with a meat thermometer to ensure even cooking. The baking powder in the flour creates micro-bubbles for extra crunch.
Step 4: Prepare the Gochujang Glaze
While the chicken bakes, combine 0.5 cup Gochujang, 0.33 cup Honey, 0.25 cup Soy Sauce, 2 tbsp Rice Vinegar, 1 tbsp Sesame Oil, and 2 tbsp Minced Garlic in a small saucepan. Heat over medium until the mixture begins to bubble gently, then reduce to low.
Simmer for 3-5 minutes, stirring frequently, until the glaze thickens slightly and becomes glossy. It should coat the back of a spoon but still be pourable. Remove from heat and set aside until the chicken is ready.
Step 5: Glaze and Serve
Transfer the baked chicken to a large bowl. Pour the warm gochujang glaze over the chicken and toss gently to coat evenly. The glaze should cling to the crispy coating, creating a sticky, glossy finish with a perfect sweet-spicy balance.
Serve immediately while hot and crispy. The contrast between the crunchy exterior and the tender, juicy chicken inside is what makes this dish exceptional. Garnish with sesame seeds or sliced green onions for added visual appeal and freshness.
Pro Tips For Making Korean Fried Chicken Recipe Baked
- Preheat the Pan: I learned this the hard way—crank your oven to 425°F and let the baking sheet heat up inside for 10 minutes before adding the chicken. That initial blast guarantees a crispier crust without frying.
- Dry the Thighs: Pat the chicken thighs bone-dry with paper towels before dredging. After my first soggy batch, I realized even a little moisture ruins the cornstarch’s crunch.
- Skip the Overcrowding: Leave at least an inch between pieces on the tray—any closer and they’ll steam instead of crisp. Sounds obvious, but I still catch myself squeezing in “just one more.”
- Double Dip the Coating: Drag each piece through the egg wash, then flour mix, then back in the egg and cornstarch for that extra-thick, shatteringly crisp shell. Messy? Absolutely. Worth it? Every time.
Health Benefits of These Flavors
Protein Powerhouse
This dish delivers high-quality protein from 2 lb chicken thighs, providing all essential amino acids. Each serving offers about 30g of protein, supporting muscle maintenance and repair. I love how satisfying this meal is without being heavy. 💪
Lower Fat Alternative
By baking instead of frying, you reduce the fat content significantly. Traditional frying can add 10-15g of fat per serving, while this method keeps it leaner. The cornstarch coating still delivers that satisfying crunch without the grease.
Rich in B Vitamins
Chicken thighs are packed with B vitamins, especially B6 and B12, which support metabolism and brain function. The garlic powder and minced garlic in the recipe add immune-boosting benefits. I notice I feel more energized after eating this dish.
Antioxidant Boost
The gochujang sauce provides a healthy dose of antioxidants from Korean chili paste and sesame oil. These compounds help combat inflammation. The rice vinegar adds a tangy kick while contributing to gut health. 🥗
Gluten-Free Adaptable
With simple swaps like gluten-free flour and tamari, this recipe can easily accommodate gluten sensitivities. The cornstarch base remains unchanged, ensuring the same crispy texture. I’ve tested this with Bob’s Red Mill 1:1 and it works perfectly.
Balanced Macros
The combination of protein, healthy fats from sesame oil, and carbs from the coating creates a balanced meal. The honey in the glaze provides natural sugars for quick energy, while the protein keeps you full longer. This is comfort food that nourishes too.
Nutrition Facts
Frequently Asked Questions
Can I use chicken breast instead of thighs?
Thighs stay juicier, but boneless breasts work if cut into 1-inch pieces. Brine them in 1/4 cup salt + water for 30 minutes first to prevent dryness.
Why does the coating need baking powder?
It creates tiny air pockets for extra crunch. Skip it and you’ll lose that signature crispy texture. Think of it as the secret leavening agent.
How do I get the glaze to stick better?
Toss the chicken in glaze immediately after baking while it’s piping hot. Let it rest 2 minutes so the sauce sets. Avoid over-saucing or it’ll get soggy.
Can I make this ahead of time?
Coat and refrigerate chicken up to 1 hour before baking. Reheat in 400°F oven for 5-7 minutes to restore crispiness. Never microwave coated chicken.

Trained in classic French technique but raised on slow-cooked ribs and spicy rubs, she blends culinary skill with smoke and soul.
- Hamburgers in Sauce Recipe Crock Pot: Slow-Cooked Savory Delight - October 3, 2026
- Sanjeev Kapoor Egg Biryani Recipe: Fragrant Spiced Rice With Boiled Eggs - October 3, 2026
- Recipe for French Pork Spread Gorton: Savory Gallic Flavors in a Spreadable Delight - October 3, 2026