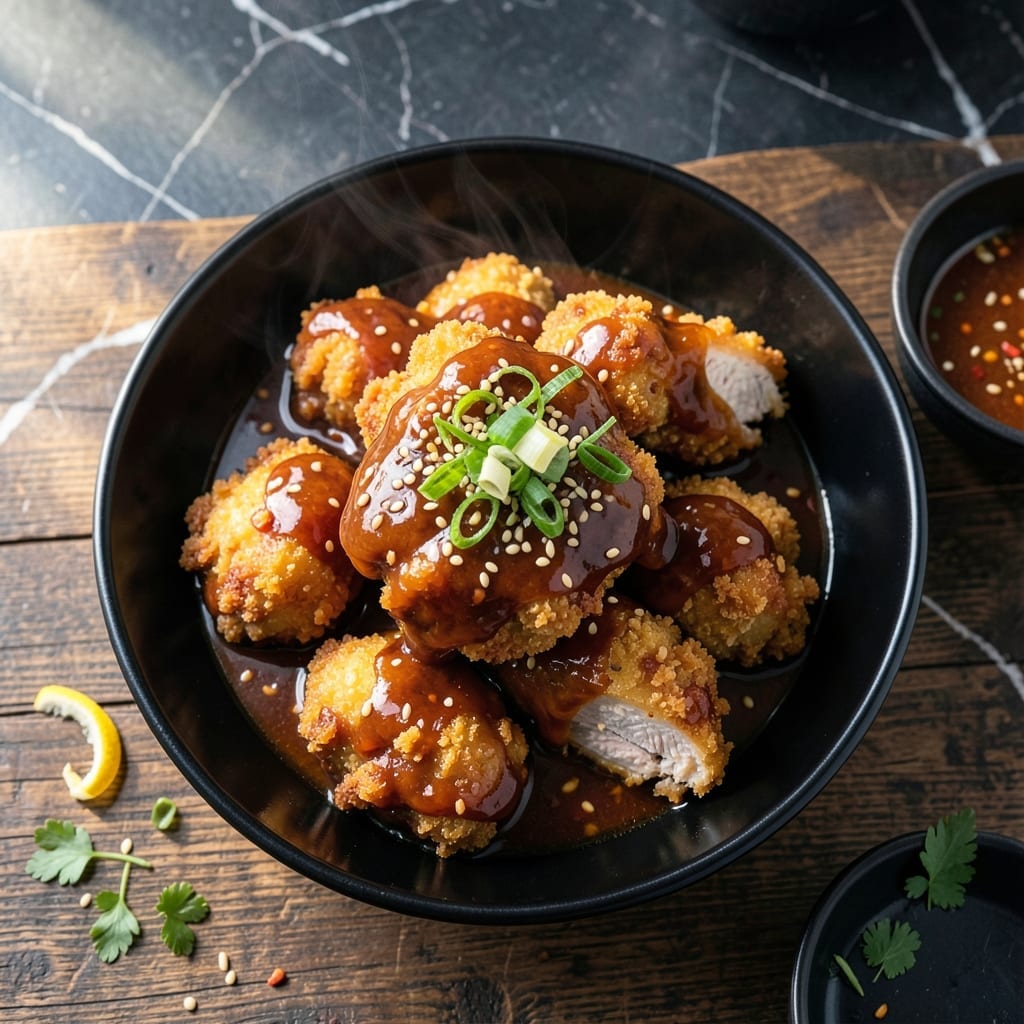
This Korean fried chicken achieves unmatched double crisp texture through a two-fry method that locks in juiciness. The secret lies in a thin, starchy batter that creates an ultra-crunchy shell, followed by a second fry for maximum crunch.
The yangnyeom sauce delivers the perfect balance of sweet and spicy with a glossy, sticky finish. Each piece gets coated evenly, ensuring every bite packs bold, complex flavors that make this dish irresistibly addictive.
Serve immediately for the ultimate experience—hot, crispy chicken with sauce that clings perfectly. The contrast between the shatteringly crisp exterior and tender meat inside is what sets this recipe apart from all others.
This method guarantees professional results with simple techniques and common ingredients. The key is patience during frying and sauce application for that signature Korean chicken house quality.
Ingredients for Korean Fried Chicken Recipe Yangnyeom
Common ingredients transform into restaurant-quality Korean fried chicken with signature crisp and glaze.
| Ingredient | Amount | Notes |
|---|---|---|
| Chicken Thighs 🍗 | 2 lb | Boneless, skin-on, cut into bite-sized pieces |
| Potato Starch 🥔 | ¾ cup | For ultra-crispy coating |
| All-Purpose Flour 🌾 | ½ cup | Balances starch for batter |
| Baking Powder 🧂 | 1 tsp | Enhances crispiness |
| Kosher Salt 🧂 | 1 tsp | Plus more for seasoning |
| Black Pepper 🌶️ | ½ tsp | Freshly ground preferred |
| Gochujang 🌶️ | ½ cup | Korean red pepper paste |
| Honey 🍯 | ¼ cup | For sweetness and shine |
| Soy Sauce 🫙 | 3 tbsp | Use low-sodium for balance |
| Rice Vinegar 🍚 | 2 tbsp | Adds tang to sauce |
| Brown Sugar 🍚 | 3 tbsp | Packed, for caramelization |
| Garlic Cloves 🧄 | 4 cloves | Minced for sauce |
| Fresh Ginger 🌿 | 1 tbsp | Grated, for depth |
| Sesame Oil 🫒 | 1 tbsp | Toasted, for aroma |
| Vegetable Oil 🫒 | 4 cups | For deep frying |
| Toasted Sesame Seeds 🌰 | 2 tbsp | For garnish |
| Green Onions 🧅 | 3 whole | Thinly sliced for garnish |
[recipe_ingredient_scaler]
The chicken thighs are non-negotiable for that perfect juicy-tender bite—boneless, skin-on gives you the right texture. For potato starch, Asian markets have the best quality, but most Whole Foods carry it too. Skip the cornstarch; potato starch delivers that next-level crunch. If you’re using skinless thighs, add a touch more oil to the batter to compensate for the missing fat.
No gochujang? Sriracha plus 1 tbsp miso paste gets you in the ballpark (not ideal, but workable). Swap honey for maple syrup or agave if needed—just avoid artificial sweeteners. The soy sauce should be Korean or Japanese for authentic flavor. For a gluten-free version, tamari works perfectly. Fresh ginger is key here—powdered lacks the bright, zesty punch.
Fry in batches to avoid crowding the pan—this keeps the oil temp steady. Leftovers? Reheat in a 375°F oven for 10-12 minutes to revive the crisp. The sauce thickens as it cools, so thin with a splash of water if needed. Best consumed the same day, but sauce keeps for 1 week in the fridge.
Why You’ll Love This Recipe
- One Bowl Mix: I just dump the potato starch, flour, and baking powder in one bowl—no fuss, no extra dishes.
- Sweet-Spicy Addiction: The yangnyeom sauce clings to every crispy, double-fried bite like it was made for chicken thighs.
- Feeds a Hungry Table: I made this for my cousin’s birthday and the platter was empty before the candles burned out.
- Leftovers? Still Good: Honestly, the chicken stays crunchy even the next day if I reheat it in the air fryer for five minutes.
Step-by-Step Instructions for Korean Fried Chicken Yangnyeom
This double-frying method guarantees ultra-crispy chicken with a glossy sweet-spicy glaze every time.
Step 1: Prepare and Coat the Chicken
Pat the 2 lb Chicken Thighs completely dry with paper towels—moisture prevents crispiness. In a large bowl, combine 0.75 cup Potato Starch, 0.5 cup All-Purpose Flour, 1 tsp Baking Powder, 1 tsp Kosher Salt, and 0.5 tsp Black Pepper until evenly distributed.
Dredge the chicken pieces in the starch mixture, pressing firmly to ensure full coverage. The baking powder creates micro-bubbles in the coating, enhancing the crunch. Shake off any excess—thick clumps will burn during frying. Let the coated pieces rest for 5 minutes to allow the starch to adhere better.
Step 2: First Fry for Crispy Base
Heat 4 cups Vegetable Oil in a deep, heavy-bottomed pot to 325°F. Use a candy thermometer for precision—oil temperature drops when you add chicken, so maintain consistency. Fry the chicken in batches to avoid crowding, which lowers oil temperature and results in greasy chicken.
Cook for 6-8 minutes until the coating is set and pale golden. The chicken won’t be fully crispy yet—that comes in the second fry. Transfer to a wire rack (not paper towels, which trap steam and make the coating soggy) and let rest for 5 minutes while you increase the oil temperature.
Step 3: Second Fry for Maximum Crispiness
Increase the oil temperature to 375°F. Return the chicken to the pot and fry for 3-4 minutes until the coating is deep golden brown and ultra-crispy. This double-fry technique, a hallmark of Korean fried chicken, ensures a shatteringly crisp exterior while keeping the meat juicy.
Drain again on the wire rack. The coating should be rigid enough to snap when bent. If you’re frying multiple batches, keep the finished chicken warm in a 200°F oven on a wire rack to maintain crispiness.
Step 4: Prepare the Yangnyeom Glaze
In a saucepan, combine 0.5 cup Gochujang, 0.25 cup Honey, 3 tbsp Soy Sauce, 2 tbsp Rice Vinegar, 3 tbsp Brown Sugar, 4 cloves minced Garlic Cloves, 1 tbsp grated Fresh Ginger, and 1 tbsp Sesame Oil. Bring to a simmer over medium heat.
Cook for 3-4 minutes, stirring constantly, until the sauce thickens enough to coat the back of a spoon. The gochujang provides depth and heat, while the honey and brown sugar create a glossy, caramelized finish. Remove from heat and let cool slightly—it will thicken further as it cools.
Step 5: Glaze and Garnish
Add the crispy chicken to the saucepan with the glaze and toss gently to coat evenly. The sauce should cling to the chicken in a thick, glossy layer. Work quickly—the crispy coating will soften slightly under the sauce, but the double-fry ensures it stays crunchy underneath.
Transfer to a serving platter and sprinkle with 2 tbsp Toasted Sesame Seeds and thinly sliced 3 whole Green Onions. Serve immediately while the chicken is still hot and crispy. The contrast of sweet, spicy, and umami flavors with the crunchy texture is what makes this dish unforgettable.
Pro Tips For Making Korean Fried Chicken Recipe Yangnyeom
- Double Fry for Crisp: I learned this the hard way—fry the chicken once at 325°F for 6-8 minutes, rest it, then hit it again at 375°F for 3-4 minutes. That second fry is what gives yangnyeom its signature shatter.
- Dry the Thighs: Pat the chicken thighs bone dry with paper towels before dredging. Sounds tedious, but it’s the only way to get that starch coating to cling and crisp properly.
- Skip the Crowding: After burning three batches, I finally figured out—fry in small batches so the oil temp doesn’t plummet. Overcrowding turns your yangnyeom into sad, soggy nuggets.
- Use Cold Starch: Sounds weird, but it works: chill your potato starch in the freezer for 10 minutes before dredging. It helps create that extra-crispy, snowflake-like crust that holds up to the sauce.
Make-Ahead Tips for Leftovers
Prep Ahead Strategy
You can prep the chicken and batter 12 hours ahead—coat the pieces and refrigerate uncovered on a wire rack. This actually improves the coating’s grip. I always prep mine the night before for stress-free cooking the next day. ❄️
Sauce Preparation
Make the yangnyeom sauce up to 3 days in advance and store in an airtight container in the fridge. The flavors meld beautifully over time. Just reheat gently and thin with 1-2 tbsp water if needed before tossing.
Frying Day Tips
Bring refrigerated chicken to room temperature for 30 minutes before frying. Cold chicken lowers oil temperature too much, risking a greasy finish. Pat dry again just before frying to remove any condensation.
Oil Management
Used oil can be strained, cooled, and reused 1-2 times for this recipe. Store in a cool, dark place in a sealed container. I use a fine-mesh strainer with coffee filters for the cleanest results.
Reheating for Crowds
For parties, fry and sauce chicken in batches, keeping finished pieces warm in a 200°F oven on a wire rack. This maintains crispiness for up to 30 minutes while you finish the remaining batches. 💡
Garnish Last
Always add Toasted Sesame Seeds and Green Onions right before serving. This keeps them fresh and prevents sogginess. I toast my sesame seeds in a dry pan for 2-3 minutes until fragrant.
Nutrition Facts
Frequently Asked Questions
Why use potato starch instead of flour?
Potato starch creates a lighter, crispier coating that stays crunchy longer. It absorbs less oil than flour, resulting in a less greasy finish. The texture is unmatched for Korean-style fried chicken.
What can I use if I don’t have gochujang?
Mix 3 tbsp sriracha with 1 tbsp miso paste as a substitute. It won’t be identical but provides similar heat and umami. Add 1 tsp sugar to balance the flavors.
How do I keep the chicken crispy after saucing?
Work quickly and sauce just before serving. The double-fry method helps maintain crispiness underneath. For leftovers, reheat in a 375°F oven for 10-12 minutes.
Can I bake instead of frying?
Baking won’t achieve the same crispiness, but for a lighter option, bake at 400°F for 25-30 minutes, flipping halfway. Use a wire rack for air circulation.

Trained in classic French technique but raised on slow-cooked ribs and spicy rubs, she blends culinary skill with smoke and soul.
- Recipe for Boneless Pork Chops in Cast Iron Skillet: Sear and Baste to Juicy Perfection - October 3, 2026
- Recipe for Boneless Cross Rib Roast: Slow-Roasted Beef with Herb Crust - October 3, 2026
- Hamburgers in Sauce Recipe Crock Pot: Slow-Cooked Savory Delight - October 3, 2026