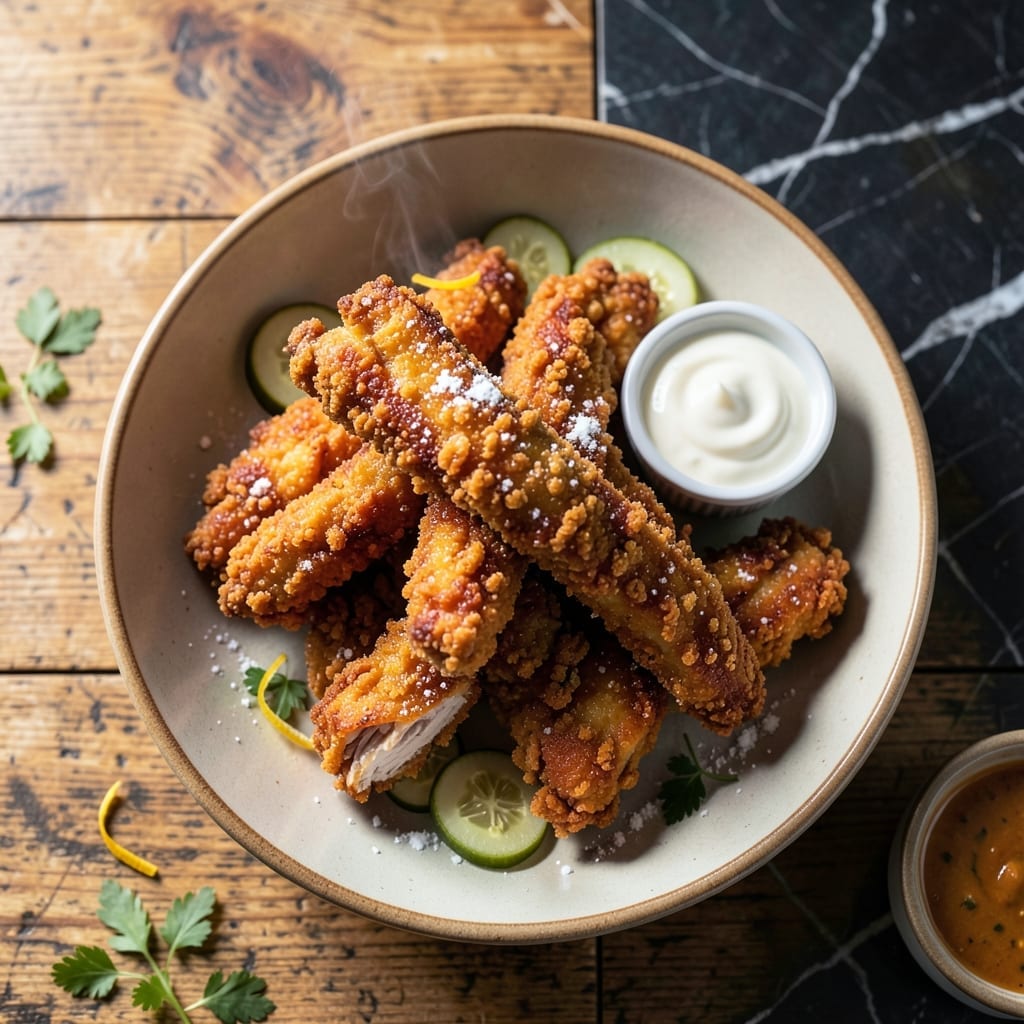
This copycat delivers the shatteringly crisp coating that made the original famous. My professional training meets Southern comfort in every bite.
Through precise technique and quality ingredients, we recreate that signature crunch and juicy interior without compromise. The result is identical to the classic.
Ingredients for Krispy Krunchy Chicken Copycat
Precision meets comfort with quality ingredients for that signature crisp coating and juicy interior.
| Ingredient | Amount | Notes |
|---|---|---|
| Chicken Thighs 🍗 | 2 lb | Boneless, skinless, cut into strips |
| Buttermilk 🥛 | 2 cups | Full-fat for best tenderness |
| All-Purpose Flour 🌾 | 2 ½ cups | Divided for dredging and batter |
| Cornstarch 🌽 | ½ cup | For extra crisp texture |
| Baking Powder 🧂 | 1 tbsp | Aluminum-free preferred |
| Paprika 🌶️ | 2 tbsp | Sweet or smoked variety |
| Garlic Powder 🧄 | 1 tbsp | Not garlic salt |
| Onion Powder 🧅 | 1 tbsp | For depth of flavor |
| Salt 🧂 | 2 tsp | Diamond Crystal kosher preferred |
| Black Pepper 🌶️ | 1 tsp | Freshly ground for best results |
| Cayenne Pepper 🔥 | ½ tsp | Adjust for heat preference |
| Vegetable Oil 🫒 | 4 cups | For deep frying, high smoke point |
| Large Eggs 🥚 | 2 whole | Beaten for egg wash binding |
[recipe_ingredient_scaler]
The chicken thighs are non-negotiable here—bone-in won’t crisp properly. Source from Whole Foods or Costco for consistent sizing. Buttermilk must be full-fat; low-fat lacks the acidity to tenderize properly. For the flour, King Arthur all-purpose gives the right protein balance for structure. Cornstarch is your secret weapon for that shatteringly crisp texture—the generic store brand works fine.
Need a buttermilk substitute? Whole milk plus 1 tbsp vinegar per cup does the trick. No cornstarch? Arrowroot powder at a 1:1 ratio works. The paprika can be swapped for smoked if you prefer depth over sweetness. Skip the baking powder and the coating won’t puff—this is the professional kitchen trick for that signature crunch. Eggs can be omitted, but the coating won’t adhere as well.
Fry in small batches to maintain oil temperature—this prevents soggy coating. Leftovers keep 3-4 days in the fridge but are best fresh. Reheat in a 375°F oven for 10 minutes to revive crispness. Never microwave—it’ll turn rubbery. Oil can be strained and reused 2-3 times if kept below smoke point.
Why You’ll Love This Recipe
- Set It and Forget It: I toss the chicken in buttermilk the night before, then it’s just a quick dredge and fry the next day.
- That Signature Crunch: The cornstarch and baking powder combo gives it that shatteringly crisp coating you’d swear came from the shop.
- Feeds My Pickiest: My nephew, who usually turns his nose up at chicken, asks for seconds of this every time.
- Stretches the Budget: Chicken thighs stay juicy and cheap, and one batch makes enough for leftovers that reheat surprisingly well.
Step-by-Step Instructions for Krispy Krunchy Chicken
Master the technique that creates that signature shatteringly crisp coating every time.
Step 1: Marinate the Chicken in Buttermilk
Cut the 2 lb Chicken Thighs into even strips and place them in a large bowl. Pour in the 2 cups Buttermilk, ensuring all pieces are fully submerged. This acidic soak tenderizes the meat and helps the coating adhere properly.
Cover and refrigerate for at least 4 hours, though overnight yields the most tender results. The buttermilk works its magic gradually—you’ll notice the chicken becomes more pliable and absorbs the liquid, which is exactly what you want for maximum juiciness.
Step 2: Prepare the Seasoned Flour Coating
In a large, shallow dish, whisk together 2.5 cups All-Purpose Flour, 0.5 cup Cornstarch, 1 tbsp Baking Powder, 2 tbsp Paprika, 1 tbsp Garlic Powder, 1 tbsp Onion Powder, 2 tsp Salt, 1 tsp Black Pepper, and 0.5 tsp Cayenne Pepper. The cornstarch is the secret to that ultra-crisp texture, while the baking powder creates tiny air pockets for extra crunch.
Whisk vigorously to distribute the spices evenly and break up any lumps. The mixture should look uniformly colored with no streaks of white flour remaining. Set this aside while you prepare the egg wash.
Step 3: Create the Egg Wash and Begin the Dredging Process
In a separate bowl, beat the 2 whole Large Eggs until completely homogeneous. This egg wash acts as the glue that binds the flour mixture to the chicken, creating that thick, craggy coating.
Working with one piece at a time, remove the chicken from the buttermilk and let the excess drip off for 3-5 seconds. Immediately dip it into the beaten eggs, ensuring full coverage, then transfer it to the seasoned flour mixture. Press firmly to adhere the coating to all sides.
Step 4: Double-Dredge for Maximum Crunch
For that signature extra-thick crust, repeat the egg wash and flour dredging process. Dip the coated chicken back into the eggs, then back into the flour mixture, pressing hard to create a thick, uneven layer. This double-dredging is what sets this recipe apart from standard fried chicken.
Place the coated pieces on a wire rack set over a baking sheet. This allows air to circulate around the chicken, preventing the coating from becoming soggy before frying. Let them rest for 10 minutes to help the coating set.
Step 5: Deep-Fry to Golden Perfection
In a heavy-bottomed pot or Dutch oven, heat the 4 cups Vegetable Oil to 350°F. Use a deep-fry thermometer for accuracy—this temperature is critical for cooking the chicken through without burning the coating.
Carefully lower 3-4 pieces of chicken into the hot oil at a time, being careful not to crowd the pot. Fry for 6-8 minutes until the coating is deep golden brown and the internal temperature reaches 165°F. The oil should bubble vigorously around the chicken, creating that characteristic crisp texture.
Transfer the fried chicken to a wire rack or paper towel-lined plate to drain. The coating should be so crisp that it shatters when you take a bite. Serve immediately while hot for the ultimate experience.
Pro Tips For Making Krispy Krunchy Chicken Copycat
- Double Dredge: Dip the thighs in buttermilk, then flour, then back in buttermilk and flour again—this builds that signature extra-crispy crust that stays put.
- Rest 10 Minutes: After dredging, let the chicken sit on a rack for 10 minutes so the coating sets; I learned this the hard way after my first batch shed half its crust in the oil.
- Use Thighs, Not Breasts: Chicken thighs stay juicy even at high heat, while breasts dry out fast—after ruining two batches with dry meat, I switched and never looked back.
- Add Cornstarch Late: Mix the cornstarch into the flour right before dredging, not ahead of time, or it’ll absorb moisture and turn gummy instead of giving that light crunch.
Wine and Beer Pairings for This Recipe
Crisp Beer Pairings
I love a cold lager with fried chicken—the carbonation cuts through the richness beautifully. Try Budweiser or Coors Banquet for that classic pairing. The light malt sweetness complements the cayenne kick without overpowering.
Hoppy Alternatives
For craft beer lovers, a West Coast IPA like Lagunitas works wonderfully. The citrusy hops balance the spice while the bitterness cleanses your palate. Just avoid double IPAs—they’re too heavy for this dish.
Wine Options
Surprisingly, sparkling wine is my secret weapon with fried chicken. The bubbles and acidity refresh your mouth between bites. A dry Prosecco or Cava adds elegance without pretension. 🍷
Sweet Contrasts
If you prefer sweeter beverages, hard cider like Angry Orchard Crisp Apple offers a nice contrast. The apple notes complement the paprika while the sweetness softens the heat. Serve it ice-cold for best results.
Non-Alcoholic Choices
For a booze-free option, sweet tea with lemon is a Southern classic. The tannins in black tea cut through the fat, while the sweetness enhances the spice. I make mine with Luzianne tea bags for authentic flavor. 💛
Nutrition Facts
Frequently Asked Questions
Can I use chicken breasts instead of thighs?
Thighs work best because their higher fat content keeps the meat juicy. Chicken breasts will dry out faster, but you can use them if you reduce cooking time to 5-6 minutes and brine them first for moisture.
What if I don’t have a deep-fry thermometer?
Test oil temperature by dropping in a pinch of flour—if it sizzles immediately, it’s ready. Alternatively, use a wooden chopstick: bubbles should form around it at 350°F.
How do I keep the coating crispy after frying?
Place fried pieces on a wire rack, never paper towels. The rack allows air circulation, preventing steam from making the coating soggy. Keep warm in a 200°F oven until serving.
Can I bake this instead of frying?
Yes, but the texture won’t be identical. Bake at 400°F for 20-25 minutes, flipping halfway. Spray with oil before baking for extra crispness.

Trained in classic French technique but raised on slow-cooked ribs and spicy rubs, she blends culinary skill with smoke and soul.
- Recipe for Boneless Pork Chops in Cast Iron Skillet: Sear and Baste to Juicy Perfection - October 3, 2026
- Recipe for Boneless Cross Rib Roast: Slow-Roasted Beef with Herb Crust - October 3, 2026
- Hamburgers in Sauce Recipe Crock Pot: Slow-Cooked Savory Delight - October 3, 2026