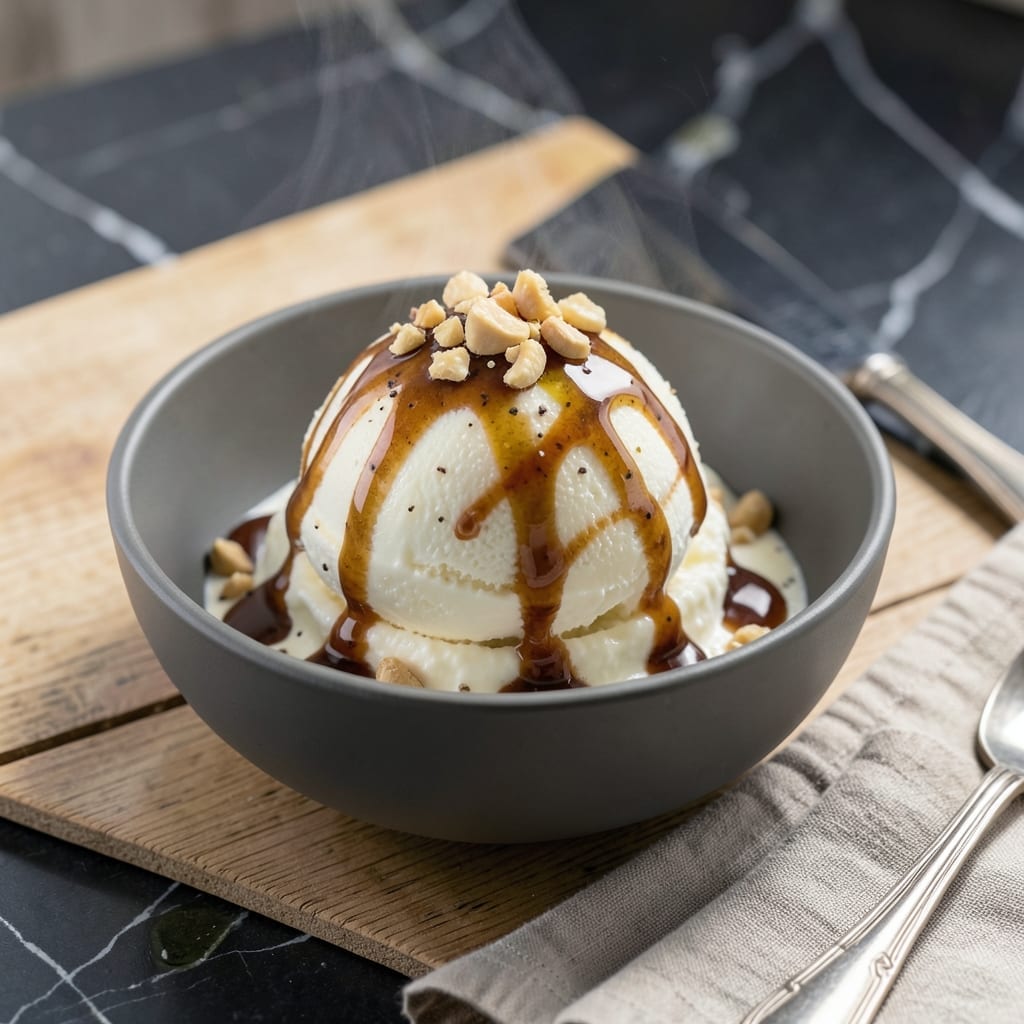
This dairy-free ice cream delivers the silky smooth texture you crave without a drop of lactose. I developed this recipe after years of perfecting plant-based desserts for those avoiding dairy.
Using simple ingredients and precise technique, you’ll achieve creamy results that rival traditional versions. The secret lies in the balance of fats and stabilizers, ensuring no icy texture.
Ingredients for Lactose Free Ice Cream
Rich, plant-based ingredients create that luxurious texture without dairy. Probably have most already.
| Ingredient | Amount | Notes |
|---|---|---|
| Full-Fat Coconut Milk 🥥 | 2 cans | 13.5 oz cans, chilled overnight |
| Cashew Butter 🌰 | ½ cup | Unsweetened, creamy variety |
| Maple Syrup 🍁 | ¾ cup | Grade A or B preferred |
| Vanilla Extract 🌿 | 2 tsp | Pure, not imitation |
| Coconut Oil 🫒 | 2 tbsp | Refined, odorless variety |
| Tapioca Starch 🌾 | 1 tbsp | For stability and creaminess |
| Sea Salt 🧂 | ¼ tsp | Fine grain preferred |
| Almond Milk 🥛 | ¼ cup | Unsweetened, for thinning |
| Xanthan Gum 🧪 | ¼ tsp | Optional, for extra creaminess |
| Vanilla Bean 🌿 | 1 whole | Scraped seeds only |
| Cacao Nibs 🍫 | ¼ cup | For texture, optional |
[recipe_ingredient_scaler]
The coconut milk is non-negotiable here—full-fat Thai Kitchen or Native Forest brands yield the creamiest results. Chill the cans overnight so the cream separates fully (that thick layer on top is gold). Cashew butter adds richness; Artisana Organics is my go-to. For the coconut oil, go refined to avoid any coconut flavor overpowering the vanilla. The tapioca starch acts as a stabilizer, preventing ice crystals.
No cashew butter? Almond butter works at a 1:1 ratio. Swap maple syrup for agave nectar if needed. Skip the xanthan gum if you don’t have it—the tapioca starch will still do its job. For a chocolate twist, add 0.5 cup cocoa powder (Dutch-processed for smoothness). The vanilla bean is a splurge, but Madagascar Bourbon vanilla extract is a solid backup.
Store leftovers in a lidded container with parchment pressed directly on the surface to prevent ice crystals. Keeps for 1 week in the freezer. Best served slightly softened—sit at room temp for 10-15 minutes before scooping.
Why You’ll Love This Recipe
- I’ll be real: I double the recipe so there’s always some in the freezer for midnight cravings.
- No Churn Magic: I just dump everything in a bowl, mix, and freeze—no ice cream maker required.
- Creamy Dreamy: The coconut milk and cashew butter blend into this impossibly rich, velvety texture.
- Allergy-Friendly Star: I serve this to dairy-free friends and they can’t believe it’s lactose free.
Step-by-Step Instructions for Lactose Free Ice Cream
Master this technique and you’ll create a luxurious, scoopable dairy-free ice cream with professional texture.
Step 1: Prepare the Base Ingredients
Begin by opening the 2 cans Full-Fat Coconut Milk and scooping out the thick cream that has separated to the top. I reserve the watery liquid for other uses, as the cream provides the rich, velvety base essential for this recipe. Ensure your coconut milk has been chilled overnight for optimal separation.
In a medium saucepan, combine the coconut cream, 0.5 cup Cashew Butter, 0.75 cup Maple Syrup, 2 tbsp Coconut Oil, 1 tbsp Tapioca Starch, and 0.25 tsp Sea Salt. The cashew butter adds body and a subtle nutty depth, while the tapioca starch will prevent ice crystals from forming.
Step 2: Infuse and Heat the Mixture
Split the 1 whole Vanilla Bean lengthwise and scrape out the seeds, adding both seeds and pod to the saucepan. This dual approach maximizes vanilla flavor. Heat the mixture over medium-low heat, whisking constantly for 5-7 minutes until it thickens slightly and becomes smooth.
Watch for small bubbles at the edges and a slight sheen on the surface—this indicates the starch is activating. Avoid boiling, as high heat can cause the mixture to separate or scorch. Remove from heat once it coats the back of a spoon but is still pourable.
Step 3: Chill and Stabilize
Stir in the 2 tsp Vanilla Extract and 0.25 tsp Xanthan Gum (if using). The xanthan gum acts as an emulsifier, ensuring a creamy texture without dairy. Pour the mixture into a blender and add the 0.25 cup Almond Milk to thin it slightly for easier processing.
Blend on high for 30-45 seconds until completely smooth. Transfer to a shallow container, cover with plastic wrap pressed directly on the surface to prevent a skin from forming, and refrigerate for at least 4 hours or overnight. Chilling is critical—it allows the flavors to meld and the base to reach the ideal temperature for churning.
Step 4: Churn and Freeze to Perfection
Pour the chilled base into your ice cream maker and churn according to the manufacturer’s instructions, typically 20-25 minutes. The mixture should resemble soft-serve ice cream when finished. If you don’t have an ice cream maker, freeze the base in a shallow dish, stirring vigorously with a fork every 30 minutes for 3-4 hours to break up ice crystals.
During the last 5 minutes of churning, add the 0.25 cup Cacao Nibs for a delightful crunch. The nibs add a bittersweet contrast to the sweetness of the base. Transfer the ice cream to a lidded container and freeze for an additional 2-4 hours until firm.
Step 5: Serve and Enjoy
Let the ice cream sit at room temperature for 5-10 minutes before scooping to soften slightly. The texture should be smooth, creamy, and easy to scoop, with no icy patches. The cacao nibs will add a satisfying bite that balances the creaminess of the base.
Serve immediately in chilled bowls for the best texture. This dairy-free delight holds its shape well but melts beautifully on the tongue, offering a luxurious mouthfeel without any lactose. Leftovers can be stored in an airtight container in the freezer for up to 2 weeks.
Pro Tips For Making Lactose Free Ice Cream
- Chill the Base: Always refrigerate your coconut milk and cashew butter mixture for at least 4 hours before churning—I learned this the hard way after ending up with soupy ice cream that wouldn’t set.
- Use Room Temp Fats: Make sure your coconut oil is liquid but not hot when mixing, or it’ll seize up and create little oil pockets in the final product.
- Skip the Overmixing: Once you add the vanilla and maple syrup, stir just until combined—overworking it incorporates too much air and gives you icy texture.
- Add a Pinch of Salt: Sounds weird, but it works: a tiny pinch of salt balances the sweetness of the maple syrup and makes all the flavors pop.
Serving Suggestions for This Dish
Bowls and Cones
Serve this creation in chilled glass bowls for an elegant presentation that highlights its creamy texture. I love using vintage depression glass for that nostalgic touch. For a fun twist, try waffle cones—the crunch contrasts beautifully with the smooth ice cream. 💛
Topping Ideas
Fresh berry compote made with 1 cup mixed berries and 2 tbsp maple syrup adds a fruity tang. A drizzle of melted dairy-free chocolate (I use Enjoy Life brand) creates a decadent finish. Sprinkle with toasted coconut flakes for extra texture.
Sauce Pairings
A warm salted caramel sauce made with coconut sugar and a pinch of flaky sea salt elevates this to restaurant quality. For chocolate lovers, a fudge sauce using cocoa powder and coconut cream is a game-changer.
Garnish Tips
Add a pop of color with edible flowers or mint leaves for special occasions. A light dusting of cinnamon or cocoa powder adds warmth. I always keep crushed nuts on hand for extra crunch.
Serving Temperature
Let it sit at room temperature for 8-10 minutes before serving for the perfect scoop. This softens just enough while maintaining its shape. Serve immediately for the creamiest texture.
Seasonal Variations
In summer, add fresh mango chunks or passion fruit pulp. For winter, try spiced pears or candied ginger. The cacao nibs already in the recipe add a lovely crunch year-round. ✨
Nutrition Facts
Frequently Asked Questions
Can I substitute the cashew butter?
Yes! Use almond butter at a 1:1 ratio for similar creaminess. For nut-free, try sunflower seed butter, though the flavor will be slightly different.
Why chill the base overnight?
Chilling for 4+ hours lets flavors meld and ensures the mixture is cold enough to churn properly. Skipping this can result in icy texture.
What if I don’t have an ice cream maker?
Freeze in a shallow dish, stirring with a fork every 30 minutes for 3-4 hours. This breaks up ice crystals for smoother results.
How long does it keep in the freezer?
Store in an airtight container with parchment on the surface for up to 2 weeks. After that, ice crystals may form.

Trained in classic French technique but raised on slow-cooked ribs and spicy rubs, she blends culinary skill with smoke and soul.
- Recipe for Fried Pork Chops With Flour: Crispy Crust and Juicy Centers - October 3, 2026
- Octopus Recipe Pan Fried: Crispy Edges With Tender Bites - October 3, 2026
- Recipe For Fried Pork Chops In An Iron Skillet: Crispy Crust With Juicy Centers - October 3, 2026