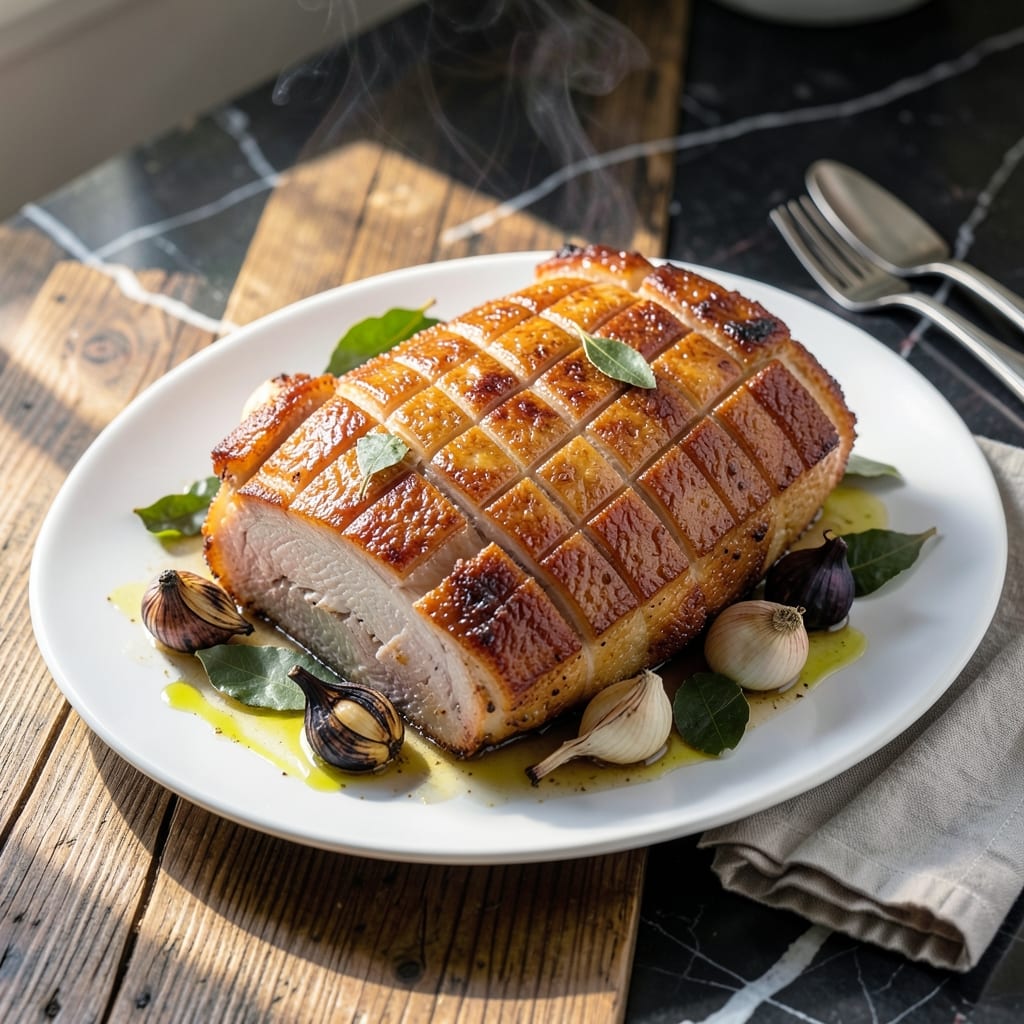
Achieving crispy skin and juicy meat with oven-baked lechon kawali is all about mastering the balance between timing and temperature. This method delivers the signature texture without deep-frying.
The key lies in scoring the skin, drying it thoroughly, then roasting at high heat to render the fat while keeping the interior tender. A final blast under the broiler ensures that perfect crackling finish.
What emerges is pork belly with shatteringly crispy skin giving way to succulent, juicy layers beneath. The oven method offers more control than traditional frying, with less mess and consistent results.
Serve with your favorite dipping sauce or as part of a Filipino feast. This technique honors tradition while adapting to modern kitchen tools.
Ingredients for Lechon Kawali Recipe Oven Baked
Quality pork belly, aromatic spices, and precise seasoning create this Filipino classic.
| Ingredient | Amount | Notes |
|---|---|---|
| Pork Belly 🥓 | 2 lb | Skin-on, even thickness preferred |
| Kosher Salt 🧂 | 2 tbsp | Diamond Crystal preferred for texture |
| Black Peppercorns 🌶️ | 1 tbsp | Freshly cracked for depth |
| Garlic Cloves 🧄 | 8 cloves | Minced for marinade infusion |
| Bay Leaves 🍃 | 4 whole | Dried, for aromatic base |
| White Vinegar 💧 | ½ cup | For skin drying and tenderness |
| Soy Sauce 🫒 | ¼ cup | Low-sodium to control seasoning |
| Water 💧 | 1 cup | For initial roasting phase |
| Brown Sugar 🍚 | 1 tbsp | Optional for caramelization |
| Dried Thyme 🌿 | 1 tsp | For herbal complexity |
| Dried Rosemary 🌿 | 1 tsp | Crushed to release oils |
| Lemon Juice 🍋 | 1 tbsp | Freshly squeezed for brightness |
[recipe_ingredient_scaler]
The pork belly is non-negotiable here. Local butchers or Asian grocers often carry skin-on slabs with the ideal fat-to-meat ratio. Look for pieces about 1.5-2 inches thick—too thin and the meat dries out before the skin crisps. Whole Foods and Costco sometimes stock suitable cuts, but call ahead. The skin must be scored deeply (without cutting through to meat) to allow fat to render and air to circulate for maximum crispness.
Out of white vinegar? Apple cider vinegar works in a pinch, though the flavor profile shifts slightly. No fresh garlic? Garlic powder at one-quarter the amount substitutes adequately. For the soy sauce, tamari offers a gluten-free alternative with similar umami depth. The brown sugar is optional but recommended—it aids in creating that coveted mahogany crust. Coconut sugar can replace it at a 1:1 ratio for a different flavor dimension.
Pork belly keeps in the fridge for 2-3 days before cooking or can be frozen for up to 3 months. Once cooked, lechon kawali is best served immediately but reheats well in a 375°F oven for 10-15 minutes to restore crispness. Store leftovers in the refrigerator for 4-5 days.
Why You’ll Love This Recipe
- Oven Does the Work: I just season the pork belly, pop it in, and let the oven handle the rest—no babysitting required.
- Crispy & Juicy: That perfect contrast of crackling skin and tender meat, thanks to the garlic and bay leaves, is pure magic.
- Feeds a Hungry Table: Honestly, it’s my go-to for potlucks or lazy Sundays when I want something impressive with minimal effort.
- Leftovers? Even Better: The flavors deepen overnight, so I always make extra for next-day rice bowls or tacos.
Step-by-Step Instructions for Oven Baked Lechon Kawali
This professional method ensures perfectly crispy pork skin with a moist, tender interior every time.
Step 1: Prepare and Marinate the Pork Belly
Begin by scoring the skin of the 2 lb pork belly in a crosshatch pattern, cutting just through the skin without penetrating the fat. This allows the fat to render out while the skin crisps evenly. Rub the flesh side with the 2 tbsp kosher salt and 1 tbsp black peppercorns, pressing the seasoning in firmly.
In a bowl, combine the 8 cloves garlic cloves (minced), 4 whole bay leaves, 0.5 cup white vinegar, 0.25 cup soy sauce, 1 tbsp lemon juice, 1 tbsp brown sugar, 1 tsp dried thyme, and 1 tsp dried rosemary. Pour this marinade over the pork belly, ensuring it coats the flesh. Refrigerate for at least 4 hours, or ideally overnight for maximum flavor penetration.
Step 2: Initial Roasting Phase for Even Cooking
Preheat your oven to 325°F. Place the marinated pork belly skin-side up on a wire rack set over a baking sheet. Pour the 1 cup water into the baking sheet to create steam, which helps cook the pork evenly without drying out the meat.
Roast for 1 hour and 30 minutes, basting occasionally with the pan juices. You’ll notice the fat beginning to render and the skin starting to tighten. This slow cooking phase ensures the interior becomes fork-tender while the exterior begins to develop the foundation for crispiness.
Step 3: High-Heat Finish for Crispy Skin
Remove the pork belly from the oven and carefully drain the rendered fat from the baking sheet, reserving it if desired for other uses. Increase the oven temperature to 425°F and return the pork to the oven, still skin-side up.
Roast for an additional 20-30 minutes, watching closely as the skin transforms. The goal is a deep golden brown, crackling skin that audibly sizzles when pressed. The interior should register 195°F on an instant-read thermometer, ensuring the fat is fully rendered and the meat is succulent.
Step 4: Rest and Serve
Transfer the pork belly to a cutting board and let it rest for 10-15 minutes. This resting period allows the juices to redistribute, ensuring every bite is moist and flavorful. The skin should remain crispy even as it cools slightly.
Slice the pork belly into 1-inch thick pieces, cutting through both the crispy skin and tender meat. Serve immediately while the skin is at its peak crispiness, accompanied by the reserved pan juices or a dipping sauce of your choice.
Pro Tips For Making Lechon Kawali Recipe Oven Baked
- Dry the Belly: Pat the pork belly completely dry before seasoning—I learned this the hard way after my first batch came out soggy instead of crispy. Even a little moisture ruins the crackling.
- Score the Skin: Cut shallow slits in a diamond pattern across the skin, about 1/4-inch deep. This lets the fat render out and helps the skin puff up into that signature lechon kawali crunch.
- Start Hot Finish Low: Roast at 425°F for 30 minutes to jumpstart the crisping, then drop to 350°F to cook through without burning the garlic or bay leaves. Sounds weird, but it works.
- Rest Before Slicing: Let it rest 10-15 minutes after baking—my grandmother swore by this, and she was right. The juices redistribute, so you won’t lose all that flavor when you finally cut into it.
Common Mistakes When Making lechon kawali recipe oven baked
Skipping the Score
I’ve seen many home cooks skip scoring the pork skin, thinking it’s optional. This is a critical mistake—the crosshatch pattern allows fat to render out and air to circulate, creating that signature shatter. Use a sharp knife to cut ¼-inch deep lines in a diamond pattern. 💡
Insufficient Drying
After marinating, the skin must be completely dry before roasting. Pat it thoroughly with paper towels, then let it air-dry in the fridge uncovered for 1-2 hours. Moisture is the enemy of crispy skin—even a little dampness will steam it instead of frying it.
Low Temperature Roasting
Roasting at too low a temperature (below 325°F) won’t render the fat properly. The initial phase needs steady, moderate heat to break down the fat while cooking the meat through. I learned this the hard way with a batch that came out greasy instead of crisp.
Neglecting the Broiler
If your skin isn’t crisp enough after the high-heat roast, don’t hesitate to finish under the broiler. Watch it like a hawk—2-3 minutes on high should do it. The broiler’s intense direct heat is the secret weapon for that final crackle.
Cutting Too Soon
Slicing immediately after roasting causes all the juices to spill out, leaving the meat dry. Let it rest for 10-15 minutes—this gives the muscle fibers time to reabsorb the moisture. Trust me, the wait is worth it for that perfect juicy bite. 🔥
Overcrowding the Pan
Using a pan that’s too small traps steam around the pork, sogging the skin. Always use a wire rack over a baking sheet to allow air circulation on all sides. I prefer a half-sheet pan with a cooling rack for even cooking.
Nutrition Facts
Frequently Asked Questions
What’s the best way to score the pork skin?
Use a sharp knife to make ¼-inch deep cuts in a diamond pattern. This helps render fat and crisp the skin evenly. Avoid cutting into the meat.
Can I use a different cut of pork?
Pork belly is ideal for its fat-to-meat ratio. Pork shoulder works but won’t achieve the same crispy skin. Stick with skin-on belly for authentic results.
How do I prevent soggy skin?
Pat the skin completely dry before roasting and use a wire rack for air circulation. Skip the foil cover—it traps steam and ruins crispiness.
Can I make this ahead of time?
Marinate overnight for best flavor. Roast the day of serving, as reheating may soften the skin. Store leftovers in the fridge for 4-5 days.

Trained in classic French technique but raised on slow-cooked ribs and spicy rubs, she blends culinary skill with smoke and soul.
- Recipe for Boneless Pork Chops in Cast Iron Skillet: Sear and Baste to Juicy Perfection - October 3, 2026
- Recipe for Boneless Cross Rib Roast: Slow-Roasted Beef with Herb Crust - October 3, 2026
- Hamburgers in Sauce Recipe Crock Pot: Slow-Cooked Savory Delight - October 3, 2026