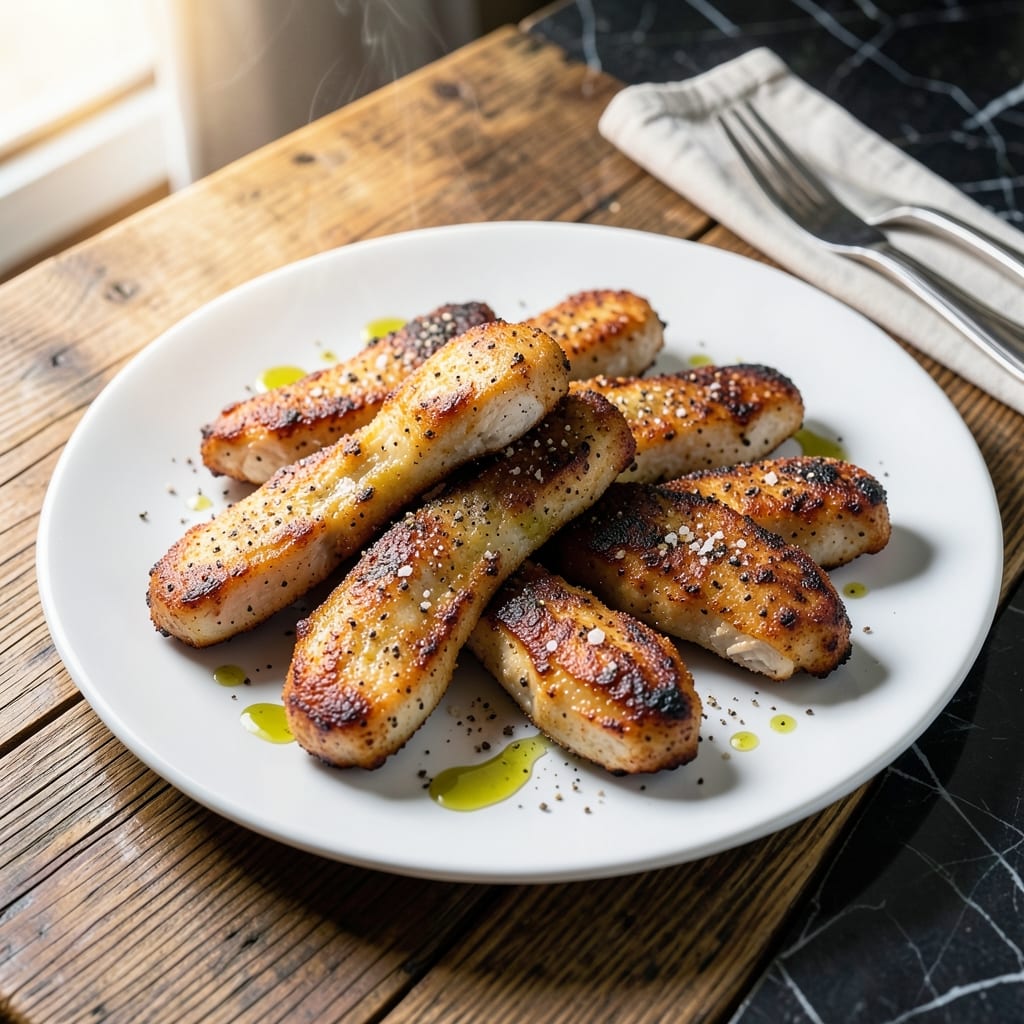
Transform yesterday’s chicken tenders into today’s crispy, tender masterpiece without the microwave disaster. This method guarantees a second life that’s just as satisfying as the first.
The oven is your best ally here. A quick blast at 400°F restores the crunch while keeping the inside juicy. No soggy breading, no dry meat—just perfectly revived tenders.
Pair them with a fresh side salad or your favorite dipping sauce for a meal that feels brand new. The key is timing and temperature—get it right, and no one will know they’re leftovers.
Ready in 15 minutes, this is the easiest way to salvage and elevate what’s left in your fridge.
Ingredients for Leftover Chicken Tenders
Revive those tenders with just a few pantry staples and fresh sides.
| Ingredient | Amount | Notes |
|---|---|---|
| Leftover Chicken Tenders 🍗 | 12 pieces | Previously cooked and chilled |
| Olive Oil 🫒 | 1 tbsp | For light brushing |
| Kosher Salt 🧂 | ¼ tsp | Diamond Crystal preferred |
| Freshly Ground Black Pepper 🌶️ | ¼ tsp | Coarse grind ideal |
| Garlic Powder 🧄 | ½ tsp | Optional for extra flavor |
| Paprika 🌶️ | ½ tsp | Sweet or smoked variety |
| Ranch Dressing 🥣 | ½ cup | For dipping (optional) |
| Honey Mustard 🍯 | ½ cup | For dipping (optional) |
| Mixed Greens 🥗 | 4 cups | For side salad |
| Cherry Tomatoes 🍅 | 1 cup | Halved for salad |
| Cucumber 🥒 | ½ whole | Diced for salad |
| Red Onion 🧅 | ¼ whole | Thinly sliced for salad |
| Balsamic Vinaigrette 🫒 | ¼ cup | For dressing salad |
[recipe_ingredient_scaler]
The chicken tenders are the star here—use ones that were properly chilled (not left out overnight). If they were originally breaded, a light brush of olive oil helps them crisp back up. I always keep Diamond Crystal kosher salt on hand for even seasoning. For the paprika, Penzeys is my go-to, but any grocery store brand works fine if it’s fresh.
No ranch? Blue cheese dressing or a quick yogurt-dill mix makes a great swap. Skip the honey mustard and try sriracha mayo (just mix mayo with a little hot sauce). The salad can be as simple as greens and dressing—add avocado if you’ve got it. If the tenders seem dry, a quick spritz of oil or lemon juice before reheating adds moisture back in.
Leftover tenders reheat best within 3 days—after that, they start losing texture. Store them in a single layer to prevent the breading from getting soggy. The salad components keep separately for up to 5 days, but dress right before serving.
Why You’ll Love This Recipe
- Five-Minute Fix: I just reheat the tenders with a drizzle of olive oil and a sprinkle of garlic powder—dinner’s ready before the kids finish arguing over who gets the last one.
- Crispy Revival: The combo of kosher salt and black pepper brings back that fresh-from-the-fryer crunch, even better than day one.
- Lunchbox Hero: I pack these in wraps or salads for work, and they taste just as good cold. Honestly, it’s my favorite way to use leftovers.
- Zero Waste: I hate tossing food, and this turns last night’s extras into a meal my family actually fights over.
Step-by-Step Instructions for Crispy Leftover Chicken Tenders
Here’s the method I use to revive leftovers without losing that perfect crunch.
Step 1: Preheat and Season the Chicken
Preheat your oven to 400°F and line a baking sheet with parchment paper. This high temperature is crucial for restoring crispiness without drying out the chicken tenders. While the oven heats, arrange the 12 pieces leftover chicken tenders in a single layer on the prepared sheet.
Lightly brush each tender with 1 tbsp olive oil—just enough to help the seasoning stick and promote even browning. Then sprinkle evenly with 0.25 tsp kosher salt, 0.25 tsp freshly ground black pepper, 0.5 tsp garlic powder, and 0.5 tsp paprika. The paprika adds a subtle smokiness that enhances the flavor.
Step 2: Bake Until Crispy and Heated Through
Place the seasoned chicken tenders in the preheated oven and bake for 8-10 minutes. Flip them halfway through to ensure even crisping on both sides. You’ll know they’re ready when the exterior turns golden brown and feels crisp to the touch.
This method works because the high heat quickly evaporates moisture from the surface, recreating that coveted crunch. Avoid overcrowding the pan—if the tenders are too close, they’ll steam instead of crisp. For best results, bake them in batches if needed.
Step 3: Prepare the Side Salad
While the chicken bakes, toss 4 cups mixed greens in a large bowl with 1 cup cherry tomatoes (halved), 0.5 whole cucumber (diced), and 0.25 whole red onion (thinly sliced). The combination of fresh, crisp vegetables balances the richness of the chicken tenders.
Drizzle with 0.25 cup balsamic vinaigrette and toss gently to coat. I like to let the salad sit for a few minutes before serving to allow the flavors to meld. This gives the dressing time to soften the greens slightly while keeping them crisp.
Step 4: Serve with Dipping Sauces
Once the chicken tenders are crispy and heated through, transfer them to a serving platter. Serve immediately with 0.5 cup ranch dressing and 0.5 cup honey mustard on the side for dipping. The cool, creamy dips contrast perfectly with the hot, crispy tenders.
Arrange the side salad on individual plates or in a large bowl for sharing. The key is to serve everything while the chicken is still hot—this is when the texture is at its peak. Any leftovers (though unlikely) can be stored in an airtight container in the fridge for up to 2 days, though they’re best enjoyed fresh.
Pro Tips For Making Leftover Chicken Tenders
- Preheat the Pan: Get your skillet screaming hot before adding the tenders—about 2 minutes on medium-high with the olive oil. I learned this the hard way after too many soggy reheats.
- Dry the Tenders: Pat the leftover tenders with a paper towel first to remove moisture. Sounds tedious, but it’s the only way to get them crispy again instead of steamed.
- Skip the Microwave: Resist the urge to nuke them—it turns the coating to mush. A quick pan-fry or oven blast at 400°F for 8-10 minutes revives the texture.
- Season After Reheating: Sprinkle the kosher salt, pepper, and garlic powder right after reheating, not before. Salt draws out moisture, and you want those tenders to stay as dry as possible.
Serving Suggestions for Leftovers
Plating Perfection
Arrange tenders on a wooden board with small ramekins of ranch dressing and honey mustard for a rustic, shareable presentation. The wood absorbs excess oil, keeping the breading crisp longer. 💛
Salad Pairing
Serve the mixed greens in a chilled bowl to keep them crisp. Top with cherry tomatoes and cucumber for color contrast. The balsamic vinaigrette adds a tangy note that cuts through the richness.
Family-Style Service
For a casual meal, pile tenders on a large platter with the salad on the side. Let everyone build their own plates—this works great for weeknight dinners with kids. I always add extra napkins for the inevitable messy fingers.
Elevated Touch
Garnish tenders with a sprinkle of paprika or finely chopped parsley for a pop of color. A lemon wedge on the side adds brightness. This small detail makes the dish feel restaurant-worthy.
Quick Lunch Box
Pack tenders and salad in separate containers for a grab-and-go meal. The 15-minute reheat time means you can prep this the morning of. They’ll stay crisp in a thermos for up to 4 hours. 🔥
Nutrition Facts
Frequently Asked Questions
Can I reheat them in the microwave?
Not recommended. Microwaving will make the breading soggy. For best results, use the oven at 400°F for 8-10 minutes to restore crispiness.
How do I keep them from drying out?
Brush lightly with olive oil before reheating and avoid overcooking. The high heat revives moisture while crisping the exterior.
Can I freeze leftover tenders?
Yes, store in an airtight container for up to 1 month. Thaw in the fridge overnight before reheating in the oven.
What if they lose their crunch?
Place under the broiler for 1-2 minutes after baking. Watch closely to prevent burning. This adds extra crispiness.

Trained in classic French technique but raised on slow-cooked ribs and spicy rubs, she blends culinary skill with smoke and soul.
- Recipe for Boneless Pork Chops in Cast Iron Skillet: Sear and Baste to Juicy Perfection - October 3, 2026
- Recipe for Boneless Cross Rib Roast: Slow-Roasted Beef with Herb Crust - October 3, 2026
- Hamburgers in Sauce Recipe Crock Pot: Slow-Cooked Savory Delight - October 3, 2026