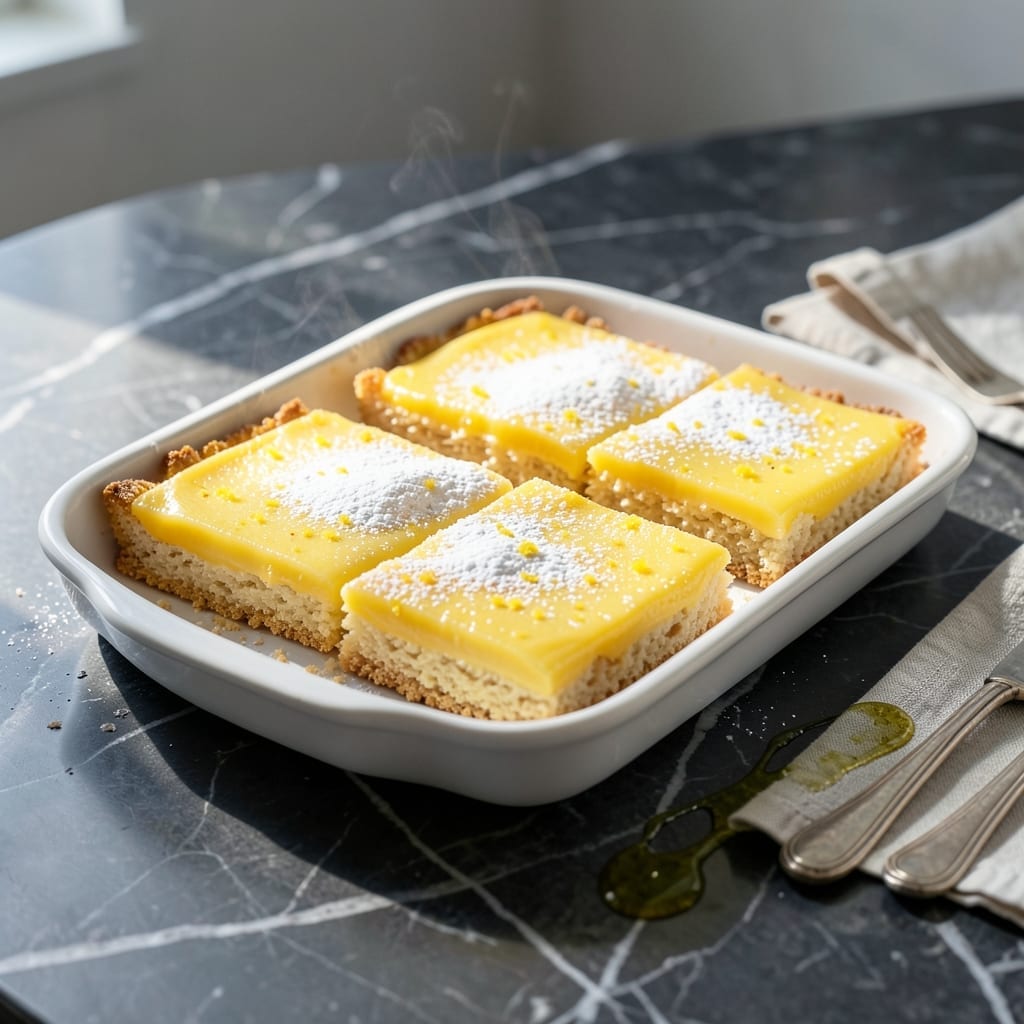
I’ve burned my fair share of lemon bars trying to get this right, but this version is foolproof and worth every minute.
One pan, simple steps, and you’ll have bright, tangy layers with a buttery shortbread crust. No fancy techniques—just pure, easy deliciousness.
Ingredients for Lemon Bars Recipe Easy and Delicious
Simple ingredients for bright, tangy layers with buttery shortbread crust in one pan.
| Ingredient | Amount | Notes |
|---|---|---|
| Unsalted Butter 🧈 | 1 cup | Cold, cut into cubes |
| All-Purpose Flour 🌾 | 2 cups | Spoon and level method |
| Granulated Sugar 🍚 | ½ cup | Divided for crust and filling |
| Powdered Sugar ❄️ | 1 ½ cups | For dusting, sifted |
| Large Eggs 🥚 | 4 whole | Room temperature preferred |
| Fresh Lemon Juice 🍋 | ¾ cup | About 4-5 lemons |
| Lemon Zest 🍋 | 2 tbsp | Finely grated, packed |
| Salt 🧂 | ¼ tsp | Fine sea salt preferred |
| Vanilla Extract 🌿 | 1 tsp | Pure vanilla, not imitation |
| Heavy Cream 🥛 | 2 tbsp | Optional for creamier filling |
[recipe_ingredient_scaler]
The butter needs to be cold—Land O’Lakes or Kerrygold give the best flake in the crust. Use King Arthur for the flour if you want ultra-reliable results. I always weigh my ingredients (252g flour, 200g granulated sugar) for foolproof layers, but volume measurements work fine too. For lemons, Meyer lemons are sweeter if you can find them at Whole Foods or a specialty grocer.
No fresh lemons? Bottled lemon juice at half the amount works in a pinch, but fresh is brighter. Out of powdered sugar? Pulse granulated in a blender, but sift it first—one-to-one ratio. The eggs are non-negotiable for structure, but room temperature ensures they incorporate smoothly. Skip the vanilla if you must, but it rounds out the tartness beautifully.
Crust freezes well for 1 month if wrapped tight. The filled bars keep 3-4 days at room temp (covered) or 1 week refrigerated. Dust with powdered sugar just before serving—don’t skip it (worth the extra minute).
Why You’ll Love This Recipe
- One Bowl Wonder: I mix the crust and filling in the same bowl—no extra dishes, just buttery flour and sugar coming together effortlessly.
- Tart-Sweet Magic: That first bite where zesty lemon cuts through the powdered sugar topping? Pure bliss in every square.
- Picnic Hero: I bring these to potlucks and they’re always the first to disappear, yet they travel perfectly in a simple container.
- Stays Fresh: Honestly, they taste even better the next day, and I can stretch one batch into four days of treats.
Step-by-Step Instructions for Lemon Bars
Here’s the method. Simple, straightforward, and guaranteed to deliver bright citrus layers.
Step 1: Prepare the Shortbread Crust
Preheat your oven to 350°F. Line a 9×13-inch baking pan with parchment paper, leaving an overhang on the sides for easy removal. This ensures your bars lift out cleanly without sticking.
In a food processor, pulse the 2 cups All-Purpose Flour, 0.5 cup Granulated Sugar, and 0.25 tsp Salt until combined. Add the 1 cup Unsalted Butter (cold, cut into cubes) and pulse until the mixture resembles coarse crumbs. The texture should look like wet sand—this indicates the butter is properly incorporated.
Press the mixture evenly into the prepared pan, using your fingers or the bottom of a measuring cup to create a smooth, compact layer. Bake for 18-20 minutes until the edges are lightly golden. This is your base—crisp, buttery, and ready to hold the tangy filling.
Step 2: Make the Lemon Filling
While the crust bakes, whisk together the 4 whole Large Eggs, 0.75 cup Fresh Lemon Juice, 2 tbsp Lemon Zest, 1 tsp Vanilla Extract, and 2 tbsp Heavy Cream in a large bowl. The mixture should be smooth and pale yellow, with tiny flecks of zest visible throughout.
Here’s the thing—I know it seems thin, but this is exactly how it should look. The eggs and lemon juice will set into a luscious, custard-like layer as it bakes. If you’re worried about curdling, strain the mixture through a fine-mesh sieve to remove any stray bits of zest or egg.
Step 3: Bake the Filling Until Set
Pour the lemon filling over the hot crust immediately after it comes out of the oven. The heat from the crust helps the filling start setting right away, ensuring a seamless bond between the layers. Return the pan to the oven and bake for 20-25 minutes.
You’ll know it’s done when the center no longer jiggles and the edges are just beginning to pull away from the pan. The top should look slightly matte, not shiny or liquid. If the filling starts to brown too quickly, tent the pan loosely with foil to prevent over-browning.
Step 4: Cool and Dust with Powdered Sugar
Let the bars cool completely in the pan on a wire rack—this takes about 1 hour. I know it’s hard to wait, but cooling is crucial. If you slice them too soon, the filling won’t set properly, and you’ll end up with a runny mess instead of clean, perfect squares.
Once cooled, lift the bars out of the pan using the parchment overhang and transfer them to a cutting board. Dust generously with the 1.5 cups Powdered Sugar (sifted for a smooth finish). Use a sharp knife to cut into squares, wiping the blade clean between cuts for clean edges. Serve chilled for the best texture.
Pro Tips For Making Lemon Bars Recipe Easy And Delicious
- Chill the Crust: Press the shortbread base into the pan and refrigerate for 15 minutes before baking—this prevents it from spreading and keeps it buttery and crisp. I learned this the hard way after pulling out a greasy, flat crust.
- Room-Temp Eggs: Take the eggs out of the fridge 30 minutes before mixing. Cold eggs can cause the filling to curdle, and nobody wants grainy lemon bars.
- Don’t Overbake: Pull the bars when the center still has a slight jiggle—it’ll set as it cools. Overbaking turns them dry and crumbly, and after ruining a batch, I now set a timer for 22 minutes sharp.
- Dust Lightly: Use a fine-mesh sieve for the powdered sugar topping—it distributes evenly and looks professional. Skip the clumps, and resist the urge to pile it on; about 2 tablespoons is plenty.
Make-Ahead Tips for Leftovers
Prep Ahead Crust
You can make the shortbread crust 1-2 days in advance. Press it into the pan, cover tightly with plastic wrap, and refrigerate. When ready, bake at 350°F for 18-20 minutes before adding the filling. This saves time on busy days. 💡
Filling Prep
Whisk the filling ingredients together the night before and store in an airtight container in the fridge. The flavors meld beautifully overnight. Just give it a quick stir before pouring over the hot crust.
Freezing Baked Bars
Once completely cooled, cut into squares and freeze in a single layer on a baking sheet for 1 hour. Then transfer to a freezer bag with parchment between layers. They’ll keep for up to 2 months. Thaw overnight in the fridge before dusting with powdered sugar.
Room Temperature Storage
Store baked and cooled bars in an airtight container at room temperature for up to 3 days. Keep them in a single layer to prevent sticking. Dust with powdered sugar just before serving for that fresh-baked look.
Fridge Storage
For longer storage, refrigerate in an airtight container for up to 1 week. The filling will firm up more in the cold, so let them sit at room temperature for 10-15 minutes before serving for the best texture.
Reheating Tip
Avoid reheating—these bars are best served chilled or at room temperature. If you must warm them, use the microwave at 50% power for 10-15 seconds to soften slightly without melting the crust. ✨
Nutrition Facts
Frequently Asked Questions
Do I need to use fresh lemon juice?
Fresh is best for bright, vibrant flavor. Bottled works in a pinch but use half the amount and expect a slightly duller taste. Always zest your own lemons—bottled zest lacks the aromatic oils that make these bars special.
Why did my filling curdle?
Overmixing or adding cold eggs to hot ingredients can cause curdling. Ensure eggs are room temperature and whisk gently just until combined. Straining the mixture before baking removes any lumps.
Can I make these gluten-free?
Yes! Swap the all-purpose flour for a 1:1 gluten-free baking blend. Press the crust mixture firmly into the pan as GF flours don’t bind as tightly. Bake time remains the same.
How do I get clean cuts?
Cool completely before slicing—this firms up the filling. Use a sharp knife dipped in hot water and wiped clean between cuts. For perfect squares, chill for 30 minutes before dusting with sugar.

Trained in classic French technique but raised on slow-cooked ribs and spicy rubs, she blends culinary skill with smoke and soul.
- Recipe for Boneless Pork Chops in Cast Iron Skillet: Sear and Baste to Juicy Perfection - October 3, 2026
- Recipe for Boneless Cross Rib Roast: Slow-Roasted Beef with Herb Crust - October 3, 2026
- Hamburgers in Sauce Recipe Crock Pot: Slow-Cooked Savory Delight - October 3, 2026