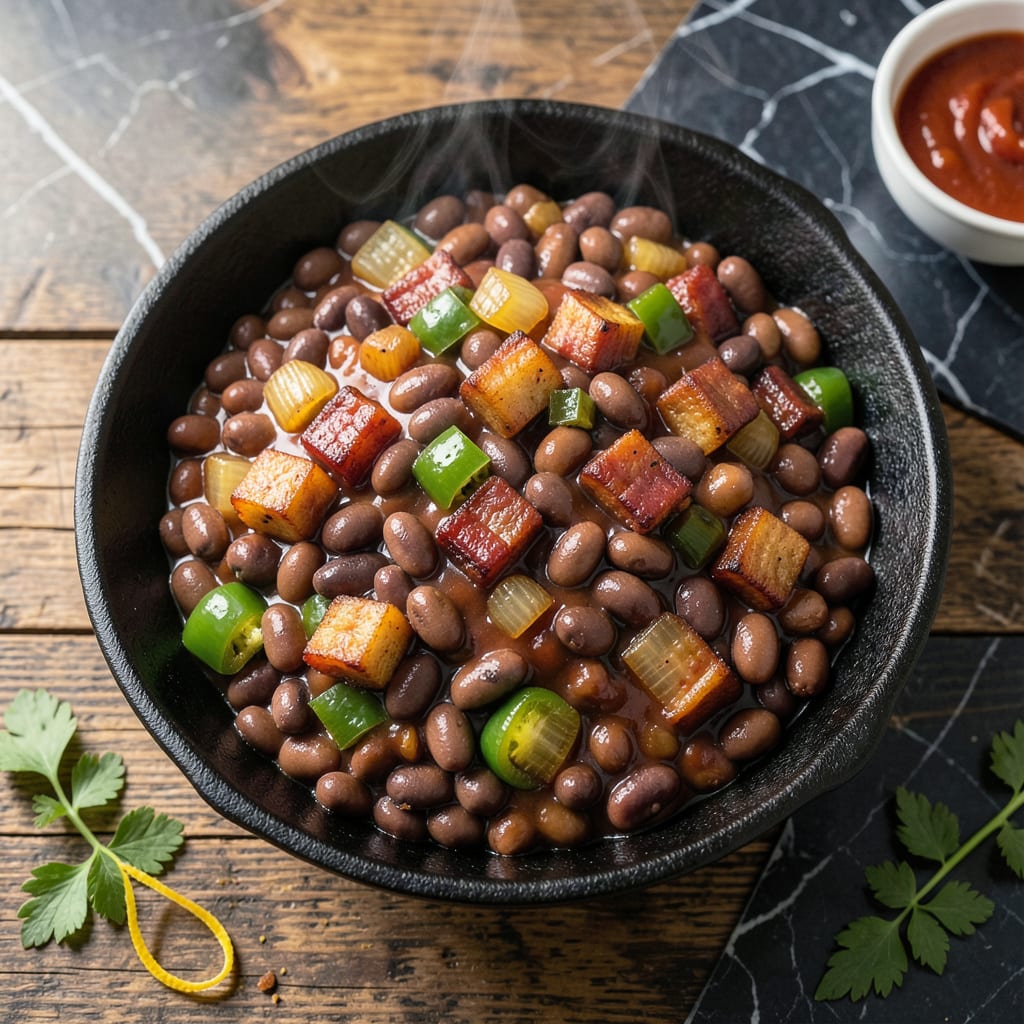
Getting my first whiff of hickory smoke always takes me back to family cookouts. This dish captures that same smoky depth with tender beans and rich sweetness.
I’ve perfected the balance between charred edges and a velvety sauce. The result is a side dish that holds its own next to any BBQ main.
Ingredients for Lucille’s Bbq Beans
Pantry staples plus bacon for that unmistakable smoky depth you crave.
| Ingredient | Amount | Notes |
|---|---|---|
| Dried Navy Beans 🫘 | 1 lb | Rinsed and picked over |
| Hickory-Smoked Bacon 🥓 | ½ lb | Chopped, thick-cut preferred |
| Yellow Onion 🧅 | 1 whole | Medium, finely diced |
| Green Bell Pepper 🌶️ | 1 whole | Seeds removed, diced |
| Garlic Cloves 🧄 | 4 cloves | Minced for depth of flavor |
| Ketchup 🍅 | 1 cup | High-quality, no high-fructose corn syrup |
| Molasses 🫙 | ¼ cup | Unsulphured for pure flavor |
| Apple Cider Vinegar 🍏 | 2 tbsp | Balances the sweetness |
| Dijon Mustard 🟡 | 2 tbsp | Smooth, not whole grain |
| Brown Sugar 🟤 | ¼ cup | Light or dark, packed |
| Worcestershire Sauce 🍶 | 1 tbsp | Adds umami complexity |
| Liquid Smoke 💨 | 1 tsp | Hickory flavor preferred |
| Chili Powder 🌶️ | 1 tsp | Mild or medium heat |
| Kosher Salt 🧂 | 1 tsp | Diamond Crystal preferred |
| Black Pepper 🌶️ | ½ tsp | Freshly ground for best results |
[recipeingredientscaler]
The bacon is non-negotiable here—thick-cut hickory-smoked from Whole Foods or your local butcher delivers the best results. Navy beans are traditional, but pinto beans work in a pinch. Look for unsulphured molasses at natural food stores; it’s darker and more robust. For the liquid smoke, Colgin’s hickory is the gold standard if you can find it. The beans need an overnight soak (don’t skip this part).
No bacon? Smoked paprika plus a splash of vegetable oil can mimic the flavor, but it won’t be the same. Out of molasses? Honey or maple syrup at half the amount (though it’ll sweeten differently). The ketchup should be a good brand—Heinz or Annie’s—since it’s a base flavor. Want more heat? Add a pinch of cayenne with the chili powder.
These taste even better the next day once all the flavors meld. Store in an airtight container in the fridge for up to 5 days, or freeze for 3 months. Perfect for making ahead—just reheat gently on the stove.
Why You’ll Love This Recipe
- Set It & Forget It: Most of the work is just letting the navy beans soak up that hickory bacon flavor while I do something else.
- Smoky Depth: The bacon and garlic create this rich, layered taste that makes store-bought beans seem flat.
- Potluck MVP: I bring this to every gathering and come home with an empty dish and requests for the recipe.
- Budget Stretch: A pound of dried beans and a few slices of bacon feed my whole family for days.
Step-by-Step Instructions for BBQ Beans
Here’s how I achieve that signature smoky-sweet flavor with perfect texture every time.
Step 1: Soak and Prep the Beans
Place the 1 lb Dried Navy Beans in a large bowl and cover with cold water by at least 2 inches. Let them soak overnight or for at least 8 hours. I always do this the night before—it ensures even cooking and prevents that dreaded tough center.
When ready to cook, drain and rinse the beans thoroughly. Pick through them to remove any small stones or damaged beans. This step might seem tedious, but it’s crucial for both safety and texture. You want every bite of these beans to be perfect.
Step 2: Render the Bacon and Sauté Aromatics
In a large Dutch oven, cook the 0.5 lb Hickory-Smoked Bacon over medium heat until crispy and the fat has rendered, about 8-10 minutes. Remove the bacon with a slotted spoon and set aside, but leave all that glorious rendered fat in the pot.
In the same pot, add the finely diced Yellow Onion and diced Green Bell Pepper. Sauté for 5-7 minutes until softened and just starting to brown. Add the 4 cloves Garlic Cloves and cook for 1 minute until fragrant. This builds the flavor foundation that makes these beans irresistible.
Step 3: Combine and Simmer the Beans
Add the soaked beans to the pot along with enough water to cover them by 2 inches. Stir in the 1 cup Ketchup, 0.25 cup Molasses, 0.25 cup Brown Sugar, 2 tbsp Apple Cider Vinegar, 2 tbsp Dijon Mustard, 1 tbsp Worcestershire Sauce, 1 tsp Liquid Smoke, 1 tsp Chili Powder, 1 tsp Kosher Salt, and 0.5 tsp Black Pepper.
Bring the mixture to a boil, then reduce heat to low. Cover and let it simmer gently for 1.5-2 hours, stirring occasionally. You’ll know it’s ready when the beans are tender and the sauce has thickened to a rich, glossy consistency that clings to the beans.
Step 4: Finish and Adjust the Seasoning
Once the beans are tender, return the crispy bacon to the pot and stir to combine. Taste and adjust the seasoning if needed—I often find that the flavors deepen as it sits, so I start with a light hand on the salt.
Let the beans sit for 15-20 minutes off the heat before serving. This resting time allows the flavors to meld together beautifully. The sauce will thicken slightly as it cools, creating that perfect balance between smoky, sweet, and tangy that defines great BBQ beans.
Pro Tips For Making Lucille’S Bbq Beans
- Soak Overnight: I learned this the hard way—navy beans stay tough if you skip the 8-12 hour soak in cold water. It cuts the cooking time in half and guarantees creamy beans.
- Render Bacon First: Cook the hickory-smoked bacon until crisp, then use the fat to sauté the onion and bell pepper. Sounds weird, but it builds layers of smoky flavor that define this dish.
- Skip Old Spices: After a few batches tasted flat, I realized dried spices lose potency fast. Use fresh garlic and recently opened paprika or cumin for the best results.
- Simmer Low and Slow: Keep the heat at a gentle bubble—aggressive boiling turns the beans mushy. Two to three hours at a lazy simmer coaxes out the creamiest texture.
Essential Equipment for lucilles bbq beans
Dutch Oven Essentials
I swear by my Le Creuset 7-quart Dutch oven for these beans—its heavy enamel coating distributes heat evenly and prevents hot spots. A good Dutch oven is non-negotiable for low-and-slow cooking. The 6-8 quart size gives beans room to expand while maintaining that rich sauce consistency. 🔥
Wooden Spoon Workhorse
A sturdy wooden spoon is my go-to for stirring without scratching the pot. I prefer olive wood from my local kitchen shop—it’s gentle on cookware and doesn’t absorb odors. The long handle keeps your hands safe from the heat while scraping up all those flavorful browned bits.
Precision Thermometer
While not strictly necessary, a ThermoWorks Instant Read Thermometer helps monitor water temperature during simmering. I aim for a gentle 190-200°F range. This prevents the beans from boiling too vigorously, which can make them tough. It’s a small investment that pays off in perfectly tender results.
Quality Knives
Sharp 8-inch chef’s knife and paring knife make quick work of the onion, pepper, and garlic prep. I use Wüsthof for its balance and durability. A good knife makes the difference between a chore and a joy when you’re dicing 2 cups of aromatics for this recipe.
Soaking Bowl
Use a large glass or ceramic bowl (at least 4-quart capacity) for soaking the beans. I prefer Pyrex because it’s non-reactive and easy to clean. The beans will triple in size, so give them plenty of room with 2-3 inches of water above them.
Honestly, these tools have never let me down during local BBQ competitions. 💛
Nutrition Facts

Trained in classic French technique but raised on slow-cooked ribs and spicy rubs, she blends culinary skill with smoke and soul.
- Recipe for Boneless Pork Chops in Cast Iron Skillet: Sear and Baste to Juicy Perfection - October 3, 2026
- Recipe for Boneless Cross Rib Roast: Slow-Roasted Beef with Herb Crust - October 3, 2026
- Hamburgers in Sauce Recipe Crock Pot: Slow-Cooked Savory Delight - October 3, 2026