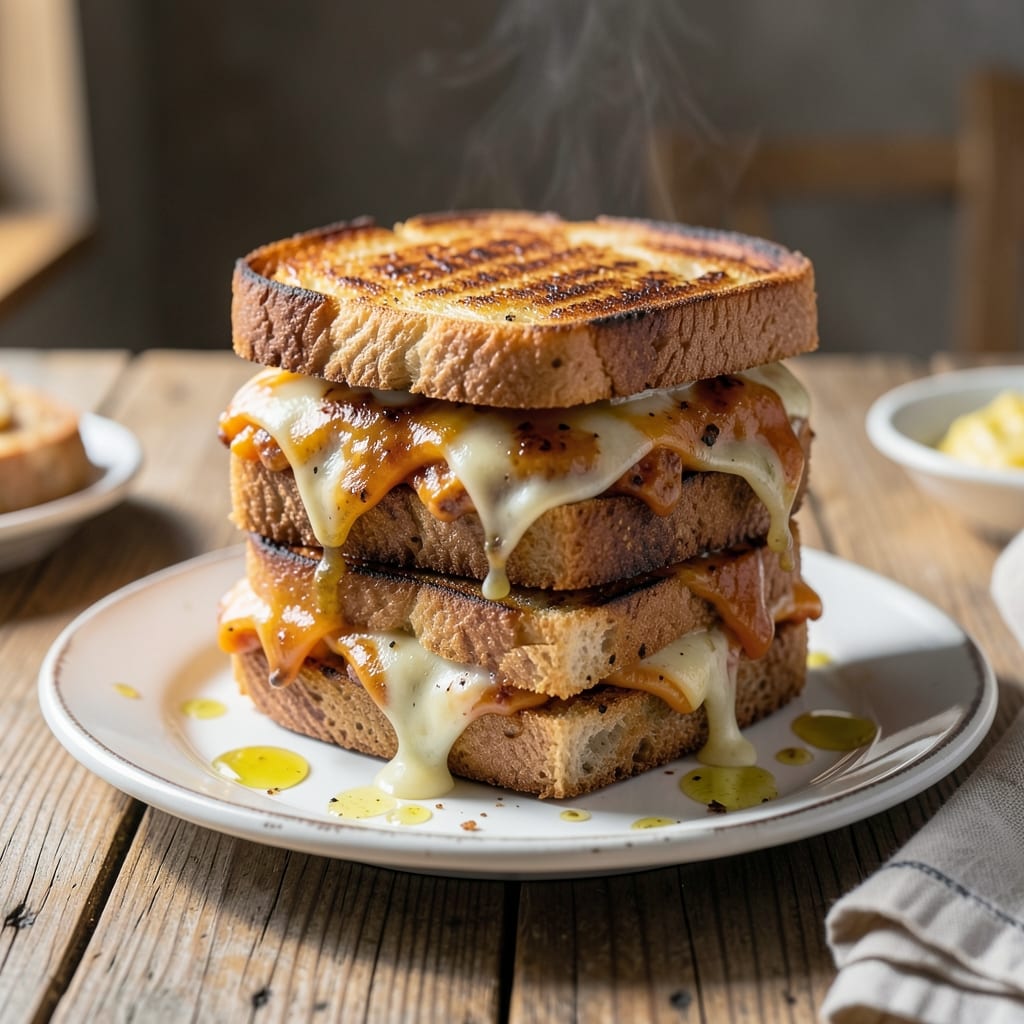
This recipe combines two comfort food classics into one indulgent creation. The mac and cheese provides a creamy, cheesy filling that transforms a simple grilled sandwich into something extraordinary.
I’ve perfected the technique for achieving a golden, crispy exterior while keeping the inside gooey and rich. The result is a double cheese decadence that satisfies even the most intense cravings.
Ingredients for Mac and Cheese Grilled Cheese Sandwich
Indulgent comfort meets cheesy perfection with these carefully selected ingredients for ultimate decadence.
| Ingredient | Amount | Notes |
|---|---|---|
| Elbow Macaroni 🍝 | 8 oz | Or any short pasta shape |
| Unsalted Butter 🧈 | 4 tbsp | Divided for mac and grilling |
| All-Purpose Flour 🌾 | 3 tbsp | For roux base |
| Whole Milk 🥛 | 2 cups | Full-fat for creaminess |
| Sharp Cheddar Cheese 🧀 | 2 cups | Freshly shredded from block |
| Gruyère Cheese 🧀 | 1 cup | Freshly shredded for depth |
| Parmesan Cheese 🧀 | ½ cup | Freshly grated for umami |
| Dijon Mustard 🟡 | 1 tsp | Smooth, not grainy |
| Worcestershire Sauce 🫒 | 1 tsp | Vegetarian version required |
| Salt 🧂 | 1 tsp | Diamond Crystal kosher preferred |
| Black Pepper 🌶️ | ½ tsp | Freshly ground for best flavor |
| Sourdough Bread 🍞 | 8 slices | Or thick-cut white bread |
| Garlic Powder 🧄 | ½ tsp | For seasoning bread |
[recipe_ingredient_scaler]
The cheese selection is paramount for this dish. Sharp cheddar provides the classic flavor base, while Gruyère adds nutty complexity. Parmesan delivers the umami depth that elevates the mac and cheese filling. Source blocks from a specialty cheese counter—pre-shredded contains anti-caking agents that make the sauce grainy. For the vegetarian Worcestershire, Annie’s or Edward & Sons are reliable brands.
No Gruyère? Fontina or Monterey Jack melt beautifully as substitutes. For the milk, whole is essential—lower fat versions won’t create a properly creamy sauce. The sourdough can be swapped for ciabatta or brioche, but avoid flimsy sandwich bread. If you only have one cheese type, use 3 cups cheddar and add a pinch of mustard powder for complexity.
The mac and cheese filling can be made 2 days ahead and refrigerated. Assemble sandwiches just before cooking. Leftovers keep 3-4 days refrigerated, though they’re best fresh. The cooked macaroni will absorb sauce as it sits, so add a splash of milk when reheating to restore creaminess.
Why You’ll Love This Recipe
- One Pot Wonder: I can cook the mac, make the sauce, and grill the sandwiches all in one pot and pan. No mountain of dishes afterward.
- Cheesy Overload: That sharp cheddar in both the mac and the sandwich filling? It’s rich, tangy, and melts into every bite.
- Crowd Pleaser: I serve these at game nights, and honestly, they disappear faster than chips and dip.
- Leftovers Reinvented: I’ll make extra mac on purpose—next day’s lunch is just assembling and grilling. Between us, it tastes even better.
Step-by-Step Instructions for Mac and Cheese Grilled Cheese Sandwich
Master the technique for this indulgent creation with precision and finesse.
Step 1: Cook the Elbow Macaroni to Al Dente
Bring a large pot of salted water to a rolling boil. Add the 8 oz Elbow Macaroni and cook according to package instructions until al dente, typically 1 minute less than the suggested time. Drain immediately and set aside.
The pasta should have a slight resistance when bitten—it will continue cooking slightly when combined with the hot cheese sauce later. Avoid overcooking, as mushy pasta will compromise the texture of your final dish.
Step 2: Prepare the Cheese Sauce with a Roux Base
In a large saucepan over medium heat, melt 2 tbsp Unsalted Butter. Once melted, whisk in the 3 tbsp All-Purpose Flour to form a smooth roux. Cook for 1-2 minutes, stirring constantly, until the mixture turns a light golden color.
Gradually whisk in the 2 cups Whole Milk, ensuring no lumps form. Stir in the 1 tsp Dijon Mustard, 1 tsp Worcestershire Sauce, 1 tsp Salt, and 0.5 tsp Black Pepper. Bring to a gentle simmer, then reduce heat to low.
Slowly add the 2 cups Sharp Cheddar Cheese, 1 cup Gruyère Cheese, and 0.5 cup Parmesan Cheese, stirring until each addition is fully melted and the sauce is smooth. The sauce should coat the back of a spoon thickly.
Step 3: Combine Macaroni and Cheese Sauce
Add the cooked Elbow Macaroni to the cheese sauce and stir until every piece is evenly coated. If the sauce appears too thick, add a splash of warm milk to loosen it slightly.
Transfer the mixture to a shallow dish and spread it out to cool slightly. This step ensures the macaroni and cheese holds its shape when assembled into sandwiches. Allow it to cool for 10-15 minutes at room temperature.
Step 4: Assemble and Grill the Sandwiches
Lay out the 8 slices Sourdough Bread and lightly butter one side of each slice with the remaining 2 tbsp Unsalted Butter. Sprinkle the unbuttered sides with 0.5 tsp Garlic Powder for added flavor.
Place a generous portion of the macaroni and cheese mixture between two slices of bread, buttered sides out. Heat a large skillet or griddle over medium-low heat. Once hot, add the sandwiches and cook for 3-4 minutes per side until the bread is golden brown and the cheese inside is fully melted.
Press down gently with a spatula during cooking to ensure even contact with the heat source. The sandwiches are done when the exterior is crisp and the filling is gooey and thoroughly heated through.
Pro Tips For Making Mac And Cheese Grilled Cheese Sandwich
- Chill the Mac: After making the mac and cheese, spread it on a tray and refrigerate for 20-30 minutes before assembling the sandwich. I learned this the hard way—hot mac melts the bread and makes a soggy mess.
- Grate Your Own: Skip pre-shredded cheddar; it’s coated in anti-caking agents that make the sauce grainy. Freshly grated sharp cheddar melts smoother and actually changes the outcome.
- Low and Slow: Cook the grilled cheese on medium-low heat, not high. After burning three batches, I finally figured out that slow melting guarantees a crispy exterior without scorching the bread.
- Butter the Outside: Use unsalted butter on the outer bread slices—about 1 tablespoon per side—and press firmly in the pan. Sounds weird, but it works: you get an even golden crust every time.
Serving Suggestions for Leftovers
Plating for Impact
I love serving these sandwiches on a wooden cutting board for rustic presentation. Cut diagonally for maximum cheese pull visibility. The golden crust contrasts beautifully against dark wood. 💛
Dipping Sauces
A simple tomato soup shot glass makes a playful pairing. For adults, a spicy marinara with ½ tsp red pepper flakes adds kick. I’ve also served with sriracha mayo—mix 2 tbsp mayo with 1 tsp sriracha.
Garnish Ideas
Fresh chopped chives or parsley add color and freshness. A light dusting of smoked paprika enhances the cheesy aroma. For extra decadence, drizzle with truffle oil just before serving.
Side Pairings
Balance the richness with a crisp green salad tossed in lemon vinaigrette. I prefer arugula for its peppery bite. Pickles or pickled jalapeños cut through the creaminess perfectly. 🌟
Temperature Tips
Serve immediately while the cheese is still gooey. If making ahead, keep warm in a 200°F oven on a wire rack to prevent sogginess. The sandwiches stay crisp for about 15 minutes out of the pan.
Portion Control
One sandwich is plenty for most people, but I always make extra. These disappear fast at gatherings. For a lighter meal, serve half a sandwich with a side of roasted tomatoes or sautéed greens.
Nutrition Facts

Trained in classic French technique but raised on slow-cooked ribs and spicy rubs, she blends culinary skill with smoke and soul.
- Recipe for Boneless Pork Chops in Cast Iron Skillet: Sear and Baste to Juicy Perfection - October 3, 2026
- Recipe for Boneless Cross Rib Roast: Slow-Roasted Beef with Herb Crust - October 3, 2026
- Hamburgers in Sauce Recipe Crock Pot: Slow-Cooked Savory Delight - October 3, 2026