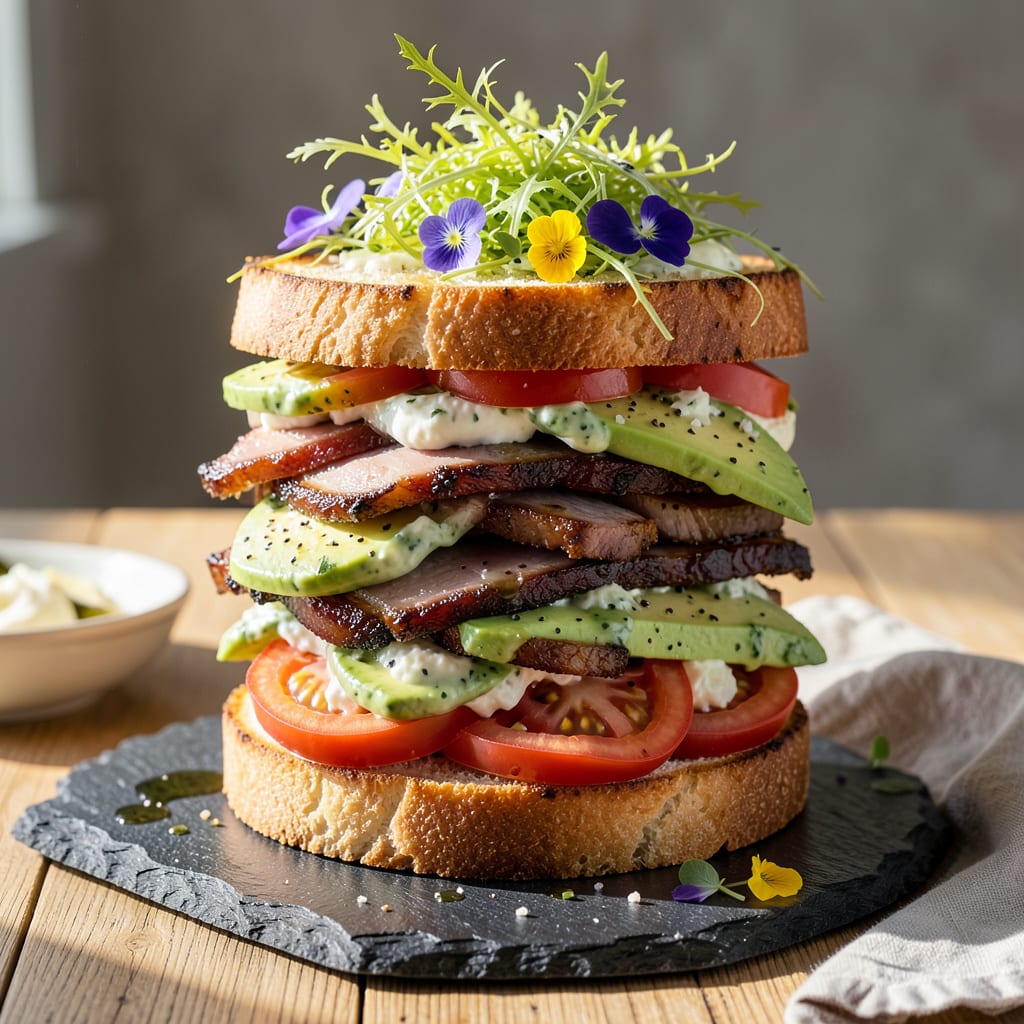
Between you and me, most sandwiches are just sad piles of ingredients between bread. But when you treat it like a flavor puzzle—layering textures and tastes just right—it becomes something worth getting excited about. I learned this the hard way after years of soggy bread and sliding fillings, until I cracked the code for building sandwiches that actually hold up and taste incredible.
Here’s the thing—great sandwiches aren’t about fancy ingredients. It’s about strategic layering: spreads on both bread slices (no soggy bottoms!), proteins and cheeses in the middle where they belong, and crunchy veggies on top for that perfect bite. I even have a trick for toasting bread so it stays crispy without making the whole thing too stiff to eat.
What you’ll end up with is a sandwich that doesn’t fall apart when you pick it up, where every bite delivers all the flavors together. No more eating the filling first and being left with plain bread. Whether you’re making a classic turkey club or experimenting with bold combos, these techniques work every time.
And yes, I’m including all my pro tips—how to prep ingredients so they stay fresh, which cheeses melt best without making everything greasy, and even how to wrap sandwiches for picnics without them getting squished. Let’s build something better than what you’d get at most delis.
📚 In This Guide
- What You’ll Need
- Instructions
- Tips and Common Mistakes
What Youll Need
- ● Bread (2 slices per sandwich): White, whole wheat, sourdough, or artisan bread (fresh or lightly toasted 🍞)
- ● Gluten-free or low-carb options (if needed)
- ● Protein (1–3 oz per sandwich): Deli meats (turkey, ham, roast beef, salami, or pastrami)
- ● Grilled chicken, steak, or tofu (½-inch thick slices)
- ● Hard-boiled eggs, tuna salad, or chickpeas (for veggie options)
- ● Cheese (1–2 slices or ¼ cup shredded): Cheddar, Swiss, provolone, mozzarella, or blue cheese crumbles
- ● Vegan cheese alternatives
- ● Spreads & Condiments (1–2 tbsp each): Mayonnaise, mustard (Dijon or yellow), or aioli
- ● Hummus, pesto, or cream cheese (for extra flavor)
- ○ Hot sauce, sriracha, or honey mustard (optional kick 🌶️)
- ● Veggies & Toppings (¼–½ cup total): Lettuce (romaine, spinach, or arugula), tomato (sliced ¼-inch thick), onion (thinly sliced)
- ● Pickles, jalapeños, olives, or roasted red peppers (for tang)
- ● Avocado (¼ mashed or sliced), sprouts, or cucumber
- ● Tools: Sharp serrated knife or bread knife 🔪
- ● Cutting board (wood or plastic)
- ● Butter knife or spreader (for condiments)
- ○ Toaster or panini press (optional for crispy results)
- ○ Optional Extras: Fresh herbs (basil, cilantro, or dill)
- ● Bacon, prosciutto, or crispy onions (for crunch)
- ● Drizzle of balsamic glaze or olive oil
Step-by-Step Instructions for Building the Perfect Sandwich
Here’s how to transform simple ingredients into a flavor-packed masterpiece with every bite.
Choose and Toast Your Bread
Start with bread that matches your sandwich vision—crusty artisan loaves for hearty fillings, soft brioche for delicate proteins, or whole grain for nutty depth. I always toast my bread lightly, even if it’s fresh. A quick 30-45 seconds in a toaster or under the broiler creates a sturdy barrier that prevents sogginess from moist ingredients.
Watch for that perfect moment when the edges turn just light golden brown and you can smell that warm, toasty aroma. This step makes all the difference between a sandwich that holds together beautifully and one that turns into a slippery mess. For extra flavor, brush the toasted sides with a thin layer of garlic butter or olive oil while still warm.
Create a Flavor Barrier with Spreads
This is where the magic begins! Apply your spread right to the toasted bread while it’s still warm—the heat helps the flavors meld. For creamy textures, I love mayonnaise mixed with a splash of lemon juice or a dash of hot sauce. For tangy brightness, stone-ground mustard or pesto works wonders. Spread it all the way to the edges—this creates a delicious barrier that protects your bread from moisture.
Here’s the pro move: use different spreads on each slice. A spicy aioli on one side and a sweet fig jam on the other creates exciting flavor contrasts with every bite. Don’t be shy with your spreads either—a thin, even layer ensures every ingredient gets that flavor boost without overpowering the main components.
Layer Ingredients Strategically
Now for the fun part—building your flavor profile! Start with sturdy ingredients at the bottom: think crisp lettuce, thinly sliced tomatoes (pat them dry first!), or pickled vegetables. These create a stable foundation that prevents your sandwich from toppling over. For proteins, distribute them evenly across the surface rather than piling them in the center.
Here’s the secret to perfect texture: alternate crunchy and soft elements. Crispy bacon with creamy avocado? Yes! Thin apple slices with melted brie? Absolutely! I always add fresh herbs like basil or cilantro right before closing the sandwich—their bright flavors cut through richer ingredients beautifully. Remember to season each layer lightly as you build—just a pinch of salt and pepper makes all the difference.
Master the Art of the Press
Place your top slice of bread gently over the stacked ingredients—don’t press down yet! For tall sandwiches, insert toothpicks at an angle to secure everything before cutting. Now comes the crucial press: apply firm, even pressure with your palm for about 5 seconds. You’ll feel the sandwich compact slightly as the flavors begin to marry.
For warm sandwiches, wrap them tightly in parchment paper and let them rest for 2-3 minutes before serving. This short wait allows the heat to distribute evenly and the flavors to meld together. The paper also helps steam the bread just enough to make it perfectly tender while maintaining structure. When you unwrap it, you’ll see how all the layers have settled into perfect harmony.
Cut and Serve with Confidence
Use a sharp serrated knife to cut your sandwich cleanly. For rectangular shapes, a single diagonal cut creates two perfect triangles. For round bread, cut straight down the middle. Wipe your knife clean between cuts if you’re making multiple sandwiches—this keeps each one looking as beautiful as it tastes.
Serve immediately while all the textures are at their peak. The first bite should reveal all your carefully constructed layers working together—the crispness of the bread, the creaminess of the spreads, the freshness of the vegetables, and the richness of your proteins. Watch how the flavors evolve with each bite, proving that great sandwiches are so much more than the sum of their parts!
Tips and Common Mistakes for Perfect Sandwiches
Let me share the game-changing secrets that transform a good sandwich into an unforgettable one.
Toasting Technique: Those 30-45 seconds in Step 1 aren’t just about warmth—they create a flavor foundation! Watch for that exact moment when edges turn light golden brown and you catch that nutty aroma. This creates a moisture barrier that keeps your sandwich structurally perfect. I always brush the warm toasted sides with garlic butter—it melts into every nook for maximum flavor impact.
Spread Strategy: Here’s what nobody tells you—spreads should be applied while the bread is still warm from toasting! In Step 2, when you spread mayonnaise or mustard on warm bread, the heat helps the flavors bloom and creates a seal against sogginess. Use different spreads on each slice for exciting flavor contrasts in every bite. A thin, even layer ensures every ingredient gets that flavor boost without overpowering.
Layering Logic: The order in Step 3 matters more than you think! Start with sturdy ingredients at the bottom (like crisp lettuce) to create a stable foundation. Then alternate textures—crunchy bacon with creamy avocado, or thin apple slices with melted brie. This creates perfect mouthfeel with every bite. I always add fresh herbs like basil right before closing—their bright flavors cut through richer ingredients beautifully.
Pressing Perfection: That 5-second press in Step 4 is magic! Apply firm, even pressure with your palm—you’ll feel the sandwich compact slightly as flavors begin to marry. For warm sandwiches, don’t skip the 2-3 minute rest wrapped in parchment paper. This short wait allows heat to distribute evenly and flavors to meld together perfectly.
Pro Tips for Making Sandwich
- Let me share the game-changing secrets that transform a good sandwich into an unforgettable one.
- Toasting Technique: Those 30-45 seconds in Step 1 aren’t just about warmth—they create a flavor foundation! Watch for…
- Spread Strategy: Here’s what nobody tells you—spreads should be applied while the bread is still warm from toasting! …
Frequently Asked Questions
Got sandwich questions? We’ve got answers! Here are the most common queries about crafting the perfect sandwich—from prep to troubleshooting.
How do I keep my sandwich from getting soggy?
Layer wet ingredients (like tomatoes or pickles) between dry items (cheese, meat, or lettuce) to create a barrier. Spread condiments on the bread’s center, not the edges. For meal prep, pack sauces separately or toast the bread lightly to add a moisture-resistant crust.
What’s the best bread for a sandwich that won’t fall apart?
Opt for sturdy, dense breads like sourdough, ciabatta, or whole-grain artisan loaves. Avoid overly soft bread (like white sandwich bread) for heavy fillings. For extra support, toast the bread lightly or use a tortilla wrap for messy ingredients.
How far in advance can I make a sandwich?
Most sandwiches stay fresh for 4–6 hours at room temp or 24 hours refrigerated if wrapped tightly in parchment paper or foil. Avoid mayo-based fillings (like chicken salad) for advance prep—opt for vinegar-based dressings or hummus instead to prevent spoilage.
What are quick alternatives if I don’t have bread?
Get creative! Use:
- Lettuce wraps (romaine or butter lettuce)
- Tortillas or flatbreads (for wraps or pinwheels)
- Rice paper (for Vietnamese-style rolls)
- Hollowed-out bell peppers or tomatoes (low-carb option)
Why does my sandwich taste bland? How can I fix it?
Blandness often comes from missing acid, salt, or texture. Boost flavor with:
- A splash of lemon juice, vinegar, or hot sauce
- Crunchy elements (pickles, nuts, or chips)
- Umami-rich spreads (pesto, tapenade, or miso mayo)
Mastering the art of making sandwiches is all about balancing flavors, textures, and creativity—whether you’re whipping up a quick lunch or a gourmet masterpiece. 🌟 With the right ingredients and techniques, every bite can be a delicious adventure. Ready to level up your sandwich game? Grab your favorite bread, experiment with bold fillings, and start crafting your next culinary creation today!

Trained in classic French technique but raised on slow-cooked ribs and spicy rubs, she blends culinary skill with smoke and soul.
- Recipe for Boneless Pork Chops in Cast Iron Skillet: Sear and Baste to Juicy Perfection - October 3, 2026
- Recipe for Boneless Cross Rib Roast: Slow-Roasted Beef with Herb Crust - October 3, 2026
- Hamburgers in Sauce Recipe Crock Pot: Slow-Cooked Savory Delight - October 3, 2026