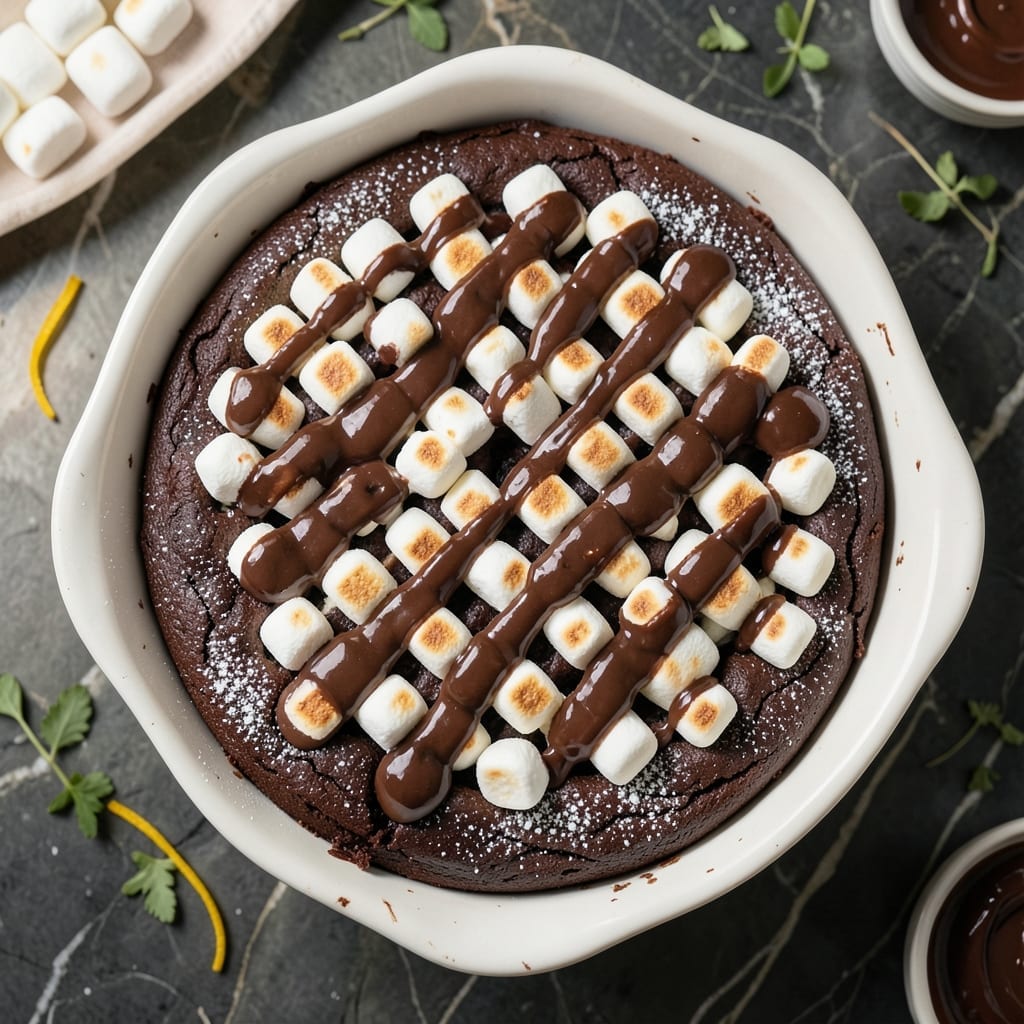
This cake redefines decadence with its gooey marshmallow and rich chocolate layers.
I’ve perfected the balance of moist cake, melted chocolate, and toasted marshmallow topping for a dessert that’s impossible to resist. Every bite delivers deep cocoa flavor with a satisfying chewy texture.
Ingredients for Marshmallow Chocolate Poke Cake
Rich cocoa and gooey marshmallows make this cake irresistibly decadent with every bite.
| Ingredient | Amount | Notes |
|---|---|---|
| All-Purpose Flour 🌾 | 2 cups | Sifted for lighter texture |
| Granulated Sugar 🍚 | 2 cups | Fine granulated preferred |
| Unsweetened Cocoa Powder 🍫 | ¾ cup | Dutch-processed for richness |
| Baking Powder 🧂 | 2 tsp | Fresh for best rise |
| Baking Soda 🧂 | 1 tsp | Balances acidity |
| Salt 🧂 | ½ tsp | Fine sea salt preferred |
| Large Eggs 🥚 | 2 whole | Room temperature for even mixing |
| Vegetable Oil 🫒 | ½ cup | Neutral flavor like canola |
| Buttermilk 🥛 | 1 cup | Full-fat for moisture |
| Vanilla Extract 🌿 | 2 tsp | Pure for best flavor |
| Semi-Sweet Chocolate Chips 🍫 | 2 cups | For melting and mixing |
| Heavy Cream 🥛 | ½ cup | Whipped for ganache |
| Mini Marshmallows 🍬 | 3 cups | For topping and poking |
| Powdered Sugar 🍚 | ½ cup | For dusting finished cake |
[recipe_ingredient_scaler]
The cocoa powder is your flavor anchor here. Hershey’s Special Dark or Ghirardelli deliver that deep chocolate punch this cake demands. Buttermilk might seem old-school, but it keeps the crumb tender—Whole Foods or your local dairy aisle will have it. For the chocolate chips, Guittard or Ghirardelli melt beautifully without that waxy aftertaste. Skip the cheap stuff; you’ll taste the difference.
No buttermilk? Whole milk plus a tablespoon of vinegar (let it curdle 5 minutes) works in a pinch. Out of mini marshmallows? Regular ones chopped small do the job—just toast them faster. The heavy cream can be swapped for coconut cream (the canned kind, not the carton) if you need dairy-free. And if you’re feeling fancy, bittersweet chocolate instead of semi-sweet gives a more sophisticated edge.
Cake layers keep 3-4 days tightly wrapped at room temperature. The marshmallow topping is best fresh but holds 2 days if you must. Freeze the base (unfrosted) for up to 3 months—thaw before adding toppings.
Why You’ll Love This Recipe
- One Bowl Wonder: I love that I can mix the flour, sugar, cocoa, and leavening right in the same bowl—no extra dishes to wash.
- Decadent Combo: The rich cocoa base with gooey marshmallows melted on top is my idea of chocolate heaven.
- Party Ready: Honestly, it’s my go-to for birthdays, potlucks, or just because it’s Tuesday and we need a treat.
- Budget Friendly: A box of cocoa and a bag of marshmallows feed my whole family without breaking the bank.
Step-by-Step Instructions for Marshmallow Chocolate Poke Cake
Here’s the method for creating this showstopper dessert with ease.
Step 1: Mix and Bake the Chocolate Cake Base
Preheat your oven to 350°F and grease a 9×13-inch baking pan. In a large bowl, whisk together the 2 cups All-Purpose Flour, 2 cups Granulated Sugar, 0.75 cup Unsweetened Cocoa Powder, 2 tsp Baking Powder, 1 tsp Baking Soda, and 0.5 tsp Salt until fully combined.
Add the 2 whole Large Eggs, 0.5 cup Vegetable Oil, 1 cup Buttermilk, and 2 tsp Vanilla Extract. Mix until the batter is smooth and no dry streaks remain. Pour it into the prepared pan and bake for 25-30 minutes, or until a toothpick inserted in the center comes out clean.
Step 2: Create the Chocolate Ganache Layer
While the cake bakes, heat the 0.5 cup Heavy Cream in a small saucepan over medium heat until it just begins to simmer. Remove from heat and pour it over the 2 cups Semi-Sweet Chocolate Chips in a heatproof bowl. Let it sit for 1 minute to soften the chocolate.
Stir the mixture until the chocolate is completely melted and the ganache is smooth and glossy. Set it aside to cool slightly while the cake finishes baking.
Step 3: Poke and Fill the Cake
Once the cake is done, remove it from the oven and let it cool for 10 minutes. Using the handle of a wooden spoon, poke holes all over the warm cake, spacing them about 1 inch apart. The holes should be deep but not all the way through to the bottom.
Pour the slightly cooled ganache evenly over the cake, letting it seep into the holes. Use a spatula to spread it into any gaps. The ganache will create rich chocolate pockets throughout the cake as it sets.
Step 4: Add the Marshmallow Topping
Sprinkle all 3 cups Mini Marshmallows evenly over the ganache-covered cake. Press them down lightly so they stick to the surface. Return the cake to the 350°F oven for 3-5 minutes, or just until the marshmallows are lightly toasted and golden.
Watch closely to avoid burning—this happens fast. Remove the cake from the oven and let it cool completely in the pan on a wire rack.
Step 5: Dust and Serve
Once the cake is completely cool, dust the top evenly with all 0.5 cup Powdered Sugar. Use a fine-mesh sieve for an even, professional-looking finish.
Slice into squares and serve. Each bite will reveal the gooey marshmallow topping, rich chocolate ganache pockets, and moist chocolate cake beneath. The contrast of textures makes this dessert irresistible.
Pro Tips For Making Marshmallow Chocolate Poke Cake
- Cool the Cake: Let the chocolate cake cool for at least 30 minutes before poking holes—otherwise, the warm cake will just absorb the marshmallow topping instead of letting it sit in pockets.
- Sift the Cocoa: Sift the unsweetened cocoa powder with the flour, baking powder, and baking soda to prevent clumps and give the cake a smoother texture.
- Skip the Overmixing: Mix the batter just until the dry ingredients disappear; overmixing develops gluten in the all-purpose flour, leading to a tough cake.
- Use Room Temp Eggs: Room temperature eggs blend more evenly into the batter, creating a lighter crumb—cold eggs can leave streaks in the mix.
Pro Cooking Tips for Great marshmallow chocolate poke cake
Perfect Hole Size
Use the handle of a wooden spoon for poking—it creates ½-inch wide holes that let ganache seep deep without collapsing the cake. I tested chopsticks and skewers first, but they made tunnels too narrow for proper filling. 💡
Ganache Temperature
Let your ganache cool for 5-7 minutes before pouring. Too hot and it’ll melt the cake; too cool and it won’t flow into the holes. You want it warm but not steaming—like 110°F on an instant-read thermometer.
Marshmallow Watch
Broil for 1-2 minutes max if you want deep toasting, but I prefer the oven method at 350°F for 3-5 minutes. Set a timer and don’t walk away—marshmallows go from golden to burnt in 30 seconds. I learned this the hard way at my first local BBQ competition. 🔥
Poking Timing
Poke the holes while the cake is still warm—this ensures the ganache absorbs better. If you wait until it’s completely cool, the holes won’t expand as much, and you’ll lose that gooey surprise in every bite.
Even Ganache Distribution
Pour the ganache in a spiral pattern starting from the center, working outward. Then use an offset spatula to gently nudge it into any empty holes. This guarantees every bite has that rich chocolate pocket we all crave.
Cooling Patience
Let the cake cool completely before dusting with powdered sugar. If it’s still warm, the sugar will melt and disappear. I use a fine-mesh sieve held 12 inches above the cake for that perfect snowy finish.
Nutrition Facts
Frequently Asked Questions
Can I make this ahead of time?
Yes! Bake and poke the cake a day ahead, but add marshmallows and powdered sugar just before serving. Store the base covered at room temperature for up to 2 days.
What if my ganache is too thick?
Warm it gently in 5-second microwave bursts, stirring between each. Add a splash of cream if needed. Avoid overheating or it may separate.
Can I use large marshmallows instead?
Yes, but cut them into quarters for even toasting and better distribution. They may take 1-2 minutes longer to melt in the oven.
How do I prevent the cake from sticking?
Grease the pan well and line it with parchment paper. Let the cake cool 10 minutes before attempting to remove it for clean slices.

Trained in classic French technique but raised on slow-cooked ribs and spicy rubs, she blends culinary skill with smoke and soul.
- Recipe for Boneless Pork Chops in Cast Iron Skillet: Sear and Baste to Juicy Perfection - October 3, 2026
- Recipe for Boneless Cross Rib Roast: Slow-Roasted Beef with Herb Crust - October 3, 2026
- Hamburgers in Sauce Recipe Crock Pot: Slow-Cooked Savory Delight - October 3, 2026