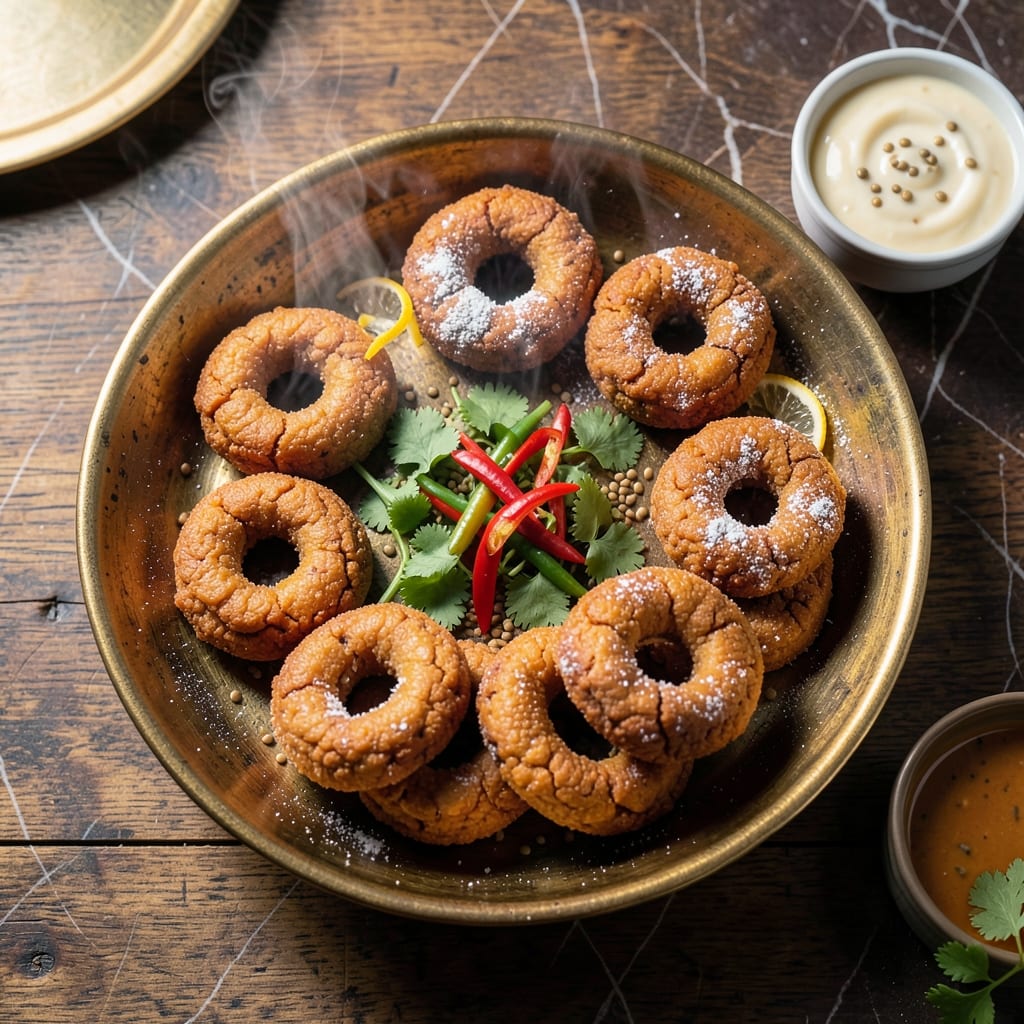
This rice flour version of medu vada delivers the same crispy texture and satisfying crunch as the traditional South Indian donut, but without the need for urad dal. I developed this method to make the dish more accessible while keeping its authentic character.
The secret lies in the proper ratio of rice flour to other ingredients and the frying technique that ensures a golden exterior. These donuts maintain their shape beautifully while achieving that signature light, airy interior that makes medu vada so beloved.
You’ll achieve restaurant-quality results with ingredients you likely already have in your pantry. The process is straightforward yet precise, with each step building toward that perfect crispy finish.
Serve these warm with coconut chutney or sambar for the complete experience. This approach makes South Indian flavors achievable in any home kitchen.
Ingredients for Medu Vada Recipe with Rice Flour
These pantry staples come together to create crispy, authentic South Indian donuts at home.
| Ingredient | Amount | Notes |
|---|---|---|
| Rice Flour 🌾 | 2 cups | Fine, white variety preferred |
| Chana Dal 🥜 | ½ cup | Soaked for 4 hours |
| Fresh Ginger 🌿 | 1 tbsp | Finely grated or minced |
| Green Chili Peppers 🌶️ | 2 pieces | Finely chopped, seeds removed |
| Fresh Cilantro 🌿 | ¼ cup | Finely chopped, stems removed |
| Cumin Seeds 🌿 | 1 tsp | Whole, for tempering |
| Mustard Seeds 🌿 | 1 tsp | Black or yellow variety |
| Asafoetida 🌿 | ¼ tsp | Hing, for authentic flavor |
| Curry Leaves 🍃 | 8 pieces | Fresh or dried, optional |
| Salt 🧂 | 1 tsp | Adjust to taste |
| Water 💧 | ½ cup | As needed for batter consistency |
| Vegetable Oil 🫒 | 4 cups | For deep frying |
| Baking Soda 🧂 | ½ tsp | For light, airy texture |
[recipe_ingredient_scaler]
Rice flour is the foundation here—fine, white rice flour yields the crispest exterior. Indian grocery stores often carry the best quality, but Bob’s Red Mill available at most supermarkets works well. Chana dal adds structure and authenticity; soak it for at least 4 hours (or overnight) for optimal texture. The ginger and green chilies should be fresh for the brightest flavor.
No chana dal? Split yellow peas or split mung beans work as substitutes. If asafoetida isn’t available, skip it—a pinch of garlic powder can add depth but won’t replicate the authentic flavor. Fresh curry leaves are ideal, but dried work in a pinch (soak them in warm water first). For heat control, adjust green chilies to preference or substitute with serrano peppers.
Store rice flour in an airtight container in a cool, dry place for up to 3 months. Soaked chana dal keeps refrigerated for 24 hours—drain and rinse before using. The batter is best used immediately, but can rest in the fridge for up to 2 hours before frying.
Why You’ll Love This Recipe
- No Soaking Needed: I skip the overnight soak entirely—rice flour and chana dal blend into the batter in minutes.
- Crispy, Spicy Bites: Fresh ginger and green chilies give that zing, while the rice flour makes them extra crunchy.
- Breakfast or Snack: Equally good with morning coffee or as an evening tea-time treat.
- Budget Stretcher: A cup of chana dal and pantry rice flour make a big batch that lasts for days.
Step-by-Step Instructions for Medu Vada With Rice Flour
Master the technique for achieving perfectly crispy, golden vadas using this alternative method.
Step 1: Soak and Prepare the Base Ingredients
Begin by draining the 0.5 cup Chana Dal after its 4-hour soak. I find this step crucial for achieving the right texture, as properly soaked dal blends smoothly with the 2 cups Rice Flour to create an authentic batter consistency.
Transfer the drained dal to a food processor along with the 1 tbsp Fresh Ginger, 2 pieces Green Chili Peppers, and 0.25 cup Fresh Cilantro. Pulse until you achieve a coarse paste—this should take about 30-45 seconds. The mixture should retain some texture rather than becoming completely smooth.
Step 2: Create the Batter with Proper Consistency
In a large mixing bowl, combine the dal paste with the 2 cups Rice Flour, 1 tsp Salt, and 0.5 tsp Baking Soda. The baking soda is essential here—it creates those characteristic air pockets that make vadas light and crispy.
Gradually add the 0.5 cup Water, mixing with your hands or a wooden spoon until you achieve a thick, dough-like consistency. The batter should be firm enough to shape into balls but not so dry that it cracks. I always test by forming a small ball—it should hold its shape without sticking to my fingers.
Step 3: Temper the Spices for Maximum Flavor
Heat 1 tablespoon of the 4 cups Vegetable Oil in a small pan over medium heat. Add the 1 tsp Mustard Seeds and allow them to pop, which should take about 30 seconds. Immediately add the 1 tsp Cumin Seeds, 0.25 tsp Asafoetida, and 8 pieces Curry Leaves.
Sauté for 20-30 seconds until the cumin seeds turn light golden and the curry leaves become crisp. Pour this tempering mixture into the batter and mix thoroughly. This step infuses the vadas with aromatic depth that’s characteristic of authentic South Indian flavors.
Step 4: Shape and Fry to Crispy Perfection
Heat the remaining vegetable oil in a deep, heavy-bottomed pan to 350-375°F. While the oil heats, shape the batter into small, flattened donuts with a hole in the center—traditional medu vada shape. I use slightly wet hands to prevent sticking and create smooth surfaces.
Fry the vadas in batches, being careful not to overcrowd the pan. They should sizzle immediately upon entering the oil. Fry for 3-4 minutes per side until they develop a deep golden brown color and crispy exterior. The vadas will float to the surface when properly cooked through.
Use a slotted spoon to transfer the fried vadas to a paper towel-lined plate to drain excess oil. The ideal vada will have a crispy exterior that gives way to a light, airy interior with visible air pockets from the baking soda.
Pro Tips For Making Medu Vada Recipe With Rice Flour
- Soak the dal overnight: I learned this the hard way—dry chana dal takes forever to grind smooth, but 6-8 hours in water makes it blend effortlessly with the rice flour.
- Use hot oil: Drop a pinch of batter in first; if it sizzles and rises immediately, the oil’s ready—this guarantees crispy vadas that don’t absorb grease.
- Grate the ginger fine: Sounds weird, but it works: minced ginger can leave fibrous bits, while freshly grated ginger melts into the batter for even flavor.
- Skip cold batter: After burning three batches, I finally figured out that room-temperature batter fries more evenly—cold batter sinks and turns greasy.
Regional Styles of medu vada recipe with rice flour
Tamil Nadu Style
In Tamil Nadu, this dish often incorporates finely chopped curry leaves and a touch of asafoetida into the batter for extra aroma. I love how the 1 tsp cumin seeds and 1 tsp mustard seeds are tempered in hot oil before mixing, a technique that elevates the flavor profile significantly. 🌿
Karnataka Approach
Karnataka versions sometimes use toor dal instead of chana dal, creating a slightly denser texture. The 2 cups rice flour is often mixed with a bit of semolina for added crunch. I find the batter consistency needs to be slightly thicker to maintain shape during frying.
Andhra Tradition
Andhra cooks often add extra green chili peppers (up to 4 pieces) for heat, and sometimes include sesame seeds in the tempering. The 0.5 tsp baking soda remains crucial for that airy interior. I appreciate how this version packs a spicier punch while keeping the crispy exterior.
Kerala Variation
Kerala style often includes grated coconut in the batter, adding subtle sweetness. The 2 cups rice flour base gets complemented by the coconut’s natural oils. I’ve noticed this version has a slightly chewier texture that’s absolutely delightful. ✨
Maharashtra Twist
In Maharashtra, they sometimes make smaller, bite-sized versions called vada pav style. The 1 tbsp fresh ginger and 0.25 cup cilantro are finely minced to create a more uniform texture. I love serving these as appetizers with mint chutney.
Hyderabad Influence
Hyderabadi cooks often add a pinch of turmeric for color and use ghee in the tempering. The 4 cups vegetable oil for frying remains essential, but the ghee adds a rich depth. This version has a beautiful golden hue that’s hard to resist. 💛
Nutrition Facts
Frequently Asked Questions
Can I make medu vada without soaking chana dal?
Soaking is essential for proper texture, but in a pinch, use 1 hour of hot water soaking. The vadas may be slightly denser but still crispy.
Why did my vadas absorb too much oil?
The oil wasn’t hot enough. Maintain 350-375°F and fry in small batches. Overcrowding lowers the temperature and causes oil absorption.
How can I make them extra crispy?
Add 2 tablespoons of cornstarch to the batter and ensure the oil is at the correct temperature. The hole in the center helps even cooking.
Can I bake instead of frying?
Baking won’t achieve the same crisp texture, but for a lighter version, brush with oil and bake at 400°F for 20-25 minutes, flipping halfway.

Trained in classic French technique but raised on slow-cooked ribs and spicy rubs, she blends culinary skill with smoke and soul.
- Recipe for Boneless Pork Chops in Cast Iron Skillet: Sear and Baste to Juicy Perfection - October 3, 2026
- Recipe for Boneless Cross Rib Roast: Slow-Roasted Beef with Herb Crust - October 3, 2026
- Hamburgers in Sauce Recipe Crock Pot: Slow-Cooked Savory Delight - October 3, 2026