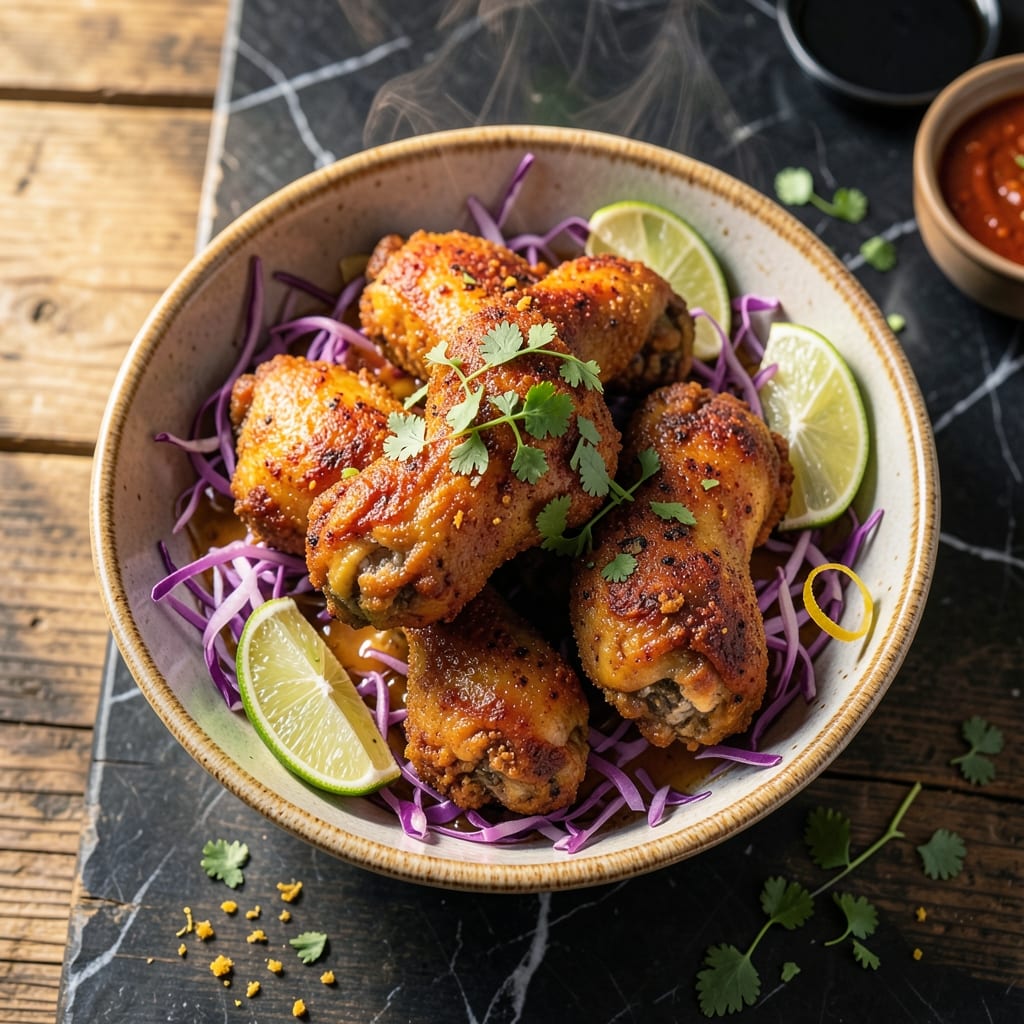
This recipe transforms ordinary fried chicken into a Mexican-inspired masterpiece with a crispy, spiced crust and bright lime finish.
I developed this method after years of perfecting Southern fried chicken, adapting traditional techniques with bold Mexican flavors. The secret lies in a two-step seasoning process that ensures every bite is packed with taste.
The result is perfect golden-brown chicken with a shatteringly crisp exterior and juicy, flavorful meat inside. The lime zest in the coating adds that signature zing that sets this dish apart.
Serve with cool avocado crema and pickled red onions to balance the heat. This is fried chicken elevated to new heights.
Ingredients for Mexican Fried Chicken
Crispy skin, bold spices, and bright lime create this elevated fried chicken experience.
| Ingredient | Amount | Notes |
|---|---|---|
| Chicken Thighs 🍗 | 2 ½ lb | Boneless, skin-on preferred |
| All-Purpose Flour 🌾 | 2 cups | For crispy coating |
| Cornstarch 🌽 | ½ cup | Ensures extra crunch |
| Chili Powder 🌶️ | 2 tbsp | Adjust for heat preference |
| Ground Cumin 🌿 | 1 tbsp | Toasted for depth |
| Smoked Paprika 🌶️ | 1 tbsp | Adds signature smokiness |
| Garlic Powder 🧄 | 1 tbsp | Not garlic salt |
| Onion Powder 🧅 | 1 tbsp | For savory base |
| Lime Zest 🍋 | 2 tbsp | Finely grated fresh |
| Lime Juice 🍋 | 3 tbsp | Freshly squeezed |
| Kosher Salt 🧂 | 1 ½ tbsp | Diamond Crystal preferred |
| Black Pepper 🌶️ | 1 tsp | Freshly ground |
| Cayenne Pepper 🔥 | ½ tsp | Optional for extra heat |
| Vegetable Oil 🫒 | 4 cups | For deep frying |
| Large Eggs 🥚 | 2 whole | For egg wash binding |
[recipe_ingredient_scaler]
The chicken thighs are non-negotiable for optimal juiciness and flavor. Bone-in, skin-on varieties work too if you prefer more traditional texture. For the spices, Penzeys or bulk bins at Whole Foods offer superior freshness. The lime zest must be freshly grated—bottled simply won’t deliver that vibrant citrus punch that defines this dish.
No chili powder? Combine equal parts cumin and paprika for a milder alternative. Swap cornstarch with arrowroot powder if needed. Fresh lime juice can be substituted with bottled in a pinch, but reduce by half to avoid bitterness. For extra crunch, add crushed tortilla chips to the flour mixture.
Fry in batches to maintain oil temperature—350°F is ideal. Store leftovers in an airtight container for up to 3 days, though best served fresh. Reheat in the oven at 375°F for 10-12 minutes to restore crispiness.
Why You’ll Love This Recipe
- One Pot Wonder: I just toss the thighs in flour, cornstarch, and those warm spices—no fancy prep, no mess.
- Smoky Crisp: The chili powder and cumin give it this deep, earthy kick that makes every bite irresistible.
- Feeds the Crew: Perfect for weeknight dinners or game day—everyone dives in without hesitation.
- Budget Stretcher: Chicken thighs stay juicy and cheap, so I can make a big batch without breaking the bank.
Step-by-Step Instructions for Mexican Fried Chicken
Master this technique for restaurant-quality results with a crisp, flavorful coating every time.
Step 1: Prepare and Season the Chicken Thighs
Begin by patting the 2.5 lb Chicken Thighs completely dry with paper towels. This critical step ensures the coating adheres properly and creates maximum crispiness. I always use skin-on thighs for this dish—they stay juicier during frying.
In a large bowl, whisk together the 2 cups All-Purpose Flour, 0.5 cup Cornstarch, 2 tbsp Chili Powder, 1 tbsp Ground Cumin, 1 tbsp Smoked Paprika, 1 tbsp Garlic Powder, 1 tbsp Onion Powder, 1.5 tbsp Kosher Salt, 1 tsp Black Pepper, and 0.5 tsp Cayenne Pepper. The lime zest will be added separately for optimal flavor impact.
Step 2: Create the Egg Wash and Coat the Chicken
In a separate shallow bowl, beat the 2 whole Large Eggs with the 3 tbsp Lime Juice until fully combined. This acidic egg wash not only helps the coating stick but adds a subtle tang that complements the spices.
Dredge each thigh in the egg wash, letting excess drip off, then coat thoroughly in the flour mixture. Press firmly to ensure the coating adheres completely. For extra crunch, I repeat the dredging process once more. Place coated thighs on a wire rack to rest for 10 minutes—this helps the coating set before frying.
Step 3: Heat the Oil and Fry to Golden Perfection
In a large, heavy-bottomed pot or Dutch oven, heat the 4 cups Vegetable Oil to 350°F. Use a deep-fry thermometer for accuracy; the temperature must remain steady for even cooking. The oil is ready when a pinch of flour sizzles immediately when sprinkled in.
Carefully lower 2-3 thighs into the hot oil at a time, avoiding overcrowding. Fry for 12-15 minutes, turning occasionally, until the coating is deep golden brown and the internal temperature reaches 165°F. The cornstarch in the coating will create an exceptionally crisp texture.
Step 4: Finish with Lime Zest and Rest Before Serving
As soon as the chicken comes out of the oil, sprinkle it generously with the 2 tbsp Lime Zest. The heat from the fried chicken will release the citrus oils, infusing each piece with bright, fresh flavor that cuts through the richness.
Transfer to a wire rack set over a baking sheet to drain. Let the chicken rest for 5 minutes before serving—this allows the juices to redistribute and the coating to reach its maximum crispness. Serve immediately while hot for the best texture.
Pro Tips For Making Mexican Fried Chicken
- Double Dredge: Coat the chicken thighs first in flour, then dip in a cornstarch slurry before the final spiced flour dredge—I learned this the hard way after my first batch had barely any crust clinging to it.
- Heat the Oil: Get that oil to 350°F before adding the chicken, and keep it steady; after burning three batches in lukewarm oil, I finally figured out why the outside stayed pale and greasy.
- Pat Dry First: Blot the chicken thighs with paper towels until bone-dry before dredging—sounds tedious, but it’s the only way to get that shatter-crisp coating instead of a soggy mess.
- Rest Before Serving: Give the fried chicken a solid 5 minutes on a rack after frying; my grandmother swore by this, and she was right—it keeps the crust crisp and lets the juices settle.
Essential Equipment for Great mexican fried chicken
Deep Fry Setup
You’ll need a heavy-bottomed Dutch oven or cast iron pot—I swear by my vintage Lodge for even heat distribution. A deep-fry thermometer is non-negotiable for maintaining that perfect 350°F oil temp. Trust me, guessing leads to soggy or burnt coating.
Dredging Station
Set up two shallow bowls for the egg wash and flour mixture. I use stainless steel mixing bowls from my collection—they’re durable and easy to clean. A wire rack over a baking sheet is essential for resting coated thighs before frying.
Oil Management
For 4 cups vegetable oil, a 5-6 quart pot gives you enough depth without risking overflow. I keep a slotted metal spoon or spider strainer nearby for safe removal. Never fill beyond halfway—hot oil expands when food is added.
Coating Tools
A whisk ensures your flour and spices blend evenly without clumps. I also keep a pastry brush handy to coat tricky spots on the chicken. For extra crispiness, I sometimes use a zip-top bag to shake the chicken in the flour mixture. 💡
Safety Essentials
Long heat-resistant gloves protect your hands from oil splatters. A splatter screen is a game-changer for containing messes. I always keep a fire extinguisher rated for grease fires in my kitchen—better safe than sorry.
Serving Prep
Have a second wire rack ready for draining fried chicken. Paper towels underneath catch any stray oil. I also set out tongs for serving and a small bowl with extra lime zest for final garnishing. 🍋
Nutrition Facts
Frequently Asked Questions
Can I use chicken breasts instead of thighs?
Thighs are ideal for juiciness, but breasts work if pounded to even 1/2-inch thickness. Reduce frying time to 8-10 minutes to prevent dryness. Always check internal temp reaches 165°F.
What’s the best oil for frying?
Vegetable or peanut oil are best for their high smoke points (400°F+). Avoid olive oil—it burns at frying temps. For extra flavor, try 1 cup lard mixed with 3 cups vegetable oil.
How do I keep the coating crispy?
Rest on a wire rack, never paper towels. Reheat in a 400°F oven for 5-8 minutes if serving later. Skip microwaving—it’ll turn soggy. Maintain oil at 350°F during frying.
Can I make this gluten-free?
Swap all-purpose flour for 1:1 gluten-free blend plus 1/4 cup extra cornstarch. Check all spice blends for additives. The texture will be slightly different but still crispy.

Trained in classic French technique but raised on slow-cooked ribs and spicy rubs, she blends culinary skill with smoke and soul.
- Recipe for Boneless Pork Chops in Cast Iron Skillet: Sear and Baste to Juicy Perfection - October 3, 2026
- Recipe for Boneless Cross Rib Roast: Slow-Roasted Beef with Herb Crust - October 3, 2026
- Hamburgers in Sauce Recipe Crock Pot: Slow-Cooked Savory Delight - October 3, 2026