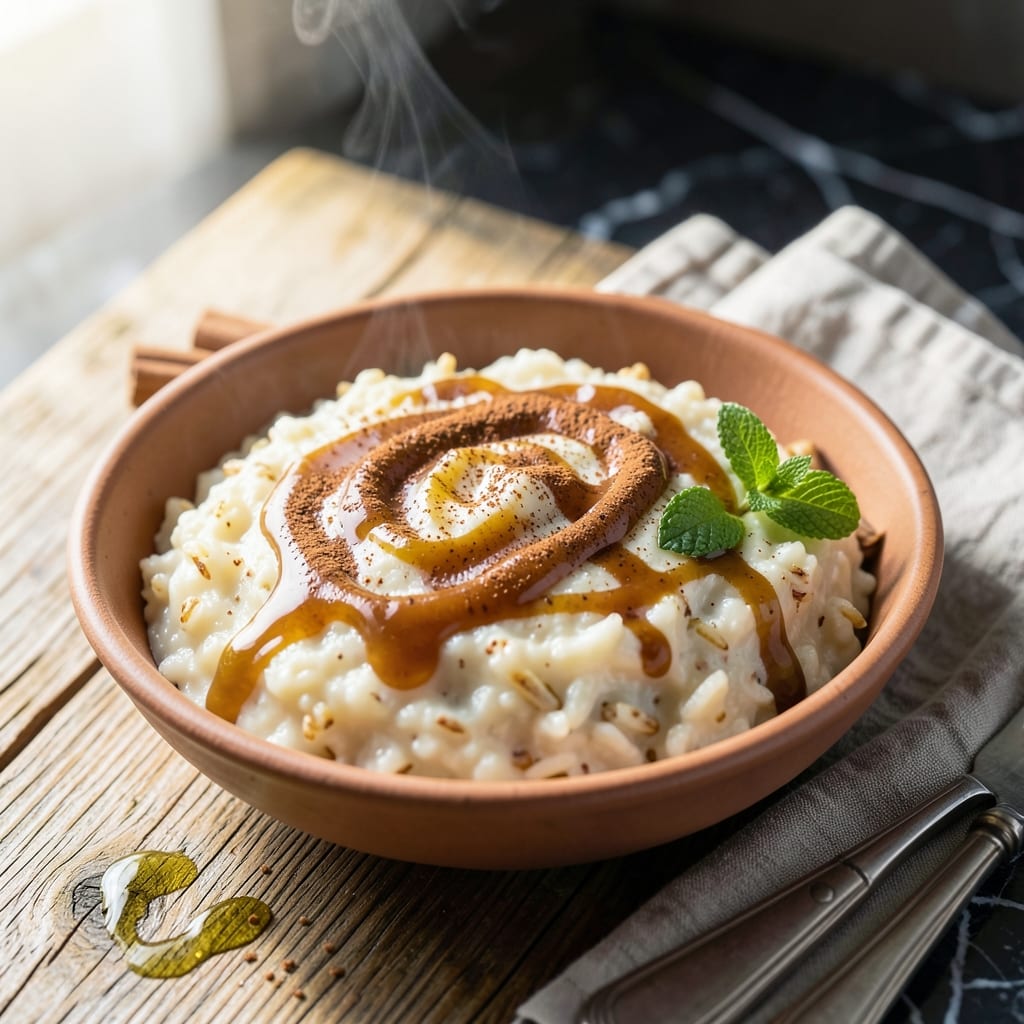
This Mexican rice pudding brings the warmth of traditional flavors to your table with a modern twist. The condensed milk creates an unmatched creamy texture that’s rich without being heavy.
I’ve adapted this recipe over years of testing, balancing the cinnamon’s warmth with the milk’s natural sweetness. The rice absorbs every bit of flavor, turning simple ingredients into something extraordinary.
The slow simmer is key—it coaxes the grains into perfect tenderness while the mixture thickens to a velvety consistency. Every spoonful delivers comforting, spiced sweetness.
Serve it warm or chilled, and watch it disappear. This is tradition made effortless.
Ingredients for Mexican Rice Pudding Recipe with Condensed Milk
Traditional Mexican flavors meet modern convenience in this creamy, spiced pudding.
| Ingredient | Amount | Notes |
|---|---|---|
| Long-Grain White Rice 🍚 | 1 cup | Rinsed until water runs clear |
| Whole Milk 🥛 | 4 cups | Full-fat for creaminess |
| Sweetened Condensed Milk 🥛 | 1 can | 14 oz can, standard size |
| Ground Cinnamon 🌿 | 2 tsp | Ceylon or cassia variety |
| Vanilla Extract 🌿 | 1 tsp | Pure extract preferred |
| Granulated Sugar 🍚 | ½ cup | Adjust to taste preference |
| Unsalted Butter 🧈 | 2 tbsp | For toasting rice grains |
| Water 💧 | 1 cup | For initial rice cooking |
| Raisins 🍇 | ½ cup | Optional, plumped in warm water |
| Lime Zest 🍈 | 1 tsp | Freshly grated for brightness |
| Salt 🧂 | ¼ tsp | Balances sweetness |
[recipe_ingredient_scaler]
The rice selection is critical here. Long-grain white rice provides the ideal texture—short-grain varieties can turn gummy. Jasmine or basmati are excellent choices, available at any supermarket. For the condensed milk, Nestlé or store brands work equally well; just ensure it’s the sweetened variety. The cinnamon should be fresh (check the aroma when opening the jar).
No condensed milk? Evaporated milk plus 1/3 cup sugar can substitute, though texture varies. Ground cinnamon at double the amount if using sticks. For a dairy-free version, coconut milk and coconut condensed milk work surprisingly well. Raisins can be swapped for chopped dates or omitted entirely. The vanilla extract is non-negotiable—imitation vanilla lacks depth.
This pudding thickens as it cools. Store covered in the refrigerator for up to 5 days. For best texture, press plastic wrap directly on the surface to prevent a skin from forming. Reheat gently on the stove with a splash of milk. Also freezes beautifully for up to 3 months.
Why You’ll Love This Recipe
- One Pot Wonder: Honestly, it’s just rice, milk, and condensed milk simmered together—no fancy techniques, no stress.
- Cinnamon Vanilla Magic: That warm cinnamon swirling through the creamy vanilla-infused pudding? It’s the hug your dessert menu needed.
- Crowd Pleaser: I’ve served this at potlucks and weeknight dinners alike, and it disappears every time.
- Budget Friendly: A bag of rice and a can of condensed milk stretch further than you’d think, and leftovers taste even better the next day.
Step-by-Step Instructions for Mexican Rice Pudding
This traditional method ensures a rich, velvety texture with balanced sweetness and warmth.
Step 1: Toast the Rice Grains
Heat a large, heavy-bottomed saucepan over medium heat. Add the 2 tbsp unsalted butter and let it melt until foamy. Stir in the 1 cup long-grain white rice and cook for 3-4 minutes, stirring constantly, until the grains turn light golden brown.
This toasting step enhances the nutty flavor of the rice and prevents it from becoming mushy during the long cooking process. You’ll notice the aroma deepen as the rice begins to color—this is your signal that it’s ready for the next step.
Step 2: Simmer Rice in Water and Milk Mixture
Carefully pour in the 1 cup water and 4 cups whole milk, stirring to release any browned bits from the bottom of the pan. Add the 0.5 cup granulated sugar, 0.25 tsp salt, and 1 tsp lime zest. Bring to a gentle boil over medium-high heat.
Reduce heat to low and simmer uncovered for 20-25 minutes, stirring frequently to prevent sticking. The mixture should thicken noticeably, and the rice grains will begin to soften. Watch for the edges to develop small bubbles and the surface to take on a slightly creamy appearance.
Step 3: Add Condensed Milk and Flavorings
Stir in the 1 can sweetened condensed milk, 2 tsp ground cinnamon, and 1 tsp vanilla extract. If using, add the 0.5 cup raisins at this point. Continue cooking over low heat for another 15-20 minutes, stirring every 2-3 minutes.
The pudding will thicken further and develop its characteristic creamy consistency. You’re aiming for a texture where the spoon leaves a distinct trail when drawn through the mixture. Be patient—this slow cooking is what develops the rich, custard-like quality.
Step 4: Finish and Cool to Desired Consistency
Remove from heat when the pudding reaches your preferred thickness. Remember it will continue to thicken as it cools. For a traditional Mexican rice pudding, I recommend a consistency that’s thick but still pourable when warm.
Let it cool for 10-15 minutes at room temperature, then transfer to serving bowls. The pudding will set further as it chills in the refrigerator. Serve warm or cold, with an extra sprinkle of ground cinnamon on top for added warmth and aroma.
Pro Tips For Making Mexican Rice Pudding Recipe With Condensed Milk
- Pre-toast the rice: Cook the rice in a dry pan for 3-4 minutes until golden before adding liquids—I learned this the hard way after my first few batches turned out gummy instead of creamy.
- Use cold milk: Start with cold whole milk and let it warm gradually with the rice to prevent the condensed milk from curdling or splitting.
- Stir every 5 minutes: Resist the urge to walk away; stir the pudding every 5 minutes during the last 20 minutes to keep it from sticking and to help the cinnamon distribute evenly.
- Add vanilla last: Stir in the vanilla extract only after removing from heat, so the alcohol doesn’t evaporate and the flavor stays bright and present.
Pro Cooking Tips for Perfect Results
Perfect Rice Texture
Toasting the 1 cup long-grain white rice in 2 tbsp unsalted butter for 3-4 minutes until golden is non-negotiable—it builds a nutty depth that defines this dish. I always use a heavy-bottomed pot to prevent hot spots. 🔥
Low and Slow Simmer
After adding 4 cups whole milk and 1 cup water, keep the heat at a gentle simmer. Anything higher risks scorching the milk. Stir every 2-3 minutes during the 20-25 minute initial cook to catch any sticking early.
Condensed Milk Timing
Add the 1 can sweetened condensed milk only after the rice is partially tender. This prevents curdling. The 15-20 minute final cook with condensed milk is where the magic happens—the pudding transforms from thin to luxurious.
Doneness Test
Your pudding is ready when a spoon leaves a clean trail that slowly fills in. If it’s too thin, cook 5 more minutes off heat—the residual warmth will thicken it. I learned this trick from my Nonna’s kitchen.
Cooling Technique
Let it rest 10-15 minutes before serving. This lets the flavors meld. For the creamiest texture, press plastic wrap directly on the surface to prevent a skin from forming during chilling.
Stirring Strategy
Use a wooden spoon—it won’t scratch your pot and distributes heat gently. Scrape the bottom frequently to prevent scorching, especially once the condensed milk is added. Patience here pays off in spades. ✨
Nutrition Facts
Frequently Asked Questions
Can I use short-grain rice instead?
I don’t recommend it. Short-grain rice can turn gummy during the long simmer. Stick with long-grain white rice for the best texture. Jasmine or basmati work perfectly.
Why toast the rice first?
Toasting enhances the nutty flavor and prevents mushiness. Cook the 1 cup rice in 2 tbsp butter for 3-4 minutes until golden before adding liquids. This step is non-negotiable for depth of flavor.
How do I prevent scorching?
Use a heavy-bottomed pot and maintain a gentle simmer. Stir every 2-3 minutes once the 4 cups milk is added. A wooden spoon helps distribute heat evenly and prevents sticking.
Can I make this ahead of time?
The pudding keeps well covered in the refrigerator for up to 5 days. For the creamiest texture, press plastic wrap directly on the surface to prevent a skin from forming.

Trained in classic French technique but raised on slow-cooked ribs and spicy rubs, she blends culinary skill with smoke and soul.
- Recipe for Boneless Pork Chops in Cast Iron Skillet: Sear and Baste to Juicy Perfection - October 3, 2026
- Recipe for Boneless Cross Rib Roast: Slow-Roasted Beef with Herb Crust - October 3, 2026
- Hamburgers in Sauce Recipe Crock Pot: Slow-Cooked Savory Delight - October 3, 2026