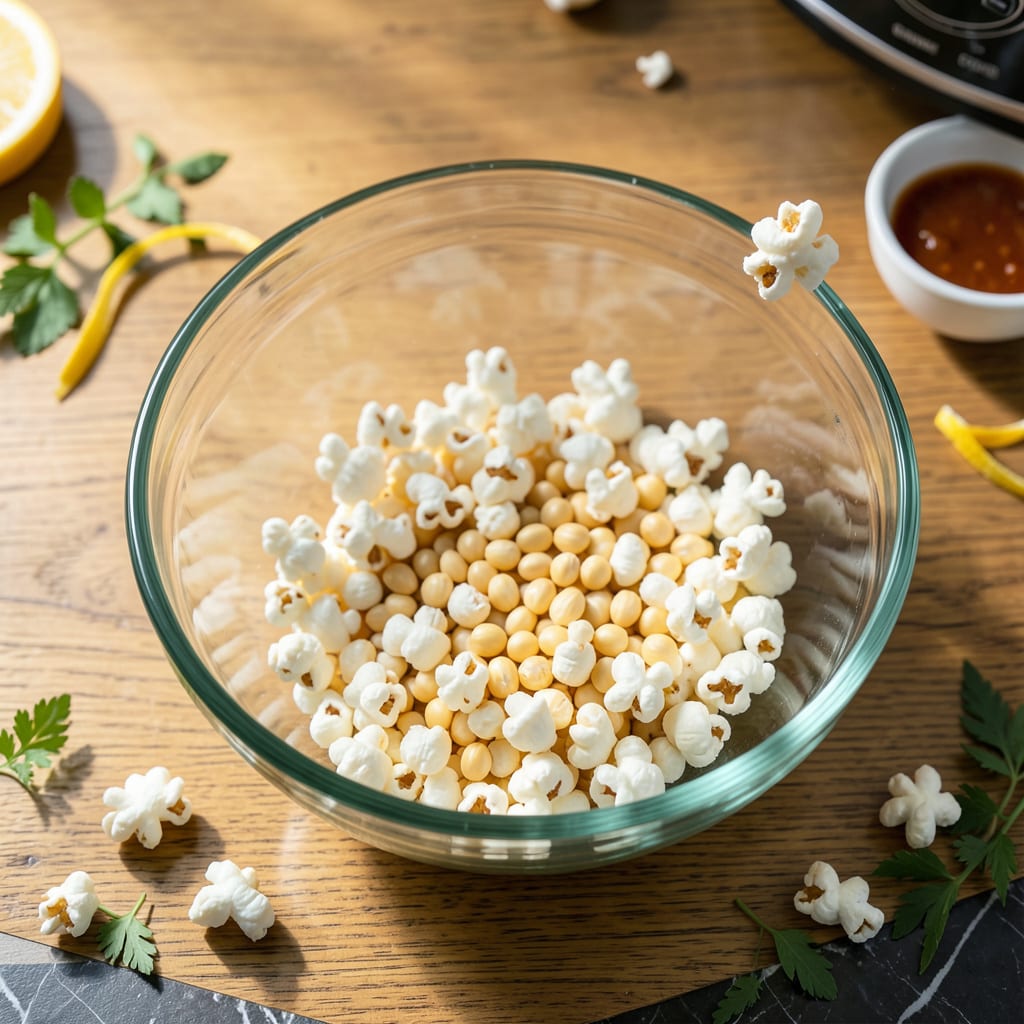
I’ll be real with you: microwave popcorn doesn’t have to mean sad, soggy kernels or that weird chemical aftertaste from store-bought bags. After burning through more batches than I’d like to admit (and nearly setting off my smoke alarm twice), I cracked the code for perfectly crispy popcorn that pops right in your microwave—no special equipment needed.
Here’s the thing—most people overcomplicate it. You don’t need a fancy popcorn maker or even a stovetop. A simple microwave-safe bowl, the right kernel-to-oil ratio, and one crucial timing trick (I’ll share in the instructions) are all it takes. The result? Light, airy popcorn with that satisfying crunch in every bite, ready in just 3 minutes.
The best part? This method gives you total control over flavor. Want classic buttery saltiness? Done. Craving something sweet with cinnamon sugar? Easy. I’ve even tested spicy chili-lime and nutritional yeast versions that’ll make you forget about those pre-packaged bags forever. No more unpopped kernels or burnt bits—just crispy, golden popcorn exactly how you like it.
Whether you’re snacking solo during movie night or feeding a crowd, this technique scales perfectly. And yes, I’ve tested it in three different microwaves—it works every time. Let’s get popping the right way.
📚 In This Guide
- What You’ll Need
- Instructions
- Tips and Common Mistakes
What Youll Need
- ● Microwave-safe bowl or popcorn popper (3–4 quart capacity, with a vented lid or loose cover)
- ● Popcorn kernels (¼ to ½ cup per batch—adjust based on bowl size)
- ○ Cooking oil or butter (1–2 tbsp; optional for extra flavor—avocado, coconut, or vegetable oil work great!)
- ○ Salt (to taste; optional but highly recommended!)
- ○ Seasonings (optional—think garlic powder, nutritional yeast, or cinnamon sugar for sweet popcorn!)
- ● Measuring cups/spoons (for precise kernel-to-oil ratios)
- ● Microwave-safe plate or paper towel (to cover the bowl if no lid is available)
- ● Oven mitts (the bowl gets hot!)
- ○ Large serving bowl (optional, for easy sharing)
Instructions
Here’s how to make perfectly crispy microwave popcorn—simple steps, foolproof results.
Prepare Your Microwave and Bowl
Choose a large microwave-safe bowl with high sides—at least 3-4 quarts in capacity. The size matters because popcorn expands dramatically as it pops. I like using glass bowls because they don’t absorb odors and you can watch the popping action.
Place the bowl in your microwave and remove the turntable if possible. This creates more even heat distribution. If your microwave doesn’t have a removable turntable, just make sure the bowl sits centered. Wipe the inside of the microwave clean—any food residue can burn and create unpleasant smells during popping.
Measure and Add the Popcorn Kernels
Add ½ cup of popcorn kernels to your prepared bowl. This amount works perfectly for most standard microwaves and yields about 4 servings of popped corn. Don’t be tempted to add more—overcrowding leads to uneven popping and more unpopped kernels.
Spread the kernels in an even layer across the bottom of the bowl. You want them in a single layer as much as possible, not stacked on top of each other. This ensures each kernel gets equal exposure to the microwave’s heat waves, which means more kernels will pop at the same time and fewer will burn.
Cover and Microwave on High
Cover the bowl with a microwave-safe plate that’s slightly larger than the bowl’s opening. This creates a seal that traps steam, which helps the kernels pop more efficiently. Don’t use plastic wrap—it can melt from the heat and doesn’t allow proper steam circulation.
Microwave on high power for 3-5 minutes, listening carefully. You’ll hear the popping start within 1-2 minutes. When the pops slow to about 2-3 seconds between pops, it’s time to stop. Most microwaves take about 3 minutes total, but timing varies based on wattage. Stop immediately when the popping slows—this prevents burning.
Vent and Check for Doneness
Carefully remove the bowl from the microwave using oven mitts—it will be extremely hot from the steam. Lift one edge of the plate to allow steam to escape (be careful of the hot rush of air). This venting prevents soggy popcorn from condensation building up under the cover.
Listen for any remaining kernels that might pop as the bowl cools. If you hear more than 2-3 pops after removing from the microwave, you can return it for 10-15 second intervals until the popping completely stops. The perfect batch will have fewer than 10 unpopped kernels remaining in the bottom of the bowl.
Season While Hot
Immediately after popping, while the popcorn is still hot, drizzle lightly with melted butter if desired. The heat helps the butter distribute evenly. Use about 1-2 tablespoons for this amount of popcorn—just enough for flavor without making it soggy.
Sprinkle with your seasoning of choice while tossing gently. I recommend starting with ½ teaspoon of salt and adjusting to taste. For sweet versions, try 1 tablespoon of powdered sugar or cinnamon sugar. Toss well to coat evenly, then serve immediately while still warm and crispy. The popcorn will stay fresher longer if stored in an airtight container once completely cooled.
Tips and Common Mistakes
Making perfect microwave popcorn is all about the details—here’s what I’ve learned from years of testing.
Bowl Selection Matters: In Step 1, using a glass bowl that’s at least 3-4 quarts makes a huge difference. I tried smaller bowls early on and ended up with half the kernels unpopped because they didn’t have room to expand. The glass also lets you watch the popping action, so you can stop at exactly the right moment during those 3-5 minutes of microwaving.
Kernel Arrangement: When you add that ½ cup of kernels in Step 2, take a moment to spread them into a single layer. I used to just dump them in, but stacking causes uneven popping. You’ll get more popped kernels and fewer burnt ones when each kernel has direct contact with the bowl’s surface, giving them equal exposure to the microwave’s heat waves.
Listening is Key: During the 3-5 minutes of microwaving in Step 3, your ears are your best tool. When the pops slow to 2-3 seconds apart, stop immediately—even if it’s before 3 minutes. I burned several batches early on by waiting for complete silence. That brief pause between pops is your signal that most kernels have popped, and continuing risks burning the ones that are done.
Steam Management: In Step 4, venting the bowl properly prevents soggy popcorn. I learned this the hard way after making mushy batches. Lift just one edge of the plate to let steam escape gradually rather than removing it all at once. This controlled release keeps your popcorn crispy while still allowing any last kernels to pop safely.
Pro Tips for Micro Popcorn Instructions
- Making perfect microwave popcorn is all about the details—here’s what I’ve learned from years of testing.
- Bowl Selection Matters: In Step 1, using a glass bowl that’s at least 3-4 quarts makes a huge difference. I tried sma…
- Kernel Arrangement: When you add that ½ cup of kernels in Step 2, take a moment to spread them into a single layer. I…
Frequently Asked Questions
Got questions about microwaving popcorn? You’re not alone! Here are the most common queries—and quick answers—to help you pop like a pro.
How long should I microwave popcorn for optimal results?
Most microwave popcorn (pre-packaged or DIY) pops in 2–4 minutes. Listen for slowdowns in popping—stop when you hear 2–3 seconds between pops to avoid burning. Check your bag’s instructions, as wattage varies (higher wattage = faster popping!).
Can I make microwave popcorn without a special bag?
Absolutely! Use a microwave-safe bowl with a plate as a lid (leave a small gap for steam). Or fold kernels into a paper lunch bag—just staple the top loosely. Add 1–2 tbsp oil for even crispiness. No butter? Try coconut oil!
Why does my popcorn burn or stay unpopped?
Burning usually means too much time or uneven heat distribution. Stir kernels halfway if using a bowl. Unpopped kernels? Old kernels lose moisture—store them in an airtight container and replace if they’re over 6 months old.
Is microwave popcorn healthier than stovetop?
It depends! Pre-packaged bags often have added salt, butter, or preservatives. DIY microwave popcorn (kernels + light oil) cuts additives. For healthiest options, skip artificial flavors and use olive oil + herbs instead of butter.
Can I reuse unpopped kernels?
Yes, but only once. Reheat them in a fresh batch—unpopped kernels may just need more time or moisture. Pro tip: Soak stubborn kernels in water for 10 minutes, then pat dry before repropping. Never microwave the same bag twice!
With these easy micro popcorn instructions, you’re just minutes away from a crispy, golden snack that beats store-bought every time! 🍿 Whether you’re craving a movie-night treat or a quick bite, mastering microwave popcorn is all about the right technique—and now you’ve got it down.
Ready to pop? Grab your kernels, follow the steps, and experiment with flavors (think cheesy, spicy, or sweet!). For even more snack inspiration, check out our guide on gourmet popcorn toppings next!

Trained in classic French technique but raised on slow-cooked ribs and spicy rubs, she blends culinary skill with smoke and soul.
- Indian Lamb Curry Recipe Pressure Cooker: Fragrant Spices in a Fraction of the Time - October 3, 2026
- Recipe for Oven Roasted: Golden Crisp Perfection Without the Fryer - October 3, 2026
- Recipe for Fried Pork Chops With Flour: Crispy Crust and Juicy Centers - October 3, 2026