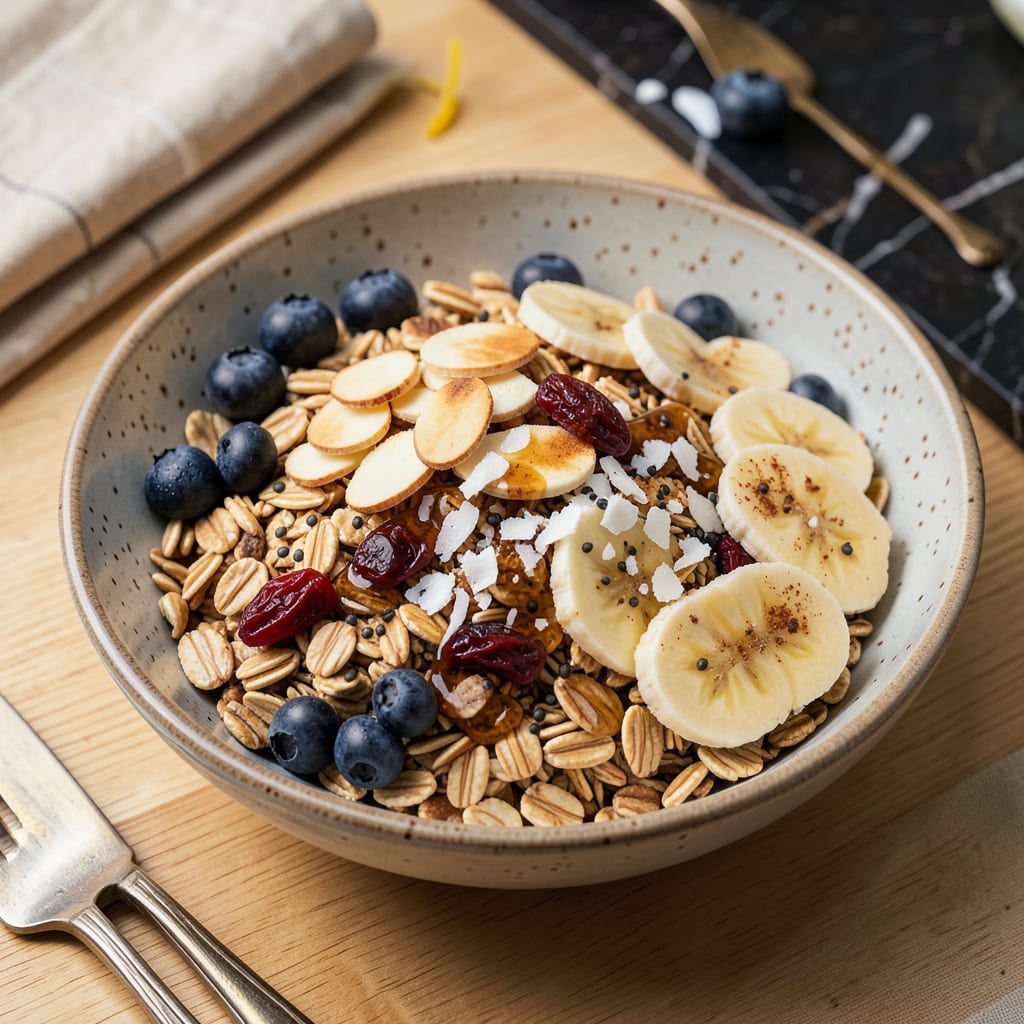
I’ll be real with you—muesli without milk was my breakfast game-changer when I needed something fast, filling, and dairy-free. No cooking required, just grab your favorite oats, nuts, and dried fruits, then let the toppings do the magic. The best part? It’s ready in 5 minutes flat while still packing serious crunch and flavor.
What makes this work is choosing the right liquid alternatives—almond milk, coconut yogurt, or even orange juice can transform plain oats into something special. I’ve tested them all, and each brings its own twist. The oats stay chewy, the nuts add protein, and the dried fruit gives natural sweetness without any added sugar.
You’ll end up with a bowl that’s creamy yet crunchy, sweet yet nutty, and completely customizable. Pile on fresh berries, drizzle with maple syrup, or sprinkle with coconut flakes—this is breakfast that actually keeps you full until lunch. And yes, it’s 100% plant-based without sacrificing satisfaction.
Perfect for busy mornings, meal prep, or when you want something healthier than cereal. Here’s how to make it your way—no milk required.
📚 In This Guide
- What You’ll Need
- Instructions
- Tips and Common Mistakes
What Youll Need
- ● Base muesli mix (2 cups per serving): 1½ cups rolled oats (gluten-free if needed 🌾)
- ● ¼ cup raw nuts (almonds, walnuts, or pecans—chopped or whole)
- ● 2 tbsp seeds (chia, flax, pumpkin, or sunflower)
- ● ¼ cup dried fruit (raisins, cranberries, or chopped apricots)
- ○ 1 tsp cinnamon (optional, for warmth ✨)
- ● Liquid alternatives (pick 1, ½ cup per serving): Dairy-free yogurt (coconut, almond, or soy)
- ● Fruit juice (orange or apple—unsweetened)
- ● Plant-based milk (oat, almond, or cashew—if avoiding dairy)
- ● Coconut water (for a light, tropical twist 🥥)
- ● Toppings (mix & match!): Fresh fruit (banana slices, berries, or mango chunks 🍓)
- ● 1 tbsp nut butter (peanut, almond, or cashew)
- ● 1 tsp honey or maple syrup (for sweetness)
- ● 1 tbsp shredded coconut or cacao nibs (for crunch)
- ● Tools: Medium mixing bowl
- ● Measuring cups/spoons
- ● Spoon or spatula for mixing
- ● Airtight container (for storing leftovers, up to 1 week)
Instructions
Here’s how to assemble the perfect no-milk muesli—quick, customizable, and packed with texture.
Select and Measure Your Base Ingredients
Begin by choosing your base grains. I recommend starting with 2 cups of rolled oats as the foundation—they provide the perfect balance of chewiness and structure. Add ½ cup of wheat bran for fiber and ¼ cup of chia seeds for omega-3s and thickening power.
This combination creates the ideal texture profile: the oats give body, the bran adds nuttiness, and the chia seeds develop a pleasant gel-like consistency when hydrated. Measure carefully—too much chia can make the mixture overly thick, while too little may leave it watery.
Add Your Preferred Sweetener and Flavorings
Stir in 2 tablespoons of honey or maple syrup for natural sweetness. I prefer honey for its floral notes, but maple syrup works beautifully for a vegan option. Add 1 teaspoon of cinnamon and ½ teaspoon of vanilla extract—these warm flavors complement the grains without overpowering them.
The key here is even distribution. Drizzle the sweetener over the dry ingredients while stirring continuously with a wooden spoon, breaking up any clumps that form. This ensures every bite has consistent flavor rather than pockets of intense sweetness.
Incorporate Your Liquid Components
Pour in 1 cup of apple juice or your preferred fruit juice. The acidity in apple juice helps soften the oats while adding natural sweetness. For creaminess without dairy, add ½ cup of coconut milk—the fat content creates a luxurious mouthfeel.
Stir vigorously for 2 minutes until the mixture reaches a uniform consistency. You’ll notice the chia seeds begin to swell almost immediately, and the oats will absorb liquid within 5 minutes. The ideal texture should resemble thick porridge—add a splash more juice if it seems too dry.
Customize with Toppings and Textures
Now for the fun part—adding your signature toppings. I recommend ½ cup of mixed nuts (toasted almonds and walnuts work beautifully) for crunch, ¼ cup of dried fruit (tart cherries or apricots balance the sweetness), and 1 tablespoon of pumpkin seeds for extra protein.
Layer these elements rather than mixing them in. This preserves textural contrast—you want that satisfying crunch with every spoonful. For freshness, add ½ cup of diced apple or pear just before serving to prevent browning. The fruit’s juiciness cuts through the density of the oats.
Rest and Serve for Optimal Flavor
Let the muesli rest for 10 minutes at room temperature. This brief waiting period allows the flavors to meld and the grains to fully hydrate. You’ll see the mixture thicken slightly as the chia seeds complete their gel formation.
Serve in bowls with an extra drizzle of honey and a sprinkle of toasted coconut flakes. The resting time makes all the difference—skipping it results in a grainy texture rather than the creamy-yet-chewy consistency that makes this dish special. Enjoy immediately for the best textural experience.
Tips and Common Mistakes
Let me share what I’ve learned from making this no-cook breakfast countless times—these details transform good muesli into something extraordinary.
Texture Secret: In Step 3, when you stir vigorously for those 2 minutes, you’re doing more than just mixing. The friction helps break down the oats slightly while activating the chia seeds’ gelling properties. I’ve found using a figure-eight motion with your spoon creates the most uniform consistency. The mixture should coat the back of a spoon but still drip slowly—this is your visual cue for perfect thickness.
Flavor Development: The 10-minute resting period in Step 5 isn’t just about hydration—it’s when the magic happens. As the chia seeds complete their gel formation, they release enzymes that help soften the oats while the cinnamon and vanilla flavors permeate every component. I always set a timer for exactly 10 minutes; going longer can make the texture overly dense, while less time results in a grainy mouthfeel.
Liquid Balance: When adding the 1 cup of apple juice and ½ cup of coconut milk in Step 3, here’s what nobody tells you—the temperature matters. Use room temperature liquids for optimal absorption. Cold liquids from the fridge can cause the chia seeds to clump before they properly hydrate, while warm liquids might make the oats mushy. I measure my liquids first and let them sit out while I prepare the dry ingredients.
Customization Strategy: For the toppings in Step 4, think about texture contrast rather than just flavor. The ½ cup of mixed nuts should be roughly chopped to create different crunch levels, while the ¼ cup of dried fruit works best when cut into small, bite-sized pieces. I toast my nuts for exactly 5 minutes at 350°F (in a dry skillet) to enhance their natural oils without burning—they’ll stay crispier in the muesli.
Pro Tips for Muesli Without Milk
- Let me share what I’ve learned from making this no-cook breakfast countless times—these details transform good muesli…
- Texture Secret: In Step 3, when you stir vigorously for those 2 minutes, you’re doing more than just mixing. The fric…
- Flavor Development: The 10-minute resting period in Step 5 isn’t just about hydration—it’s when the magic happens. As…
Frequently Asked Questions
Can I eat muesli without milk if I’m lactose intolerant?
Muesli without milk is a perfect lactose-free option. Swap dairy for plant-based milks (almond, oat, or coconut), yogurt alternatives, or even fruit juice. Many enjoy it dry with toppings like nuts, seeds, or fresh fruit for extra flavor and crunch.
What’s the best liquid alternative to milk for muesli?
Try oat milk (creamy), almond milk (light), or coconut yogurt (rich). For a twist, use chilled chamomile tea or apple juice—just add it right before eating to keep the muesli crispy! Pro tip: Soak overnight in coconut water for a tropical vibe.
How long can I store muesli without milk before it gets soggy?
Keep it airtight in a cool, dry place for up to 2 months. Once mixed with liquids (even alternatives), eat within 30–60 minutes for the best texture. For overnight muesli, store liquids separately and combine just before serving.
What are some crunchy toppings to replace milk’s creaminess?
Boost texture with:
- Nuts: Almonds, walnuts, or pecans (toasted for extra crunch!)
- Seeds: Pumpkin, chia, or sunflower seeds
- Dried fruit: Chopped dates, cranberries, or banana chips
- Granola clusters: For a sweet, crispy bite
Why does my muesli taste bland without milk?
Milk adds sweetness and fat, but you can easily fix this! Stir in:
- Spices: Cinnamon, cardamom, or vanilla extract
- Sweeteners: Honey, maple syrup, or mashed banana
- Healthy fats: Nut butter or avocado slices (yes, really!)
Who knew skipping milk could unlock so much flavor? 🌟 From creamy yogurt swaps to tropical fruit combos and even savory twists, muesli without milk proves breakfast can be just as exciting—without the dairy. Whether you’re vegan, lactose-intolerant, or just craving something new, this no-cook bowl is your blank canvas.
Ready to dig in? Pick one topping idea from above, grab your favorite muesli blend, and start experimenting—your taste buds (and morning routine) will thank you! Tag us in your creations—we’d love to see your mix! 📸

Trained in classic French technique but raised on slow-cooked ribs and spicy rubs, she blends culinary skill with smoke and soul.
- Recipe for Boneless Pork Chops in Cast Iron Skillet: Sear and Baste to Juicy Perfection - October 3, 2026
- Recipe for Boneless Cross Rib Roast: Slow-Roasted Beef with Herb Crust - October 3, 2026
- Hamburgers in Sauce Recipe Crock Pot: Slow-Cooked Savory Delight - October 3, 2026