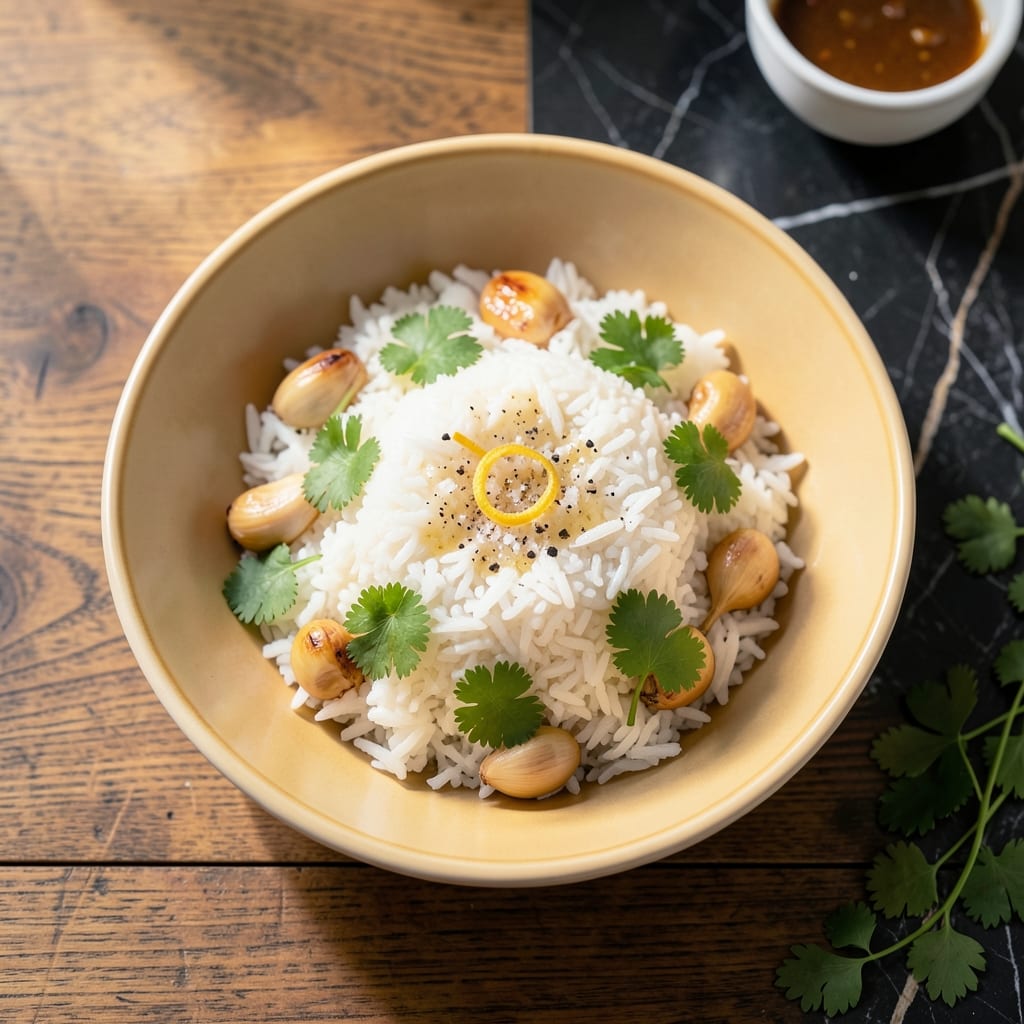
This method delivers perfectly fluffy jasmine rice with minimal effort and maximum flavor.
Using a precise water-to-rice ratio and proper microwave timing, you’ll achieve tender, separate grains every time without any special equipment.
Ingredients for Microwave Jasmine Rice
These fragrant ingredients yield tender, separate grains with minimal effort and maximum flavor.
| Ingredient | Amount | Notes |
|---|---|---|
| Jasmine Rice 🌾 | 2 cups | Rinsed until water runs clear |
| Water 💧 | 3 cups | Filtered or distilled preferred |
| Kosher Salt 🧂 | ½ tsp | Diamond Crystal brand recommended |
| Neutral Oil 🫒 | 1 tsp | Avocado or light olive oil |
| Garlic Cloves 🧄 | 2 cloves | Minced finely, optional |
| Fresh Cilantro 🌿 | ¼ cup | Chopped, for garnish |
| Lime 🍋 | 1 whole | Zested and juiced |
| Scallions 🧅 | 3 whole | Thinly sliced, green parts only |
| Sesame Oil 🫒 | ½ tsp | Toasted, for finishing |
| Ground White Pepper 🌶️ | ¼ tsp | For authentic Thai flavor |
[recipe_ingredient_scaler]
The jasmine rice quality matters most here. Look for Thai-grown varieties like Elephant Brand or Golden Phoenix at Asian markets or well-stocked grocery stores. The grains should be long and unbroken. Rinsing removes excess starch that could make the rice gummy—keep going until the water runs completely clear (usually 4-5 rinses).
No jasmine rice? Basmati works in a pinch but use one-third less water. Skip the cilantro if you’re one of those people who thinks it tastes like soap. Green onions or chives add a similar fresh note. For extra flavor, toast the rice in a dry pan for 2 minutes before microwaving. The oil is optional but prevents sticking.
Cooked rice holds at room temperature for 2 hours or refrigerated for 4-5 days. Reheat with a splash of water and cover to steam. Freeze portions for up to 3 months—thaw overnight in the fridge before reheating (worth the extra minute).
Why You’ll Love This Recipe
- 20-Minute Meal: I can have fluffy jasmine rice ready before the takeout arrives—just rinse, microwave, and go.
- Garlic-Infused Bite: The sizzle of garlic in that neutral oil gives every grain a little punch without overpowering.
- Meal Prep Hero: I make a big batch on Sunday and it pairs just as well with stir-fry as it does with grilled chicken all week.
- Pantry Staples Only: Between us, I always have rice, salt, and garlic on hand, so this is my last-minute dinner lifesaver.
Step-by-Step Instructions for Microwave Jasmine Rice
Here is the method—precise, efficient, and designed for perfect results every time.
Step 1: Rinse and Prepare the Jasmine Rice
Place the 2 cups Jasmine Rice in a fine-mesh strainer and rinse under cold water, swishing the grains with your hand until the water runs completely clear. This removes excess starch, preventing the finished dish from becoming gummy.
Drain thoroughly, then transfer to a microwave-safe bowl with at least 4-cup capacity. Add the 3 cups Water, 1 tsp Neutral Oil, and 0.5 tsp Kosher Salt. Stir lightly to combine—this ensures even distribution of seasoning and prevents the rice from clumping as it cooks.
Step 2: Microwave on High with a Vented Cover
Cover the bowl loosely with a microwave-safe lid or damp paper towel, leaving a small gap for steam to escape. This prevents pressure buildup while still trapping enough heat for even cooking.
Microwave on high power for 10 minutes. After this time, carefully remove the cover (watch for hot steam) and give the rice a gentle stir. You’ll notice the grains have absorbed much of the water but may still appear slightly firm.
Step 3: Finish Cooking and Rest
Re-cover the bowl and return it to the microwave for another 8-10 minutes on high power. The rice is done when the water is fully absorbed and the grains are tender with no chalky center. If any liquid remains, cook in 1-minute increments until it disappears.
Once cooked, let the rice rest, covered, for 5 minutes. This critical step allows residual steam to redistribute moisture, yielding fluffier, more uniform grains.
Step 4: Fluff and Add Aromatics
Use a fork to fluff the rice, breaking up any clumps. If using, stir in the 2 cloves minced Garlic Cloves and 0.25 tsp Ground White Pepper for subtle depth of flavor.
Drizzle with the 0.5 tsp Sesame Oil and fold gently to incorporate. This adds a nutty aroma that complements the rice’s natural fragrance without overpowering it.
Step 5: Garnish and Serve
Transfer the rice to a serving dish. Garnish with the 0.25 cup chopped Fresh Cilantro, lime zest and juice, and thinly sliced Scallions. These fresh elements brighten the dish and add layers of color and acidity.
Serve immediately while hot. The rice should be tender, separate easily, and carry a light, floral aroma with a hint of toasted sesame.
Pro Tips For Making Microwave Jasmine Rice
- Rinse the Rice: Always rinse jasmine rice until the water runs clear—this removes excess starch and prevents gummy, clumpy rice. I skipped this once and ended up with a gluey mess.
- Use the Right Ratio: For microwave jasmine rice, stick to a 1:1.5 rice-to-water ratio. Any more water and it turns mushy; less and it stays undercooked.
- Cover Tightly: Use a microwave-safe lid or damp paper towel to trap steam—this guarantees even cooking. I learned this the hard way after finding half-cooked rice at the bottom.
- Rest Before Serving: Let the rice sit covered for 5 minutes after microwaving. It finishes steaming and absorbs any lingering moisture—sounds small, but it actually changes the outcome.
Common Mistakes When Making This Dish
Skipping the Rinse
Never skip rinsing the 2 cups Jasmine Rice—this step removes excess starch that would otherwise make your rice gummy and sticky. I’ve learned the hard way that 4-5 rinses until the water runs clear are essential for fluffy results. 💡
Using the Wrong Bowl
Always use a microwave-safe bowl with at least 4-cup capacity. A bowl that’s too small causes water to boil over, creating a mess and potentially undercooking the rice. I prefer Pyrex glass bowls for even heating.
Sealing Too Tightly
Covering the bowl with a tight lid traps steam, leading to uneven cooking or even a microwave disaster. Use a damp paper towel or vented lid to allow steam to escape while retaining moisture. This simple step prevents soggy or mushy grains.
Ignoring the Rest
Letting the rice rest for 5 minutes after cooking is non-negotiable. This allows the grains to absorb residual steam, ensuring even moisture distribution. Skipping this step often results in uneven texture and dry spots.
Overcooking or Undercooking
Microwave power varies, so start checking at 10 minutes and adjust in 1-minute increments. Overcooking turns rice mushy, while undercooking leaves a chalky center. I find 18-20 minutes total works best in my 1200W microwave. ⚡
Skipping the Fluff
Always fluff the rice with a fork after cooking to separate the grains and release excess steam. Pressing down with a spoon compacts the rice, making it dense. This final step ensures light, airy grains ready for your favorite toppings.
Nutrition Facts
Frequently Asked Questions
Can I use a different type of rice?
Yes, but adjust the water. Basmati needs 1/3 less water and may cook faster. Long-grain white rice works too, though jasmine’s floral aroma is unique.
Why does the rice need to rest after cooking?
The 5-minute rest lets steam redistribute, ensuring even moisture and fluffier texture. Skipping this can leave the grains unevenly cooked.
What if my microwave is less powerful?
For microwaves under 1000W, increase cooking time by 2-3 minutes. Check at 12 minutes and adjust as needed.
Can I make this ahead of time?
Cooked rice stays fresh in the fridge for 4-5 days. Reheat with a splash of water and cover to steam.

Trained in classic French technique but raised on slow-cooked ribs and spicy rubs, she blends culinary skill with smoke and soul.
- Recipe for Boneless Pork Chops in Cast Iron Skillet: Sear and Baste to Juicy Perfection - October 3, 2026
- Recipe for Boneless Cross Rib Roast: Slow-Roasted Beef with Herb Crust - October 3, 2026
- Hamburgers in Sauce Recipe Crock Pot: Slow-Cooked Savory Delight - October 3, 2026