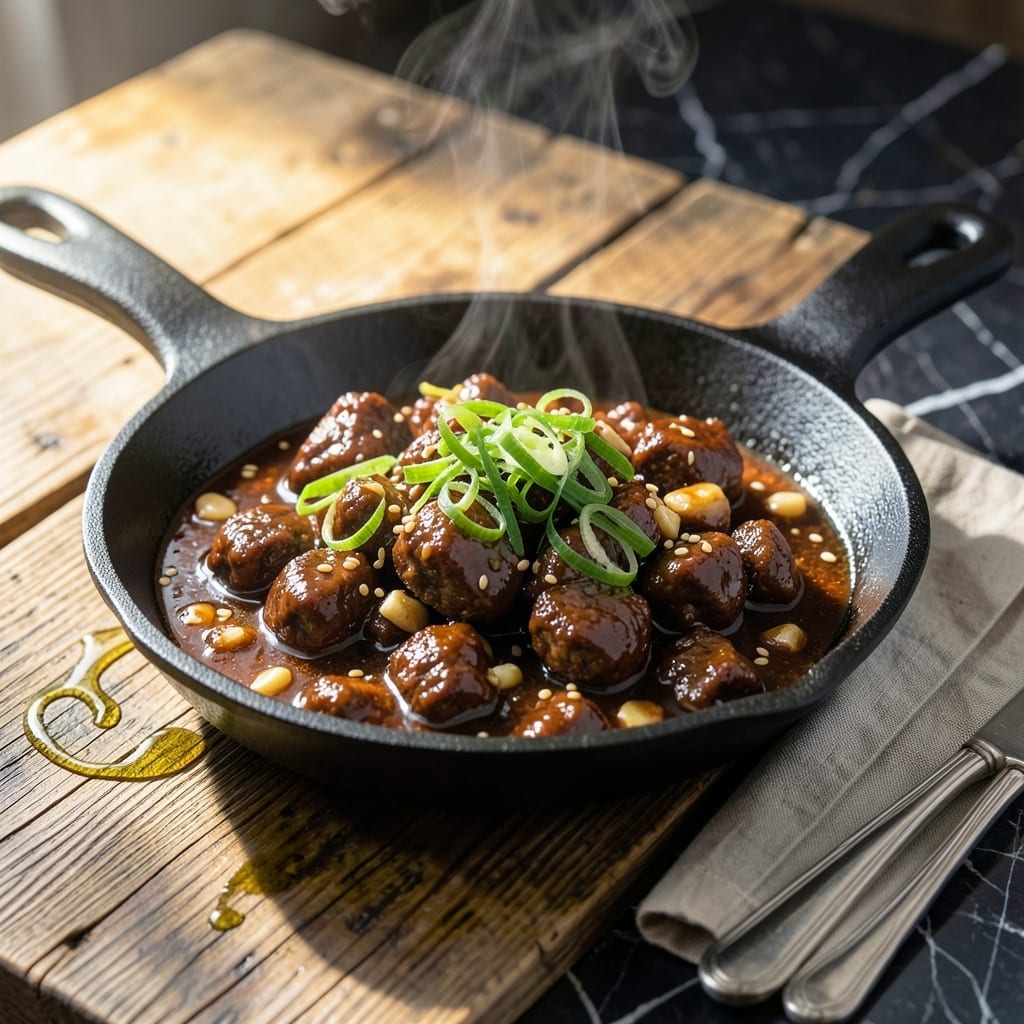
This ground beef adaptation of Mongolian beef delivers all the bold, savory flavors of the classic dish with a practical weeknight twist.
I developed this version after realizing how perfectly ground beef absorbs the rich soy-ginger-garlic sauce, creating a dish that’s both deeply flavorful and ready in 20 minutes.
The secret lies in browning the beef thoroughly before adding the sauce, which builds layers of umami and ensures every bite carries that signature sweet-spicy kick.
What emerges is a quick, satisfying stir-fry that brings restaurant-quality Asian flavors to your home kitchen without the takeout price.
Ingredients for Mongolian Beef Recipe Ground Beef
Ground beef, bold Asian flavors, and a sauce that clings to every bite. Ready in minutes.
| Ingredient | Amount | Notes |
|---|---|---|
| Ground Beef 🥩 | 1 ½ lb | 80/20 lean-to-fat ratio preferred |
| Low-Sodium Soy Sauce 🫒 | ½ cup | Or tamari for gluten-free |
| Dark Brown Sugar 🍚 | ⅓ cup | Packed, for caramelization |
| Fresh Ginger Root 🌿 | 1 tbsp | Minced or grated finely |
| Garlic Cloves 🧄 | 4 cloves | Minced for maximum flavor |
| Rice Vinegar 🍶 | 2 tbsp | Or apple cider vinegar |
| Sesame Oil 🫒 | 1 tbsp | Toasted for depth |
| Cornstarch 🌾 | 2 tbsp | For thickening the sauce |
| Red Pepper Flakes 🌶️ | ½ tsp | Adjust for heat preference |
| Fresh Green Onions 🧅 | 4 whole | Thinly sliced for garnish |
| Vegetable Oil 🫒 | 2 tbsp | High smoke point for frying |
| Water 💧 | ½ cup | For sauce consistency |
[recipe_ingredient_scaler]
The ground beef is the foundation here. 80/20 lean-to-fat ratio gives you the best browning and flavor absorption. I grab mine from Whole Foods or Costco—both have great quality without the premium butcher price. For the soy sauce, low-sodium lets you control the salt level, but regular works if that’s what you’ve got. The ginger and garlic? Fresh is non-negotiable for that authentic punch.
No rice vinegar? Apple cider vinegar works in a pinch. Missing sesame oil? Toasted vegetable oil plus a pinch of toasted sesame seeds gets you close. For gluten-free, swap the soy sauce for tamari. The brown sugar can be light, but dark gives that molasses depth that really makes the sauce sing. And if you’re out of cornstarch, arrowroot powder works the same.
This reheats like a dream—actually tastes better the next day. Keeps 4-5 days in the fridge, freezes beautifully for 3 months. I always double the sauce portion (it’s that good) and keep it in a jar for quick stir-fries.
Why You’ll Love This Recipe
- One Pan Wonder: I toss everything in a single skillet—ground beef, soy sauce, brown sugar—and it’s done in 20 minutes flat.
- Sweet & Savory Magic: The dark brown sugar caramelizes with the soy sauce, while ginger and garlic give it that deep, takeout-style flavor.
- Weeknight Hero: Between us, it’s my go-to when I need something fast, filling, and way cheaper than delivery.
- Leftovers Win: Honestly, it tastes even better the next day—packed for lunch or reheated for dinner, no complaints.
Step-by-Step Instructions for Mongolian Beef Stir-Fry With Ground Beef
Here’s my tested method for achieving that perfect balance of sweet, savory, and slightly spicy in every bite.
Step 1: Brown the Ground Beef
Heat the 2 tablespoons vegetable oil in a large skillet or wok over medium-high heat until it shimmers. Add the 1.5 lb ground beef and cook, breaking it up with a wooden spoon, for 5-7 minutes until evenly browned and no pink remains.
I prefer an 80/20 lean-to-fat ratio here because the extra fat adds richness to the dish. Drain excess fat if needed, but leave about 1 tablespoon in the pan for flavor. This step builds the foundation of the stir-fry with deep, meaty flavor.
Step 2: Create the Aromatic Base
Push the beef to one side of the pan and add the 1 tablespoon fresh ginger root and 4 cloves garlic cloves to the cleared space. Sauté for 30-45 seconds until fragrant—just until the raw edge disappears from the garlic.
Be careful not to burn the garlic; it turns bitter quickly. The ginger and garlic should release their aromas into the oil, creating a potent base that will infuse every bite. This is where the dish starts to develop its characteristic depth of flavor.
Step 3: Build the Signature Sauce
In a small bowl, whisk together the 0.5 cup low-sodium soy sauce, 0.33 cup dark brown sugar, 2 tablespoons rice vinegar, 1 tablespoon sesame oil, and 0.5 teaspoon red pepper flakes until the sugar dissolves. Pour this mixture over the beef in the pan.
Add the 0.5 cup water and stir to combine. Bring the mixture to a gentle simmer. The sauce should start to thicken slightly as it reduces, coating the beef in a glossy, flavorful sheen. You’ll notice the aroma become more complex as the ingredients meld together.
Step 4: Thicken and Finish the Stir-Fry
In a small cup, mix the 2 tablespoons cornstarch with 2 tablespoons water to create a slurry. Stir this into the simmering sauce and cook for an additional 1-2 minutes until the sauce thickens to a glossy, syrup-like consistency.
The cornstarch slurry is the secret to that restaurant-style glaze that clings perfectly to the beef. Keep the heat at a gentle simmer to prevent the sauce from breaking or becoming too thick. You want it to coat the back of a spoon but still be pourable.
Step 5: Garnish and Serve Immediately
Remove from heat and stir in half of the 4 whole fresh green onions, thinly sliced. Taste and adjust seasoning if needed—though with the soy sauce and sugar, it should be perfectly balanced. The green onions add a fresh, crisp contrast to the rich sauce.
Transfer to a serving dish and garnish with the remaining green onions. Serve immediately while hot, as the sauce will continue to thicken as it cools. The ideal serving temperature is when the sauce is still glossy and fluid enough to soak into rice or noodles.
Pro Tips For Making Mongolian Beef Recipe Ground Beef
- Brown the Beef Fast: Crank the heat to medium-high and resist the urge to stir constantly—let the ground beef develop a deep brown crust for about 3-4 minutes before breaking it up. I learned this the hard way after ending up with gray, steamed meat too many times. —
- Grate the Ginger: Skip the mincing and use a microplane to grate the fresh ginger root—it blends seamlessly into the sauce and releases way more flavor without fibrous bits. —
- Ditch the Cold Beef: Take the ground beef out of the fridge 15-20 minutes before cooking. Cold beef seizes up in the pan and steams instead of searing, and nobody wants that. —
- Bloom the Aromatics: Cook the garlic and ginger in a little oil for 30 seconds before adding the beef—just until fragrant. After burning three batches, I finally figured out that raw garlic tastes harsh in the finished dish.
Troubleshooting This Recipe
Sauce Too Thin
If your sauce isn’t thickening, the cornstarch slurry might not have been given enough time. Simmer for an additional 2-3 minutes over medium heat. I always mix the slurry with cold water first—hot water causes clumping. If it’s still thin, make another slurry with 1 tbsp cornstarch and 1 tbsp water. 💡
Overly Thick Sauce
Sauce too thick? Thin it with 1-2 tbsp water and stir until it reaches your desired consistency. Remember, the sauce will thicken slightly as it cools. If you accidentally add too much cornstarch, a splash of rice vinegar can help balance the texture.
Beef Not Browning
For proper browning, ensure your pan is hot enough before adding the ground beef. Don’t overcrowd the pan—cook in batches if needed. I use medium-high heat and let the beef sit undisturbed for 1-2 minutes to develop a good sear before stirring.
Sauce Too Salty
If your sauce is too salty, stir in 1-2 tsp brown sugar or a splash of water to dilute. Using low-sodium soy sauce helps prevent this. I always taste the sauce before adding it to the beef to adjust seasoning first. 🌟
Burnt Garlic or Ginger
Burnt aromatics can ruin the dish. Sauté the ginger and garlic for no more than 30-45 seconds. If you notice them browning too quickly, lower the heat to medium. I often pull the pan off the heat entirely when adding these to prevent burning.
Sauce Separating
If your sauce breaks or separates, it might have boiled too vigorously. Lower the heat and whisk constantly until it comes back together. A small pat of butter can help emulsify the sauce if needed. This usually happens if the heat was too high during thickening.
Nutrition Facts
Frequently Asked Questions
Can I use a different type of ground meat?
Yes! Ground turkey or chicken work well for a lighter version. For more flavor, try ground pork. Just adjust cooking time to ensure it reaches 165°F internally.
What if I don’t have rice vinegar?
Apple cider vinegar is the best substitute. Use the same amount for similar tanginess. Avoid white vinegar as it can be too harsh for this dish.
How do I make it less sweet?
Reduce brown sugar to 1/4 cup or substitute with honey. Balance with an extra 1 tbsp soy sauce or splash of vinegar to maintain depth.
Can I make this ahead of time?
The dish keeps well for 4-5 days refrigerated. Reheat gently with a splash of water to restore sauce consistency. It often tastes even better the next day!

Trained in classic French technique but raised on slow-cooked ribs and spicy rubs, she blends culinary skill with smoke and soul.
- Recipe for Boneless Pork Chops in Cast Iron Skillet: Sear and Baste to Juicy Perfection - October 3, 2026
- Recipe for Boneless Cross Rib Roast: Slow-Roasted Beef with Herb Crust - October 3, 2026
- Hamburgers in Sauce Recipe Crock Pot: Slow-Cooked Savory Delight - October 3, 2026