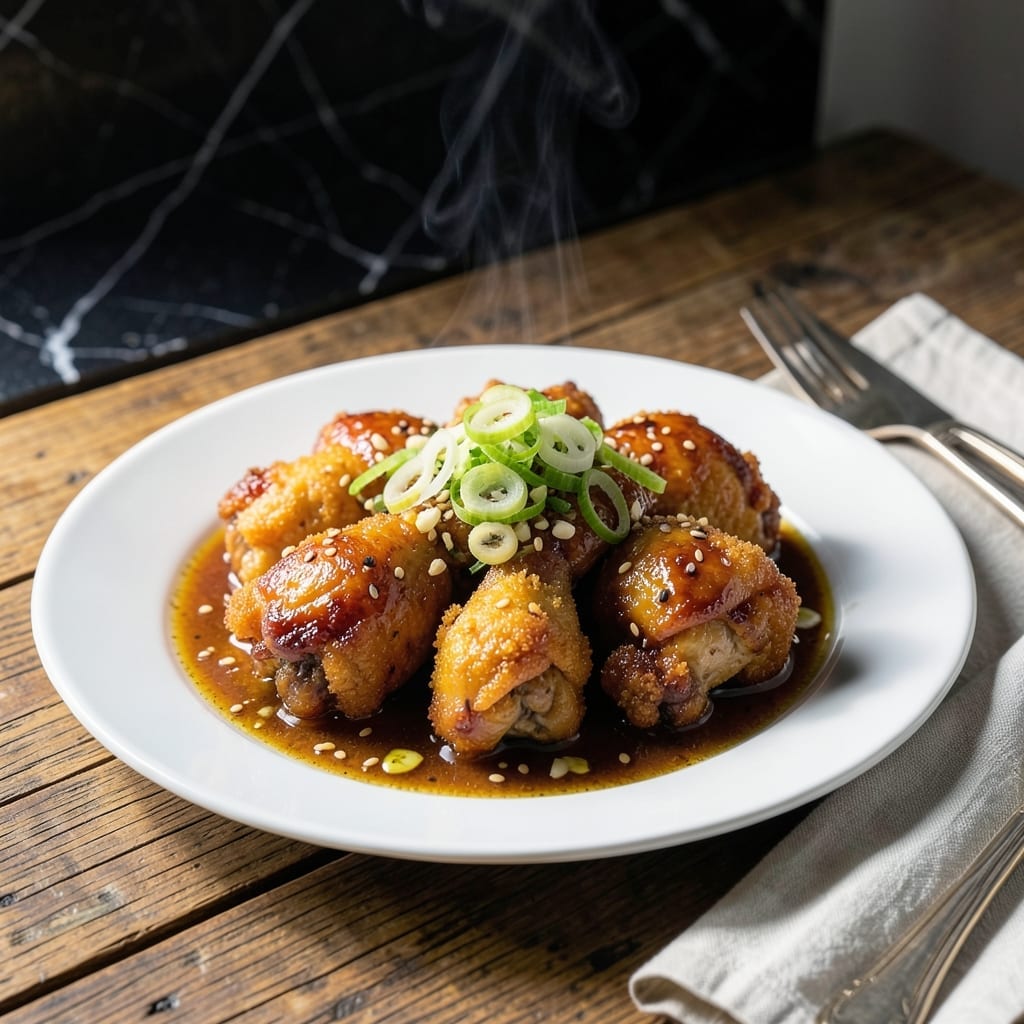
This dish delivers the perfect balance of sweet and savory with minimal effort. I developed it for busy evenings when takeout isn’t an option but flavor can’t be compromised.
The key is a simple sauce that comes together in 10 minutes while the chicken cooks. Brown sugar, soy sauce, and garlic create that signature sticky glaze that coats every piece.
What you get is tender chicken pieces glistening with a sweet-savory sauce that’s better than any restaurant version. The entire meal takes 30 minutes from start to finish.
Serve it over rice for a complete dinner that satisfies every time. Here’s how to make it.
Ingredients for Mongolian Chicken Recipe Easy
Pantry staples plus a quick stop at the grocery store. Sweet, savory, and ready in no time.
| Ingredient | Amount | Notes |
|---|---|---|
| Boneless Skinless Chicken Thighs 🍗 | 1 ½ lb | Cut into bite-sized pieces |
| Cornstarch 🌾 | ½ cup | For coating chicken |
| Vegetable Oil 🫒 | 3 tbsp | High smoke point for frying |
| Garlic Cloves 🧄 | 4 cloves | Minced for sauce |
| Fresh Ginger 🌿 | 1 tbsp | Grated or minced |
| Low-Sodium Soy Sauce 🥫 | ½ cup | For sauce base |
| Brown Sugar 🍚 | ½ cup | Packed, for sweetness |
| Rice Vinegar 🍶 | 2 tbsp | For acidity balance |
| Hoisin Sauce 🥫 | 2 tbsp | Adds depth of flavor |
| Sesame Oil 🫒 | 1 tsp | Toasted, for finishing |
| Green Onions 🧅 | 4 whole | Sliced for garnish |
| Sesame Seeds 🌾 | 1 tbsp | Toasted, for garnish |
| Red Pepper Flakes 🌶️ | ½ tsp | Optional for heat |
[recipe_ingredient_scaler]
The chicken is the star here—thighs stay juicier than breasts when stir-fried. Costco has great pre-cut options, but any grocery store works. Look for bone-in, skin-on if you want to debone yourself (saves money). Ginger matters too—fresh is best, but ground ginger at half the amount works in a pinch. Just don’t skip it.
No hoisin? Oyster sauce plus a pinch of sugar gets you close. Low-sodium soy is key—regular can make the dish too salty. Brown sugar can be swapped for coconut sugar or honey (though honey’s not vegan). The rice vinegar is flexible—apple cider vinegar works too. For extra depth, add a splash of Shaoxing wine if you’ve got it.
Leftovers keep 4-5 days in the fridge—reheat gently to avoid drying out. Freezes for 3 months (the sauce thickens when thawed, but a splash of water fixes it). Best served fresh over rice, though. (worth the extra minute)
Why You’ll Love This Recipe
- One Pan Wonder: I just toss the chicken thighs in cornstarch, fry them up, and let the garlic and ginger do their magic—minimal cleanup, maximum flavor.
- Crave-Worthy Sauce: That sticky, garlicky glaze from the fresh ginger and minced garlic clings to every bite. Honestly, I could drink it with a spoon.
- Feeds a Crowd: I stretch this to four servings with rice, or pack leftovers for lunch the next day. My kids even fight over the scraps.
- Budget Hero: Boneless thighs stay juicy and cost less than breasts. Between us, I’ve made this three weeks straight and no one’s complained.
Step-by-Step Instructions for Mongolian Chicken
This straightforward method delivers restaurant-quality results with minimal effort on busy evenings.
Step 1: Coat and Brown the Chicken
Cut the 1.5 lb boneless skinless chicken thighs into bite-sized pieces and pat them dry with paper towels. Toss the pieces in 0.5 cup cornstarch until evenly coated, shaking off any excess. This coating is what creates that signature crispy exterior.
Heat 3 tbsp vegetable oil in a large skillet over medium-high heat until shimmering. Add the coated chicken in a single layer (work in batches if needed) and cook for 3-4 minutes per side until golden brown and crispy. Don’t stir too often—let it develop that beautiful crust.
Step 2: Create the Flavorful Sauce Base
While the chicken cooks, mince the 4 cloves garlic and grate the 1 tbsp fresh ginger. In a bowl, whisk together the 0.5 cup low-sodium soy sauce, 0.5 cup brown sugar, 2 tbsp rice vinegar, and 2 tbsp hoisin sauce until the sugar dissolves.
Once the chicken is crispy, remove it to a plate. Add the garlic and ginger to the same skillet and sauté for 30 seconds until fragrant. Pour in your sauce mixture and stir to combine—it should start bubbling immediately.
Step 3: Finish and Thicken the Dish
Return the chicken to the skillet and toss to coat in the sauce. Reduce heat to medium and let it simmer for 2-3 minutes until the sauce thickens slightly and coats the chicken beautifully. The cornstarch from the chicken will help thicken the sauce naturally.
Stir in the 0.5 tsp red pepper flakes if using, then drizzle with 1 tsp sesame oil. This final touch adds that authentic restaurant flavor. Taste and adjust seasoning if needed—though the balance should be perfect with these proportions.
Step 4: Garnish and Serve Immediately
Slice the 4 whole green onions thinly. Transfer the chicken to serving plates and sprinkle with the green onions and 1 tbsp sesame seeds. The green onions add freshness while the sesame seeds provide texture.
Serve this immediately over steamed rice to soak up every bit of that incredible sauce. The chicken should be crispy on the outside, tender inside, and coated in a glossy, sweet-savory sauce that makes this dish irresistible for any weeknight dinner.
Pro Tips For Making Mongolian Chicken Recipe Easy
- Velvet the Chicken: Toss the chicken thighs with cornstarch and let them sit for 10 minutes before frying—this creates that signature tender, silky texture Mongolian chicken is known for.
- Hot Oil Only: I learned this the hard way—always heat the vegetable oil until it shimmers before adding the chicken, or you’ll end up with greasy, soggy pieces instead of crispy ones.
- Fresh Grate Ginger: Skip the powdered stuff and grate fresh ginger yourself; it adds a brighter, more vibrant kick that balances the dish perfectly.
- Double Fry Trick: Fry the chicken once, pull it out, then fry it again for 30 seconds before saucing—sounds like extra work, but it keeps the coating crispy under the sauce.
Common Mistakes When Making This Dish
Overcrowding the Pan
This is the most common mistake I see home cooks make. When you add all 1.5 lb chicken at once, it steams instead of browning. Work in batches with 1/3 of the chicken at a time for that perfect crispy coating. Trust me, it’s worth the extra 2 minutes. 🔥
Skipping the Cornstarch
Some try to skip the 0.5 cup cornstarch coating to save time, but this creates two problems: your chicken won’t get crispy, and your sauce won’t thicken properly. The cornstarch is non-negotiable for that signature texture.
Burning the Garlic
The 4 cloves garlic and 1 tbsp ginger only need 30 seconds in the hot pan. Any longer and they’ll burn, turning your sauce bitter. I pull the pan off heat while adding them to prevent this.
Using Regular Soy Sauce
Low-sodium soy sauce is crucial here. Regular soy sauce makes the dish too salty, especially with the hoisin. I learned this the hard way after ruining my first batch.
Overcooking the Chicken
Once the chicken returns to the sauce, it only needs 2-3 minutes to finish. Overcooking makes it tough. The chicken should reach 165°F internal temperature—use a meat thermometer if unsure.
Skipping the Rest
Let the chicken rest 5 minutes after cooking. This lets the sauce cling better and the juices redistribute. I always serve it immediately after resting for the best texture. ✨
Nutrition Facts
Frequently Asked Questions
Can I use chicken breast instead of thighs?
Yes, but thighs stay juicier. If using breasts, cut into 1-inch pieces and reduce cooking time by 1-2 minutes to prevent dryness. The cornstarch coating helps keep them tender.
What if I don’t have hoisin sauce?
Substitute with 2 tbsp oyster sauce plus 1 tsp sugar. This keeps the sweet-savory balance intact. The flavor will be slightly different but still delicious.
How do I make the sauce thicker?
Simmer uncovered for 1-2 extra minutes. If needed, mix 1 tsp cornstarch with 1 tbsp water and stir in. The sauce should coat the back of a spoon.
Can this be made ahead?
Cook and refrigerate for up to 4 days. Reheat gently on the stove with a splash of water. Avoid microwaving to maintain the crispy texture.

Trained in classic French technique but raised on slow-cooked ribs and spicy rubs, she blends culinary skill with smoke and soul.
- Recipe for Boneless Pork Chops in Cast Iron Skillet: Sear and Baste to Juicy Perfection - October 3, 2026
- Recipe for Boneless Cross Rib Roast: Slow-Roasted Beef with Herb Crust - October 3, 2026
- Hamburgers in Sauce Recipe Crock Pot: Slow-Cooked Savory Delight - October 3, 2026