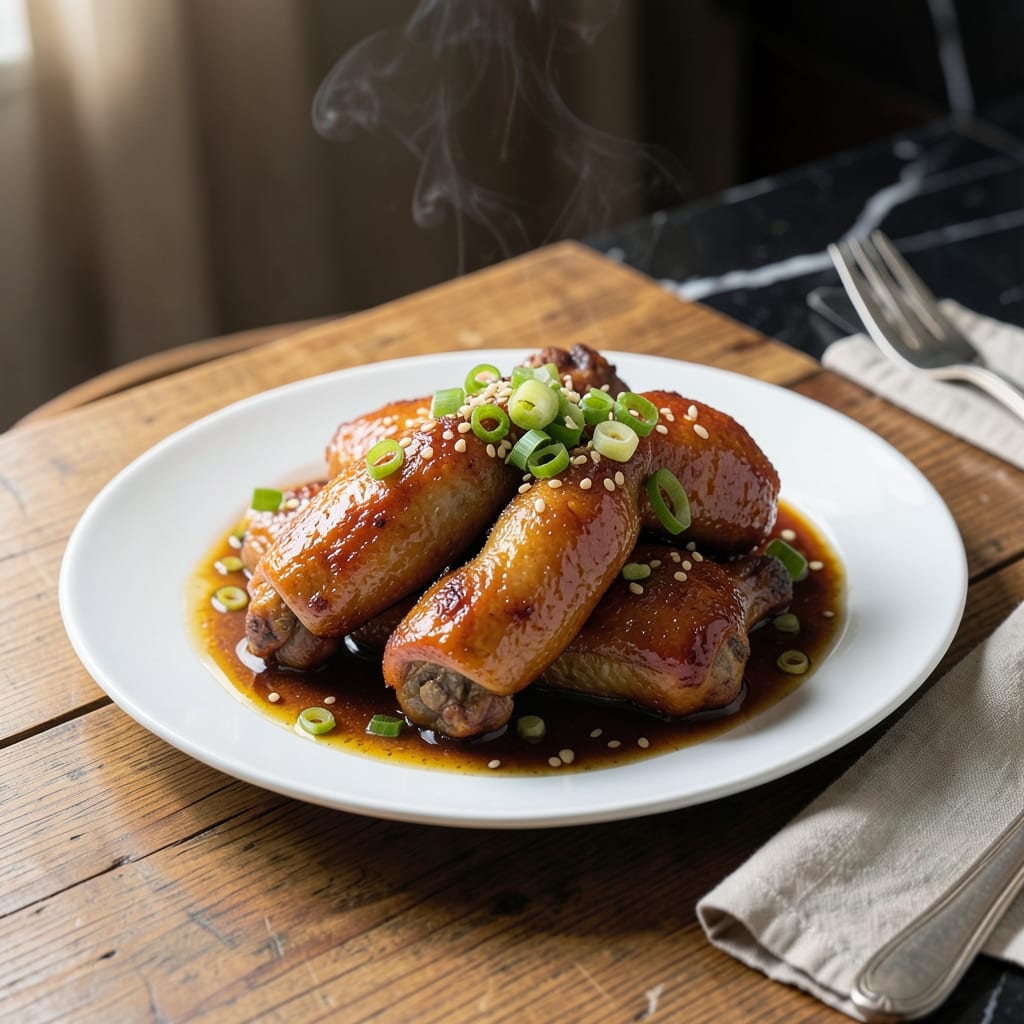
This Instant Pot version transforms classic Mongolian chicken into a weeknight-friendly dish without sacrificing flavor. The pressure cooker locks in moisture while building deep, savory-sweet layers in record time.
I developed this method after years of restaurant takeout cravings, perfecting the balance of hoisin, soy, and brown sugar that defines the dish. The chicken stays tender, never dry, as it soaks up the rich sauce under pressure.
The beauty lies in its simplicity: one pot, minimal prep, and 20 minutes from start to finish. No babysitting the stove or worrying about overcooking—just bold, restaurant-quality results at home.
Serve over steamed rice with a sprinkle of green onions for the full experience. The sauce thickens perfectly under pressure, coating every piece in that signature sticky glaze.
Ingredients for Mongolian Chicken Recipe Instant Pot
Pantry staples plus fresh aromatics create this pressure-cooked favorite with minimal effort.
| Ingredient | Amount | Notes |
|---|---|---|
| Boneless Skinless Chicken Thighs 🍗 | 1 ½ lb | Cut into bite-sized pieces |
| Cornstarch 🌾 | ¼ cup | For coating chicken |
| Vegetable Oil 🫒 | 2 tbsp | Divided for sautéing |
| Garlic Cloves 🧄 | 4 cloves | Minced finely |
| Fresh Ginger 🌿 | 1 tbsp | Peeled and grated |
| Hoisin Sauce 🥫 | ½ cup | Quality brand preferred |
| Soy Sauce 🥫 | ⅓ cup | Low-sodium recommended |
| Brown Sugar 🧈 | ½ cup | Packed firmly |
| Rice Vinegar 🍯 | 2 tbsp | Balances sweetness |
| Chicken Broth 🥣 | ½ cup | Low-sodium preferred |
| Green Onions 🧅 | 4 whole | Sliced thinly for garnish |
| Sesame Seeds 🌰 | 1 tbsp | Toasted for garnish |
| Red Pepper Flakes 🌶️ | ½ tsp | Adjust to taste preference |
[recipe_ingredient_scaler]
The chicken thighs are non-negotiable for that fall-apart texture—Costco has great pre-cut options if you’re short on time. Kikkoman hoisin sauce delivers authentic flavor without artificial additives, and I always keep a backup bottle in the pantry. Fresh ginger and garlic are essential (the jarred stuff just doesn’t compare), and most Asian markets sell them in larger quantities at better prices than regular supermarkets.
No hoisin? Mix equal parts soy sauce and honey with a dash of five-spice powder. Brown sugar can be swapped for coconut sugar (use the same amount), and rice vinegar works interchangeably with apple cider vinegar. For a gluten-free version, tamari replaces soy sauce perfectly. The cornstarch coating is what gives the chicken that signature velvety texture—don’t skip it (or use arrowroot powder as a 1:1 substitute).
Leftovers keep beautifully for 4-5 days in the fridge, and the flavors actually deepen overnight. Freeze extras for up to 3 months in airtight containers. The sauce thickens as it cools, so thin with a splash of water when reheating if needed.
Why You’ll Love This Recipe
- Set It and Forget: I toss everything in the Instant Pot, press start, and walk away—no babysitting required.
- Garlic-Ginger Bomb: The fresh ginger and garlic cloves make the sauce so aromatic, I catch myself sneaking tastes straight from the pot.
- Weeknight MVP: Between us, this is my go-to for busy evenings when I need dinner on the table faster than takeout arrives.
- Budget Stretch: Boneless skinless thighs stay juicy and cost less than half of what I’d pay for takeout Mongolian chicken.
Step-by-Step Instructions for Mongolian Chicken Instant Pot
Master the technique for this pressure-cooked dish with perfect texture and balanced flavors.
Step 1: Coat and Sear the Chicken
Cut the 1.5 lb boneless skinless chicken thighs into bite-sized pieces and pat them dry with paper towels. Toss the pieces in 0.25 cup cornstarch until evenly coated—this creates a velvety texture and helps thicken the sauce later.
Set your Instant Pot to Sauté mode and add 1 tbsp vegetable oil. When the oil shimmers, add half the chicken in a single layer. Sear for 3-4 minutes until golden brown on all sides, then transfer to a plate and repeat with the remaining chicken and 1 tbsp vegetable oil.
Step 2: Build the Flavor Base
With the Instant Pot still on Sauté, add the 4 cloves minced garlic cloves and 1 tbsp fresh ginger. Stir constantly for 30 seconds until fragrant—this prevents burning while developing deep aroma.
Pour in 0.5 cup chicken broth and use a wooden spoon to deglaze the pot, scraping up all the browned bits. These fond bits are pure flavor and will dissolve into your sauce. Add the 0.5 cup hoisin sauce, 0.33 cup soy sauce, 0.5 cup brown sugar, and 2 tbsp rice vinegar, stirring until the sugar begins to dissolve.
Step 3: Pressure Cook to Perfection
Return all the seared chicken to the Instant Pot and stir to coat in the sauce. Secure the lid, set the valve to Sealing, and cook on High Pressure for 5 minutes. The chicken will finish cooking and absorb the rich, sweet-savory flavors.
When the cooking cycle completes, allow a natural pressure release for 5 minutes, then carefully switch the valve to Venting to release any remaining pressure. This gradual release prevents the chicken from toughening.
Step 4: Finish and Garnish
Open the lid and switch the Instant Pot back to Sauté mode. Simmer the chicken uncovered for 3-4 minutes to allow the sauce to thicken slightly to a glossy consistency that clings to each piece.
Sprinkle with 0.5 tsp red pepper flakes for a subtle heat, then garnish with 4 whole sliced green onions and 1 tbsp sesame seeds. The green onions add freshness, while the sesame seeds provide a nutty crunch. Serve immediately over steamed rice.
Pro Tips For Making Mongolian Chicken Recipe Instant Pot
- Brown the Chicken Well: Sear the chicken thighs in batches until deeply golden—about 3-4 minutes per side. I learned this the hard way: skipping this step leaves the sauce flavorless and the texture bland.
- Velvety Cornstarch Coat: Toss the chicken in cornstarch right before browning, not earlier—it clumps if it sits. Use 2 tablespoons for 1.5 lbs of thighs; it makes a real difference in that sticky, glossy coating.
- Skip the Overcrowding: Resist the urge to dump all the chicken in at once. Crowding steams instead of sears, and you’ll end up with a sad, pale mess. Two batches max in a standard Instant Pot.
- Fresh Ginger Only: Sounds obvious, but powdered ginger won’t cut it here. Grate 1 tablespoon of fresh ginger—it’s the thing that actually changes the outcome from “meh” to restaurant-quality.
Troubleshooting Perfect Results
Sauce Too Thin
If your sauce is watery after pressure cooking, switch to Sauté mode and simmer uncovered for 3-5 minutes. I often add a cornstarch slurry—mix 1 tbsp cornstarch with 2 tbsp cold water—then stir it in and cook for 1-2 minutes until glossy. 💡
Burn Notice
If you see the “Burn” error, it’s usually from insufficient liquid. Always deglaze with 0.5 cup chicken broth and scrape the bottom well. If it persists, release pressure, add ¼ cup water, and restart cooking.
Chicken Not Cooked
If the chicken isn’t done after 5 minutes of pressure cooking, return the lid, reseal, and cook for another 2-3 minutes. Check internal temp with a meat thermometer—it should reach 165°F.
Sauce Too Thick
Thicken too much? Stir in 2-3 tbsp water or chicken broth while on Sauté mode until it loosens. The sauce will continue to thicken as it cools, so err on the side of slightly thinner.
Lacking Flavor Depth
If the dish tastes flat, boost umami with 1 tbsp soy sauce or a splash of rice vinegar for brightness. Fresh garlic and ginger are non-negotiable—I learned this the hard way during my early cooking days.
Sticky Residue
For easy cleanup, soak the inner pot in warm, soapy water immediately after serving. The brown sugar can caramelize, but a 10-minute soak loosens it right up. My secret? A sprinkle of baking soda in the water. ✨
Nutrition Facts
Frequently Asked Questions
Can I use chicken breast instead of thighs?
You can, but thighs stay far juicier. If using breast, reduce pressure time to 3 minutes to prevent dryness. Always check internal temp reaches 165°F.
What if I don’t have hoisin sauce?
Mix 3 tbsp soy sauce with 1 tbsp honey and 1 tsp five-spice powder. This creates a similar sweet-savory profile. Adjust to taste.
How do I store leftovers?
Keep in an airtight container in the fridge for up to 5 days. The flavors intensify overnight. Reheat gently with a splash of water.
Can I make this gluten-free?
Easily! Swap regular soy sauce for tamari and use cornstarch (already gluten-free). Verify all sauces are certified gluten-free.

Trained in classic French technique but raised on slow-cooked ribs and spicy rubs, she blends culinary skill with smoke and soul.
- Recipe for Boneless Pork Chops in Cast Iron Skillet: Sear and Baste to Juicy Perfection - October 3, 2026
- Recipe for Boneless Cross Rib Roast: Slow-Roasted Beef with Herb Crust - October 3, 2026
- Hamburgers in Sauce Recipe Crock Pot: Slow-Cooked Savory Delight - October 3, 2026