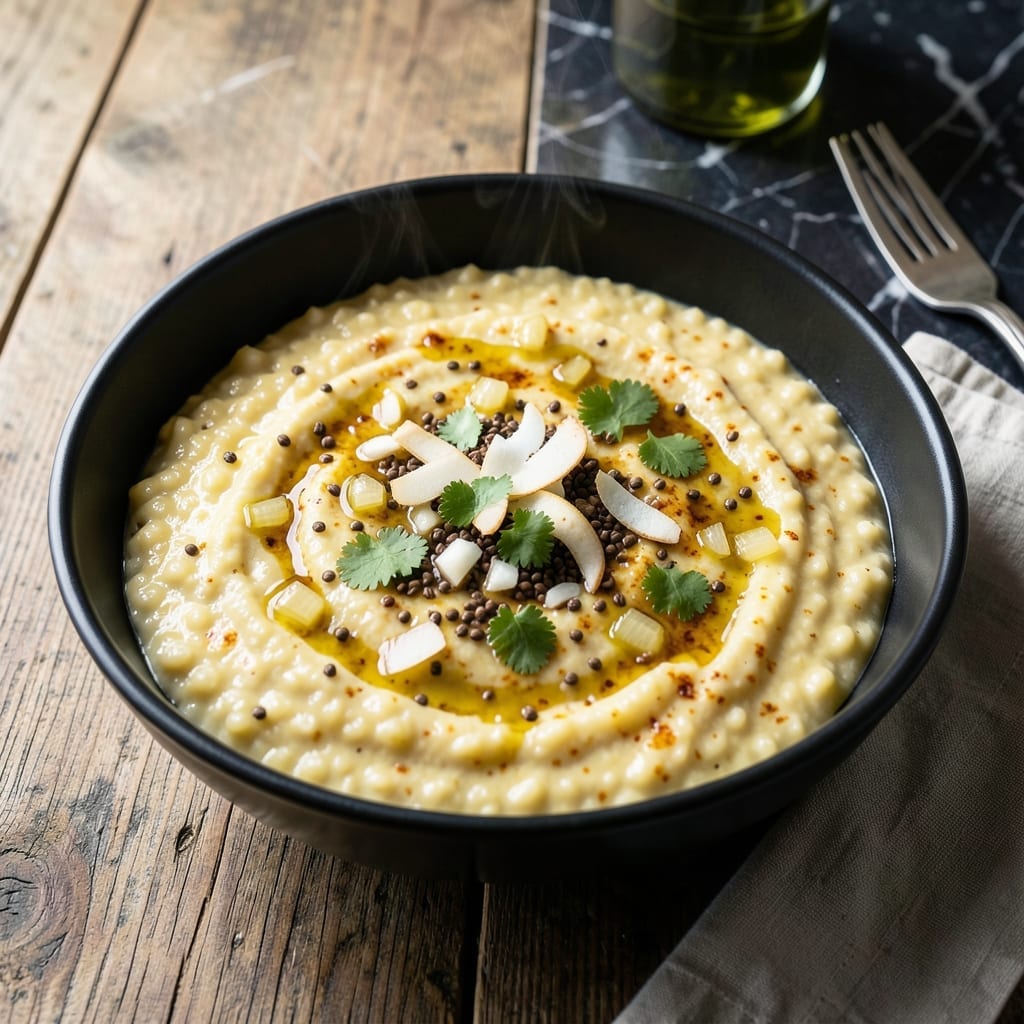
This Instant Pot version of a classic Indian dish brings traditional creamy comfort to your table with minimal effort. The pressure cooker transforms simple split yellow lentils into a velvety, flavorful dal that’s ready in under 30 minutes.
What makes this recipe special is its hands-free approach. No constant stirring or watching the pot—just add the ingredients, set the timer, and let the Instant Pot do the work. The result is a dish that’s naturally vegan, protein-packed, and deeply satisfying.
You’ll love the balance of warm spices like cumin and turmeric that infuse the lentils with rich, aromatic depth. The texture is perfectly smooth yet hearty, making it ideal for pairing with rice or flatbread.
This method preserves all the authentic flavors while cutting the usual cooking time in half. It’s comfort food at its most convenient.
Ingredients for Moong Dal Recipe Instant Pot
Simple, wholesome ingredients transform into creamy, aromatic comfort in minutes with this method.
| Ingredient | Amount | Notes |
|---|---|---|
| Yellow Moong Dal 🟡 | 1 cup | Split and rinsed thoroughly |
| Water 💧 | 4 cups | For pressure cooking |
| Yellow Onion 🧅 | 1 whole | Finely diced |
| Fresh Ginger 🌿 | 1 tbsp | Peeled and minced |
| Garlic Cloves 🧄 | 3 cloves | Minced finely |
| Green Chili 🌶️ | 1 whole | Slit lengthwise, optional |
| Fresh Cilantro 🌿 | ¼ cup | Chopped for garnish |
| Cumin Seeds 🌿 | 1 tsp | Toasted for aroma |
| Ground Turmeric 🟡 | ½ tsp | For color and warmth |
| Ground Coriander 🌿 | 1 tsp | Freshly ground preferred |
| Garam Masala 🌶️ | ½ tsp | Added at the end |
| Salt 🧂 | 1 ½ tsp | Adjust to taste |
| Fresh Lemon Juice 🍋 | 1 tbsp | Squeezed just before serving |
| Coconut Oil 🥥 | 2 tbsp | Or substitute neutral oil |
[recipe_ingredient_scaler]
The moong dal is the foundation here—look for split yellow lentils at Indian grocery stores or the international aisle of Whole Foods. They cook faster and yield a creamier texture than whole lentils. Quality matters with spices: freshly ground cumin and coriander (toasted briefly in dry pan) deliver the authentic depth. Organic turmeric often has more vibrant color and potency.
No fresh ginger? Ground ginger at one-quarter the amount works in a pinch. Out of cilantro? Skip it or use parsley (flavor differs but adds freshness). For heat, serrano peppers can replace green chilies. The coconut oil can be swapped for any neutral oil like avocado or grapeseed. Vegetable broth instead of water adds extra depth if you have it.
Store dried lentils in an airtight container in a cool, dark place for up to 1 year. Once cooked, dal keeps in the fridge for 4-5 days or can be frozen for 3 months (portion before freezing for easy reheating). The flavors deepen overnight, making leftovers even better.
Why You’ll Love This Recipe
- Set It and Forget: I just dump everything in the Instant Pot, press a button, and walk away—no stirring, no watching.
- Ginger-Garlic Magic: The fresh ginger and garlic bloom in the pressure cooker, turning the dal into something deeply aromatic.
- Meal Prep Hero: It reheats beautifully, so I make a big batch on Sunday and eat it all week.
- Pantry MVP: Yellow moong dal is cheap, keeps forever, and this version makes it taste like a restaurant dish.
Step-by-Step Instructions for Moong Dal
Here’s the method. Simple steps, consistent results, creamy texture guaranteed.
Step 1: Sauté Aromatics for Flavor Foundation
Set your Instant Pot to the Sauté function on Normal heat. Add the 2 tbsp coconut oil and let it heat until shimmering. Toss in the 1 tsp cumin seeds and toast for 20-30 seconds until they sizzle and release their aroma.
Immediately add the finely diced 1 whole yellow onion. Cook for 3-4 minutes until the onion softens and turns translucent. Stir in the 1 tbsp fresh ginger, 3 cloves garlic cloves, and 1 whole green chili, cooking for another 30 seconds until fragrant. This builds the flavor base for your dal.
Step 2: Toast Spices and Add Dal
Sprinkle in the 0.5 tsp ground turmeric and 1 tsp ground coriander. Stir constantly for 15-20 seconds to toast the spices—their scent should intensify and the mixture deepen in color. Be careful not to let them burn.
Add the rinsed 1 cup yellow moong dal and stir to coat the lentils in the spiced oil. Toast for 1-2 minutes, stirring frequently, until the dal turns slightly opaque. This step enhances the nutty flavor of the lentils and prevents a raw taste in the finished dish.
Step 3: Pressure Cook to Creamy Perfection
Pour in the 4 cups water and add the 1.5 tsp salt. Stir well to combine, scraping the bottom of the pot to deglaze and prevent burning. Secure the lid, set the valve to Sealing, and cook on High Pressure for 8 minutes.
Once the cooking cycle completes, allow the pressure to release naturally for 10 minutes, then quick-release any remaining pressure. The natural release prevents the dal from becoming mushy while ensuring the lentils are fully tender.
Step 4: Finish with Final Touches
Open the lid and stir the dal. It should be creamy and thick, with the lentils fully broken down. If it appears too thick, add a splash of hot water to reach your desired consistency. Stir in the 0.5 tsp garam masala and let it sit for 2-3 minutes to meld the flavors.
Just before serving, stir in the 1 tbsp fresh lemon juice and taste for seasoning. Adjust salt if needed. Garnish with the 0.25 cup fresh cilantro and serve warm for the ultimate creamy comfort.
Pro Tips For Making Moong Dal Recipe Instant Pot
- Rinse the Dal: Wash the moong dal thoroughly in 3-4 changes of water until the water runs clear—this removes excess starch and prevents a gummy texture.
- Sauté the Aromatics: Cook the onion, ginger, and garlic in the Instant Pot first (using sauté mode) for 2-3 minutes until fragrant—this builds a deeper flavor base.
- Skip the Soak: Moong dal cooks fast in the Instant Pot, so no pre-soaking is needed—just add 1:3 dal-to-water ratio and pressure cook for 5 minutes.
- Natural Release Only: Let the pressure release naturally for 10 minutes after cooking to prevent the dal from breaking down into mush.
Troubleshooting This Recipe
Dal Too Thin
If your dal seems watery after cooking, use the Sauté function for 5-7 minutes with the lid off. Stir frequently to prevent sticking. I’ve found that adding 1 tbsp mashed dal to the pot thickens it naturally, as the lentils release starch.
Overly Thick Texture
For dal that’s too thick, stir in hot water ¼ cup at a time until it reaches your desired consistency. I prefer mine like a creamy soup, so I often add up to 1 cup extra liquid at the end. 💡
Burn Notice
If you see the Burn error, immediately release pressure and check the pot. Scrape the bottom thoroughly, then add ½ cup water and stir well. Restart the cook cycle. This usually happens if the dal wasn’t stirred enough before pressure cooking.
Spices Not Aromatic
If your dish lacks depth, toast whole spices like cumin seeds in dry heat before adding oil. I also recommend blooming ground spices in hot oil for 20-30 seconds to wake up their flavors.
Lentils Undercooked
If your dal isn’t soft after 8 minutes, seal the lid and cook for another 2-3 minutes on High Pressure. Older lentils may need extra time. Always rinse your dal first—it removes debris that can interfere with cooking.
Bitter Aftertaste
Bitterness often comes from over-toasting spices. Next time, reduce toasting time to 10-15 seconds for ground spices. A pinch of sugar or extra lemon juice can balance the flavor in your current batch. 🍋
Nutrition Facts
Frequently Asked Questions
Can I use red lentils instead of moong dal?
Yes, but they’ll break down more and create a thicker texture. Red lentils cook faster, so reduce pressure time to 5 minutes and check for doneness.
Why does my dal taste bland?
Toast your spices longer in hot oil to release their oils. Also, finish with a squeeze of lemon juice and a pinch of salt just before serving to brighten flavors.
How do I prevent the Burn error?
Always deglaze the pot after sautéing by scraping the bottom with a wooden spoon. Add at least 4 cups liquid to prevent sticking during pressure cooking.
Can I make this ahead of time?
The flavors deepen overnight. Store in an airtight container in the fridge for up to 5 days or freeze for 3 months.

Trained in classic French technique but raised on slow-cooked ribs and spicy rubs, she blends culinary skill with smoke and soul.
- Recipe for Boneless Pork Chops in Cast Iron Skillet: Sear and Baste to Juicy Perfection - October 3, 2026
- Recipe for Boneless Cross Rib Roast: Slow-Roasted Beef with Herb Crust - October 3, 2026
- Hamburgers in Sauce Recipe Crock Pot: Slow-Cooked Savory Delight - October 3, 2026