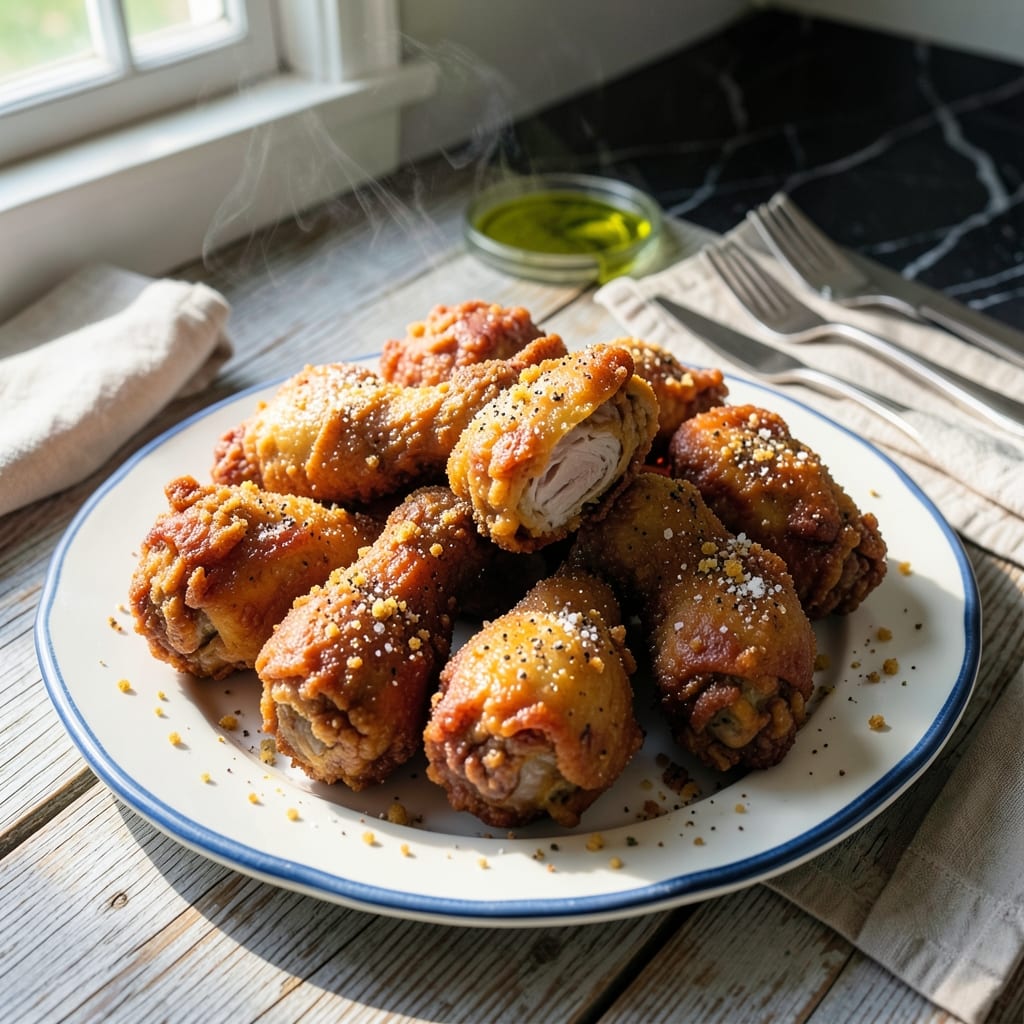
There’s a reason Mrs. Wilkes’ fried chicken has been a Savannah institution since 1943. This recipe delivers the crispy, golden-brown perfection that defined Southern comfort food for generations.
Using a simple but precise method, the chicken develops a shatteringly crispy crust while staying juicy inside. The secret lies in a well-seasoned flour dredge and hot oil at the right temperature—no shortcuts, just tradition.
I’ve tested this technique in my own kitchen, and the results speak for themselves. Each piece emerges with that signature crunch and rich, savory flavor that makes it impossible to stop at just one.
Serve it hot with biscuits and honey for the full experience. Here’s how to bring this classic home.
Ingredients for Mrs Wilkes Fried Chicken
Classic Southern ingredients for that legendary crispy, golden-brown finish everyone craves.
| Ingredient | Amount | Notes |
|---|---|---|
| Chicken Thighs and Drumsticks 🍗 | 3 ½ lb | Bone-in, skin-on for crispiness |
| All-Purpose Flour 🌾 | 2 cups | Plus extra for dredging |
| Kosher Salt 🧂 | 1 tbsp | Diamond Crystal preferred |
| Freshly Ground Black Pepper 🌶️ | 1 tbsp | Coarse grind for texture |
| Garlic Powder 🧄 | 2 tsp | Not garlic salt |
| Onion Powder 🧅 | 2 tsp | Fresh ground preferred |
| Paprika 🌶️ | 2 tsp | Sweet or smoked variety |
| Cayenne Pepper 🔥 | ½ tsp | Adjust for heat preference |
| Dried Thyme 🍃 | 1 tsp | Rubbed between fingers to release oils |
| Buttermilk 🥛 | 2 cups | Full-fat for richness |
| Vegetable Shortening 💧 | 4 cups | For deep frying, Crisco brand |
| Large Eggs 🥚 | 2 whole | Beaten for binding |
| Hot Sauce 🌶️ | 1 tbsp | Crystal or Tabasco brand |
[recipe_ingredient_scaler]
The chicken is everything here. Bone-in, skin-on thighs and drumsticks yield the juiciest, crispiest results—breasts dry out too fast. Buttermilk (full-fat, not low-fat) tenderizes while adding that signature tang. Diamond Crystal kosher salt dissolves perfectly into the flour dredge. For the oil, Crisco vegetable shortening hits the ideal smoke point without imparting flavor. Most Southern grocery stores carry it in the baking aisle.
No buttermilk? Stir 1 tbsp white vinegar into regular milk and let sit 5 minutes. Out of shortening? Peanut oil or lard (for non-vegetarian versions) work too—just monitor temperature closely. The cayenne can be reduced or omitted, but don’t skip the paprika—it’s key for that classic golden hue. Freshly ground black pepper makes a noticeable difference over pre-ground.
Fry in batches to avoid crowding—keeps oil temp steady. Drain on a wire rack (not paper towels) to maintain crispiness. Leftovers? Rare, but they reheat best in a 350°F oven for 15 minutes. Never microwave—it’ll turn the coating soggy. Consume within 2 days for peak texture.
Why You’ll Love This Recipe
- One Pan Magic: I just toss the thighs and drumsticks in flour with salt, pepper, and garlic powder—no fancy prep, no mess.
- That Garlic Crunch: The garlic powder in the flour gives every bite this warm, savory depth that’s honestly hard to stop eating.
- Feeds the Crew: I make a big batch for Sunday dinner, and it’s just as good cold in sandwiches the next day.
- Wallet-Friendly Winner: Thighs and drumsticks stay cheap, and a bag of flour stretches across multiple meals. Here’s what sold me—it tastes like a splurge without the cost.
Step-by-Step Instructions for Crispy Southern Fried Chicken
Master these steps and you’ll achieve perfectly crispy, golden-brown fried chicken with juicy meat.
Step 1: Season and Marinate the Chicken
Begin by patting the 3.5 lb Chicken Thighs and Drumsticks completely dry with paper towels. This ensures the coating adheres properly and promotes maximum crispiness.
In a large bowl, whisk together the 2 cups Buttermilk, 2 whole Large Eggs, and 1 tbsp Hot Sauce. Add the chicken pieces, making sure they’re fully submerged. Cover and refrigerate for at least 4 hours or overnight. This buttermilk brine tenderizes the meat and adds significant flavor.
The longer you marinate, the more pronounced the flavor and tenderness will be. I’ve found that overnight marination yields the juiciest results.
Step 2: Prepare the Seasoned Flour Dredge
In a large shallow dish, combine the 2 cups All-Purpose Flour, 1 tbsp Kosher Salt, 1 tbsp Freshly Ground Black Pepper, 2 tsp Garlic Powder, 2 tsp Onion Powder, 2 tsp Paprika, 0.5 tsp Cayenne Pepper, and 1 tsp Dried Thyme.
Rub the dried thyme between your fingers as you add it to release its essential oils. Mix thoroughly to ensure even distribution of all seasonings. This blend creates that signature Southern flavor profile with just the right amount of heat from the cayenne.
For extra crispiness, I recommend adding an additional ¼ cup of flour to the dredging station as you work.
Step 3: Dredge and Rest the Chicken
Remove the chicken from the buttermilk mixture, allowing excess to drip off. Dredge each piece in the seasoned flour, pressing firmly to ensure the coating adheres completely. Shake off any excess flour.
Place the dredged pieces on a wire rack set over a baking sheet. This allows air circulation on all sides. Let the chicken rest for 15-20 minutes at room temperature. This crucial step helps the coating set and adhere better during frying.
You’ll notice the dredge will appear slightly moist – this is normal and actually helps create that perfect crust.
Step 4: Fry to Golden Perfection
In a deep, heavy-bottomed pot or Dutch oven, heat the 4 cups Vegetable Shortening to 350°F over medium-high heat. Use a deep-fry thermometer for accuracy – proper temperature is critical for even cooking and crispiness.
Working in batches to avoid crowding, carefully lower 3-4 pieces of chicken into the hot oil. Fry for 12-15 minutes, turning occasionally, until the chicken is deep golden brown and the internal temperature reaches 165°F.
Maintain the oil temperature between 325°F-350°F throughout frying. If the oil temperature drops too low, the chicken will absorb oil and become greasy rather than crispy.
Step 5: Drain and Serve Immediately
Transfer the fried chicken to a wire rack set over a baking sheet or to paper towels to drain. This allows excess oil to drip away while maintaining crispiness. Sprinkle with a pinch of kosher salt while still hot to enhance flavor.
Let the chicken rest for 5 minutes before serving. This brief rest allows the juices to redistribute, ensuring moist meat in every bite. The coating should be shatteringly crisp with a deep amber color.
Serve immediately while hot and crispy. The contrast between the crunchy exterior and juicy interior is what makes this Southern classic so irresistible.
Pro Tips For Making Mrs Wilkes Fried Chicken
- Dry the Chicken: Pat the thighs and drumsticks completely dry with paper towels before dredging—this guarantees the flour sticks and fries up crispy instead of gummy.
- Season the Flour: Mix the kosher salt, black pepper, and garlic powder right into the flour before coating, so every bite carries that savory punch.
- Don’t Crowd the Pan: Fry in batches with space between pieces, or the oil temp drops and you’ll end up with soggy, greasy chicken instead of golden, crunchy.
- Rest Before Serving: Let the fried chicken drain on a rack for 5 minutes after frying—this keeps the crust crisp instead of steamy and soft.
Essential Equipment for This Recipe
Deep Fryer Setup
For authentic results, I use a 12-quart enameled cast iron Dutch oven—my Le Creuset has handled weekly batches for years. The heavy base distributes heat evenly, preventing hot spots that burn the coating before the meat cooks through. 🔥
Thermometer Essentials
A candy/deep-fry thermometer clipped to the pot is non-negotiable. I swear by Taylor Precision models for their accuracy. Maintain 350°F oil temperature—any lower and you’ll get greasy chicken instead of that signature crunch.
Dredging Station
Use a large stainless steel bowl for your flour mixture—wide enough to fully coat each piece. I keep a fine-mesh strainer nearby to sift excess flour back into the bowl, minimizing waste and mess.
Draining Solution
A wire cooling rack set over a baking sheet is my go-to for draining. Unlike paper towels, it lets air circulate, keeping the crust crisp. Elevate the rack 1 inch above the sheet to prevent soggy bottoms. 💡
Oil Management
Invest in a fat separator for oil storage between batches. I reuse Crisco shortening up to 3 times if kept clean and filtered. Strain through a coffee filter to remove any food particles that could burn.
Safety Gear
Always keep a fire extinguisher rated for grease fires nearby. I also wear heat-resistant gloves for handling hot metal—safety never takes a backseat to tradition in my kitchen.
Nutrition Facts
Frequently Asked Questions
What’s the best oil temperature for frying?
Maintain 350°F for perfect crispiness. Use a deep-fry thermometer to monitor.
Can I use chicken breasts instead of thighs?
Not recommended. Bone-in, skin-on thighs and drumsticks stay juicier and crisp up better than lean breasts.
How do I keep the coating crispy after frying?
Drain on a wire rack, not paper towels. This allows air circulation to prevent sogginess.
How long should I marinate the chicken?
Marinate for at least 4 hours, but overnight yields the juiciest, most flavorful results.

Trained in classic French technique but raised on slow-cooked ribs and spicy rubs, she blends culinary skill with smoke and soul.
- Recipe for Boneless Pork Chops in Cast Iron Skillet: Sear and Baste to Juicy Perfection - October 3, 2026
- Recipe for Boneless Cross Rib Roast: Slow-Roasted Beef with Herb Crust - October 3, 2026
- Hamburgers in Sauce Recipe Crock Pot: Slow-Cooked Savory Delight - October 3, 2026