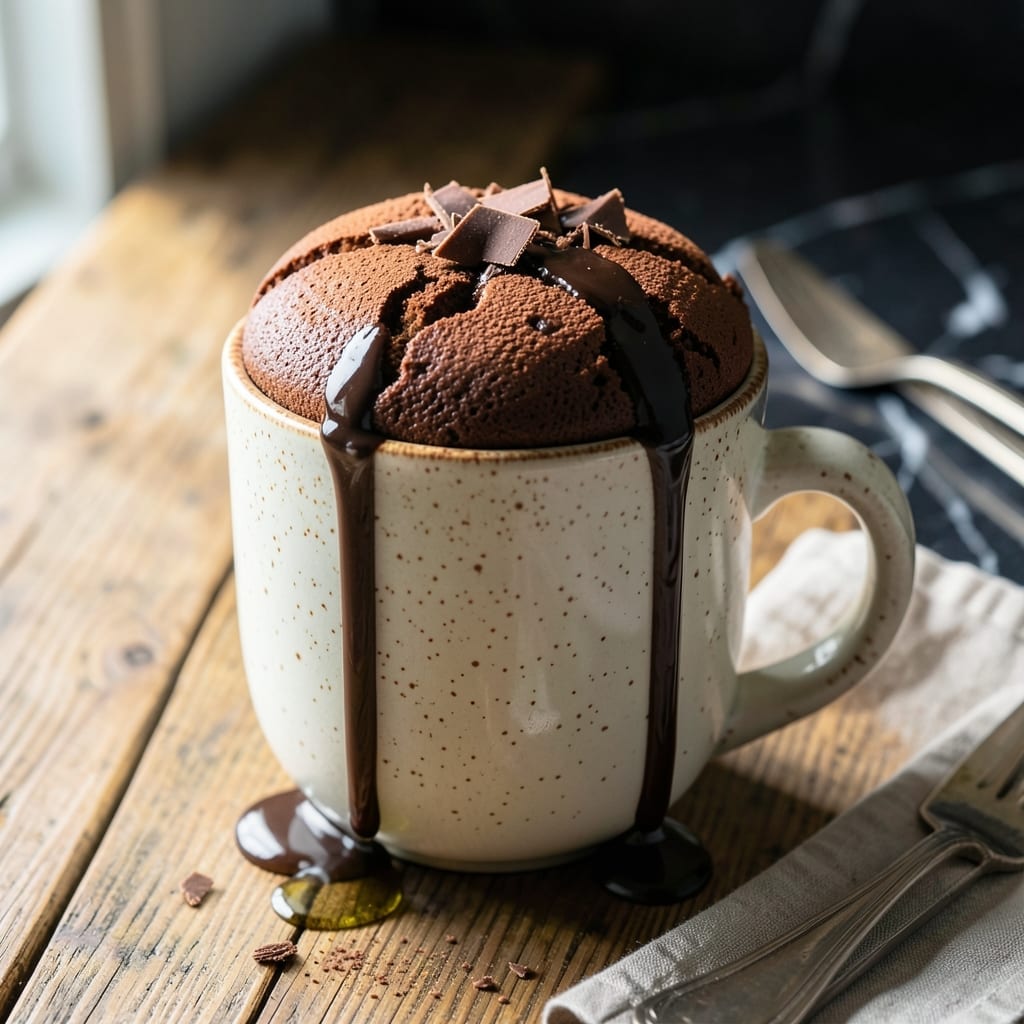
This single-serve chocolate mug cake delivers rich, decadent flavor without any dairy. A 5-minute solution for sudden cravings.
With just a few pantry staples and a microwave, you can enjoy warm, moist cake whenever the mood strikes. No oven, no milk, no problem.
Ingredients for Mug Cake Recipe No Milk
Pantry staples come together for this quick, dairy-free chocolate treat.
| Ingredient | Amount | Notes |
|---|---|---|
| All-Purpose Flour 🌾 | ¼ cup | Sifted for lighter texture |
| Granulated Sugar 🍚 | 3 tbsp | White or coconut sugar |
| Unsweetened Cocoa Powder 🍫 | 2 tbsp | Dutch-process for richer flavor |
| Baking Powder 🧂 | ¼ tsp | Ensures proper rise |
| Salt 🧂 | 0.125 tsp | Fine grain preferred |
| Vegetable Oil 🫒 | 3 tbsp | Or melted coconut oil |
| Vanilla Extract 🌿 | ½ tsp | Pure extract recommended |
| Water 💧 | ¼ cup | Or plant-based milk if preferred |
| Maple Syrup 🍁 | 1 tbsp | For natural sweetness |
| Chocolate Chips 🍫 | 2 tbsp | Dairy-free dark chocolate |
[recipe_ingredient_scaler]
The cocoa powder matters here. Hershey’s Special Dark or Ghirardelli Dutch-process give that deep chocolate flavor. I keep a bag of it in my Costco haul for emergencies like this. The flour should be fresh—if it smells musty, toss it. Vanilla extract is worth the splurge; McCormick or Nielsen-Massey are my go-tos (the imitation stuff just doesn’t cut it).
No cocoa powder? Melted dark chocolate at half the amount works in a pinch. Out of maple syrup? Agave or date syrup sub 1:1. The oil can be swapped for applesauce if you’re watching calories (but texture changes slightly). Enjoy Life makes great dairy-free chocolate chips—find them at Whole Foods or Target. No water? Any plant-based milk (oat, almond) adds richness.
This keeps 2-3 days covered at room temp, but let’s be real—it’s gone in minutes. For longer storage, mix dry ingredients in advance, then just add wet when ready to make. Stays fresh for 1 month in a sealed jar.
Why You’ll Love This Recipe
- 3-Minute Fix: I mix the dry ingredients in a mug, add water, microwave—done. No bowls, no mess.
- Rich Chocolate Hit: The cocoa powder gives it that deep, fudgy taste I crave without any dairy.
- Late-Night Rescue: Honestly, it’s my go-to when the sweet tooth strikes at 10 PM and the pantry’s almost bare.
- Penny-Wise Treat: Flour, sugar, cocoa—stuff I always have. Feeds my dessert habit without blowing my grocery budget.
Step-by-Step Instructions for Single-Serve Chocolate Indulgence
This no-milk method delivers rich, moist results in minutes with minimal effort.
Step 1: Combine Dry Ingredients
In a microwave-safe mug, whisk together the 0.25 cup All-Purpose Flour, 3 tbsp Granulated Sugar, 2 tbsp Unsweetened Cocoa Powder, 0.25 tsp Baking Powder, and 0.125 tsp Salt until no lumps remain. I sift the flour first for a lighter texture.
The cocoa powder should be fully incorporated—you’ll see the mixture turn a rich, uniform chocolate color. This step ensures even distribution of leavening agents for proper rise.
Step 2: Add Wet Ingredients and Mix
Pour in the 3 tbsp Vegetable Oil, 0.5 tsp Vanilla Extract, 0.25 cup Water, and 1 tbsp Maple Syrup. Stir vigorously with a fork for 30-45 seconds until the batter is smooth and glossy.
The batter will be thick but pourable. If it seems too dense, add a splash more water—just enough to loosen it slightly. The maple syrup adds depth and natural sweetness without overpowering.
Step 3: Fold in Chocolate Chips
Sprinkle the 2 tbsp Chocolate Chips over the batter and fold them in gently. I like to reserve a few chips to sprinkle on top before microwaving for extra melty pockets.
The chips will soften as the cake cooks, creating gooey chocolate bursts. If using dairy-free dark chocolate, ensure it’s finely chopped for even melting.
Step 4: Microwave to Perfection
Microwave on high for 1 minute, then check the center. If it’s still wet, cook in 10-15 second increments until the top looks dry and slightly domed. Mine usually takes 1 minute 20 seconds total.
Don’t overcook—it’ll continue setting as it rests. The edges should pull away slightly from the mug, and a toothpick inserted in the center should come out with a few moist crumbs.
Step 5: Rest and Serve Warm
Let the mug cake sit undisturbed for 1-2 minutes before digging in. This brief rest allows the structure to set and prevents a gummy texture.
Serve warm, straight from the mug, with a dusting of cocoa powder or a scoop of ice cream if desired. The contrast of warm cake and cool topping is unbeatable.
Pro Tips For Making Mug Cake Recipe No Milk
- Microwave in Bursts: Cook the mug cake in 20-second intervals—microwaves vary, and I learned this the hard way after pulling out a sad, overcooked hockey puck.
- Sift the Cocoa: Sounds fussy, but sifting the cocoa powder first prevents those annoying dry clumps that never quite mix in.
- Skip Overmixing: Stir just until the flour disappears—overmixing makes mug cakes tough, and after ruining a few, I finally stopped treating the batter like a science experiment.
- Add a Pinch Extra: Double-check the baking powder amount; a scant ½ teaspoon works better than a level one for a proper rise in this small batch.
Essential Equipment for mug cake recipe no milk
Microwave-Safe Mug
The foundation of this recipe. Use a 12-16 oz microwave-safe ceramic mug—I love my Stone Lain mugs from Target. Avoid metal or mugs with metallic trim. The size matters; too small and it overflows, too large and it won’t cook evenly. 🔥
Mixing Tools
A simple fork works perfectly for mixing the batter directly in the mug. For smoother batter, I sometimes use a mini whisk from OXO. Avoid electric mixers—overmixing can make your cake dense.
Measuring Essentials
Accurate measurements ensure consistent results. I use OXO Good Grips measuring cups and spoons. For the cocoa powder, spoon it into the measuring spoon and level it off. A kitchen scale is optional but helpful for the flour.
Toothpick Test
An essential tool for checking doneness. Insert a wooden toothpick into the center—it should come out with a few moist crumbs, not wet batter. I keep a stash in my utensil drawer just for baking.
Resting Surface
After microwaving, let your cake rest on a heat-safe surface. I use a wire cooling rack or a wooden cutting board. This prevents the bottom from getting soggy and lets the cake set properly.
Optional Toppings
For serving, I love adding a dusting of powdered sugar or a dollop of dairy-free whipped cream. A fine-mesh sieve helps dust the sugar evenly. These aren’t essential but make the experience feel extra special. ✨
Nutrition Facts
Frequently Asked Questions
Can I use a different liquid instead of water?
Any plant-based milk like almond, oat, or coconut works perfectly. They may add slight flavor variations but maintain the moist texture. Avoid dairy milk to keep it truly milk-free.
Why did my cake turn out dry?
Overmicrowaving is the usual culprit. Start with 1 minute, then check in 10-15 second bursts. Also, ensure you’re using the exact 12-16 oz mug size for even cooking.
Can I make this without eggs?
Yes! This recipe is naturally egg-free. The baking powder provides lift, while oil and water create moisture. No substitutions needed for a vegan-friendly result.
How do I know when it’s done?
The top should look dry and slightly domed. Insert a toothpick—it should come out with a few moist crumbs, not wet batter. Let it rest for 1-2 minutes before eating.

Trained in classic French technique but raised on slow-cooked ribs and spicy rubs, she blends culinary skill with smoke and soul.
- Recipe for Boneless Pork Chops in Cast Iron Skillet: Sear and Baste to Juicy Perfection - October 3, 2026
- Recipe for Boneless Cross Rib Roast: Slow-Roasted Beef with Herb Crust - October 3, 2026
- Hamburgers in Sauce Recipe Crock Pot: Slow-Cooked Savory Delight - October 3, 2026