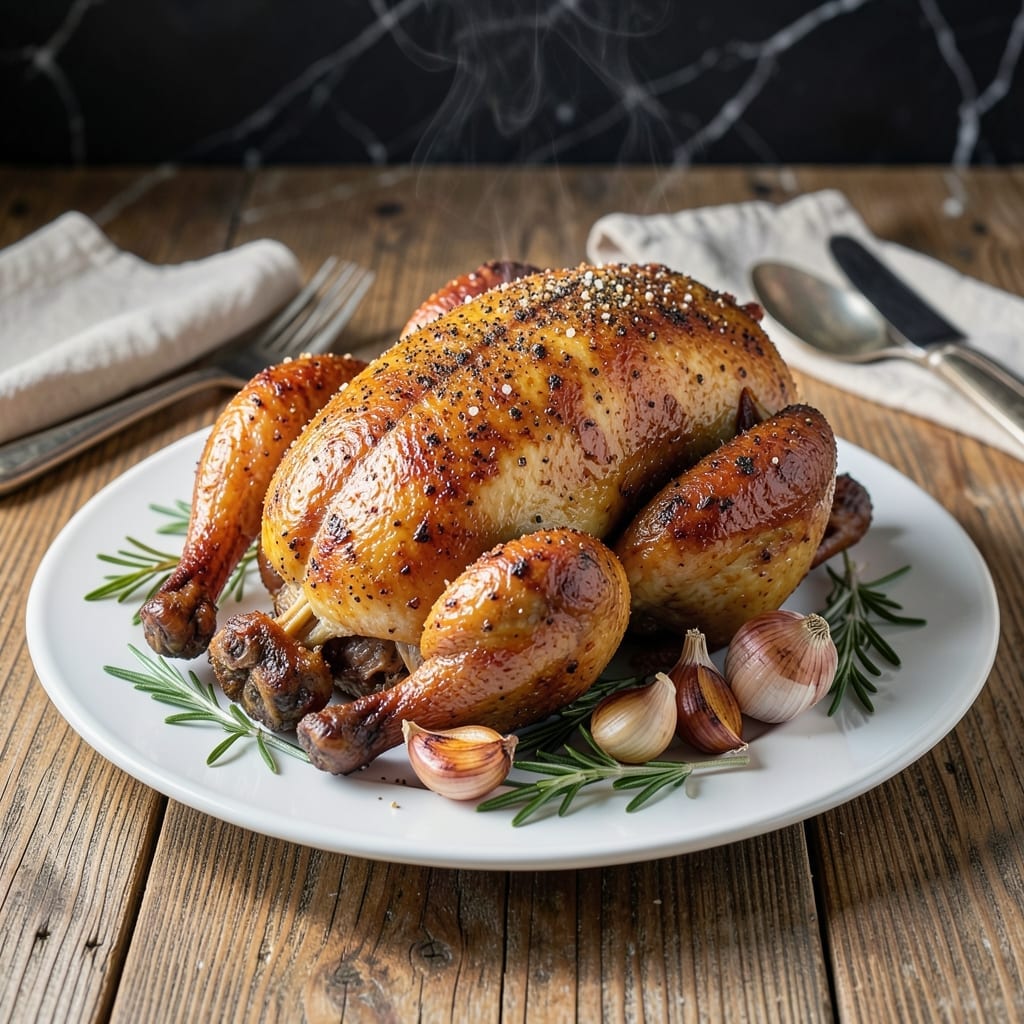
This Ninja Foodi method delivers juicy chicken with charred skin using one appliance. The multi-cooker function ensures even cooking while the grill feature adds that perfect crisp finish.
I developed this technique to combine the convenience of a pressure cooker with the flavor of grilled meat. The result is tender, flavorful chicken with professional-quality results every time.
Ingredients for Ninja Foodi Grill Roast Chicken
Fourteen ingredients transform into juicy, charred perfection in your Ninja Foodi appliance.
| Ingredient | Amount | Notes |
|---|---|---|
| Whole Chicken 🍗 | 4 lb | Giblets removed, patted dry |
| Kosher Salt 🧂 | 1 ½ tbsp | Diamond Crystal preferred for even seasoning |
| Black Pepper 🌶️ | 1 tsp | Freshly ground for maximum flavor |
| Garlic Powder 🧄 | 1 tbsp | Not garlic salt substitute |
| Onion Powder 🧅 | 1 tbsp | Enhances depth of flavor |
| Smoked Paprika 🌶️ | 1 tsp | Adds authentic grill flavor |
| Dried Thyme 🍃 | 1 tsp | Rubbed between fingers to release oils |
| Dried Rosemary 🌿 | 1 tsp | Crushed lightly before using |
| Olive Oil 🫒 | 2 tbsp | Extra-virgin for best results |
| Unsalted Butter 🧈 | 2 tbsp | Melted for basting |
| Lemon 🍋 | 1 whole | Zest and juice reserved |
| Chicken Broth 🥣 | ½ cup | Low-sodium preferred for control |
| Fresh Rosemary Sprigs 🌿 | 4 pieces | For cavity aromatics |
| Fresh Thyme Sprigs 🍃 | 4 pieces | For cavity aromatics |
| Yellow Onion 🧅 | 1 whole | Quartered for cavity |
[recipe_ingredient_scaler]
The whole chicken quality is non-negotiable—opt for air-chilled, organic birds from Whole Foods or Trader Joe’s for superior texture. The skin must be dry before seasoning to achieve that signature char. Diamond Crystal kosher salt is preferred by professional kitchens for its clean flavor and even distribution. The smoked paprika and fresh herbs create the authentic grill profile that defines this technique.
No fresh herbs? Dried at one-third the amount works in the rub, though fresh in the cavity is ideal. Short on broth? Water with a bouillon cube substitutes adequately. The butter can be omitted for a leaner result, but the basting step contributes significantly to the final moisture. Avocado oil may replace olive oil if you prefer a higher smoke point.
The seasoned chicken can rest in the refrigerator for up to 24 hours before cooking, which enhances flavor penetration. Leftovers keep in the refrigerator for 4-5 days and reheat best in the Ninja Foodi using the air crisp function to maintain skin texture.
Why You’ll Love This Recipe
- One Pot Wonder: I toss the chicken in, sprinkle the salt, pepper, garlic and onion powder, then let the Ninja Foodi do the rest—no flipping, no fuss.
- That Crispy Skin: Honestly, the way the grill function chars the outside while keeping the inside juicy? It’s the reason I make this every Sunday.
- Feeds Everyone: Between us, it’s my go-to for family dinners, meal prep, or even a casual get-together.
- Leftovers for Days: One chicken turns into sandwiches, tacos, or soup—saves me time and money all week.
Step-by-Step Instructions for Ninja Foodi Grill Roast Chicken
Master the technique that delivers crispy skin and juicy meat using your multi-cooker’s unique capabilities.
Step 1: Prepare and Season the Whole Chicken
Begin by ensuring the whole chicken is thoroughly patted dry—this is essential for achieving crispy skin. I rub the entire surface with the 1.5 tbsp Kosher Salt, 1 tsp Black Pepper, 1 tbsp Garlic Powder, 1 tbsp Onion Powder, 1 tsp Smoked Paprika, 1 tsp Dried Thyme, and 1 tsp Dried Rosemary.
The dried herbs should be rubbed between your fingers to release their oils before application. This spice blend creates a flavorful crust while enhancing the natural taste of the chicken. Let the seasoned chicken sit at room temperature for 30 minutes to allow the salt to penetrate the meat.
Step 2: Prepare the Cavity and Grill Setup
Stuff the cavity of the whole chicken with the 1 whole Yellow Onion (quartered), 4 pieces Fresh Rosemary Sprigs, 4 pieces Fresh Thyme Sprigs, and half of the 1 whole Lemon. These aromatics infuse the meat with subtle, complementary flavors during cooking.
Insert the grill grate into the Ninja Foodi and set it to the “Grill” function at 375°F. Preheat for 5 minutes to ensure the cooking surface is properly heated. This temperature provides the ideal balance between charring the skin and cooking the meat through without drying it out.
Step 3: Grill and Rotate for Even Cooking
Place the whole chicken breast-side up on the grill grate. Brush the surface with the 2 tbsp Olive Oil to promote browning. Close the lid and grill for 30 minutes.
After 30 minutes, carefully flip the chicken breast-side down using tongs. Brush with the remaining 2 tbsp Olive Oil and the 2 tbsp Unsalted Butter (melted). This basting step adds richness and helps develop a deep golden color. Grill for another 25-30 minutes until the internal temperature reaches 165°F in the thickest part of the thigh.
Step 4: Finish with Broth and Rest
Transfer the chicken to a cutting board and pour the 0.5 cup Chicken Broth into the Ninja Foodi. Place the grill grate back in and set the chicken on it, breast-side up. Close the lid and let it steam for 5 minutes to enhance moisture.
Remove the chicken and let it rest for 10-15 minutes before carving. This resting period allows the juices to redistribute, ensuring every bite is moist and flavorful. The skin should be deeply browned and crisp, while the meat remains tender and juicy throughout.
Pro Tips For Making Ninja Foodi Grill Roast Chicken
- Pat It Dry: I learned this the hard way—skip patting the chicken dry and you’ll steam it instead of grill it. Use paper towels to remove every bit of moisture for crispy skin.
- Season Under Skin: Sounds weird, but it works: loosen the skin over the breasts and rub the salt, garlic powder, and onion powder directly onto the meat. The flavor sinks in deeper.
- Preheat the Grill: After burning three batches, I finally figured out the Foodi needs a full 10-minute preheat on “Grill” mode to sear properly. Don’t rush this.
- Use a Meat Thermometer: Resist the urge to guess—insert the thermometer into the thickest part of the thigh and pull it at 165°F. No more dry chicken.
Health Benefits of ninja foodi grill roast chicken
Lean Protein Power
A 4 lb whole chicken provides about 120g of protein per serving, supporting muscle repair and growth. Chicken is a complete protein, meaning it contains all nine essential amino acids your body needs but can’t produce on its own. 💪
Rich in B Vitamins
This dish delivers a significant dose of B6 and B12, which are crucial for energy metabolism and nervous system health. A single serving covers about 30% of your daily B6 needs and 15% of B12.
Minimal Saturated Fat
Compared to red meats, chicken contains far less saturated fat—just 3g per serving in skinless portions. Even with the skin on, it’s a heart-healthier option that doesn’t compromise on flavor or juiciness.
Iron and Zinc Boost
Dark meat portions are particularly rich in heme iron (more easily absorbed) and zinc. These minerals support immune function and oxygen transport. I often pair this with vitamin C-rich sides to enhance iron absorption. ✨
Low Calorie Density
At approximately 250-300 calories per serving (without skin), this recipe offers excellent nutritional value. The Ninja Foodi method locks in moisture without adding excess fat, making it a smart choice for calorie-conscious diners.
Bone Health Support
Chicken contains phosphorus and calcium, both vital for maintaining strong bones and teeth. The cavity aromatics like onion and lemon add small amounts of these minerals while enhancing the overall flavor profile.
Nutrition Facts
Frequently Asked Questions
Do I need to preheat the Ninja Foodi?
Yes, preheating for 5 minutes at 375°F ensures even cooking. This step helps achieve that perfect char on the skin while locking in juices.
Can I use chicken pieces instead of whole?
Reduce cooking time to 20-25 minutes total. Bone-in pieces work best for moisture retention, but adjust the internal temp to 165°F for all cuts.
Why rest the chicken before carving?
Resting for 10-15 minutes lets juices redistribute. Skipping this step can lead to dry meat, as slicing too soon causes flavorful juices to escape.
What if my skin isn’t crispy enough?
Try the air crisp function for 5-10 minutes after grilling. Ensure the chicken was thoroughly patted dry before seasoning for maximum crispiness.

Trained in classic French technique but raised on slow-cooked ribs and spicy rubs, she blends culinary skill with smoke and soul.
- Recipe for Boneless Pork Chops in Cast Iron Skillet: Sear and Baste to Juicy Perfection - October 3, 2026
- Recipe for Boneless Cross Rib Roast: Slow-Roasted Beef with Herb Crust - October 3, 2026
- Hamburgers in Sauce Recipe Crock Pot: Slow-Cooked Savory Delight - October 3, 2026