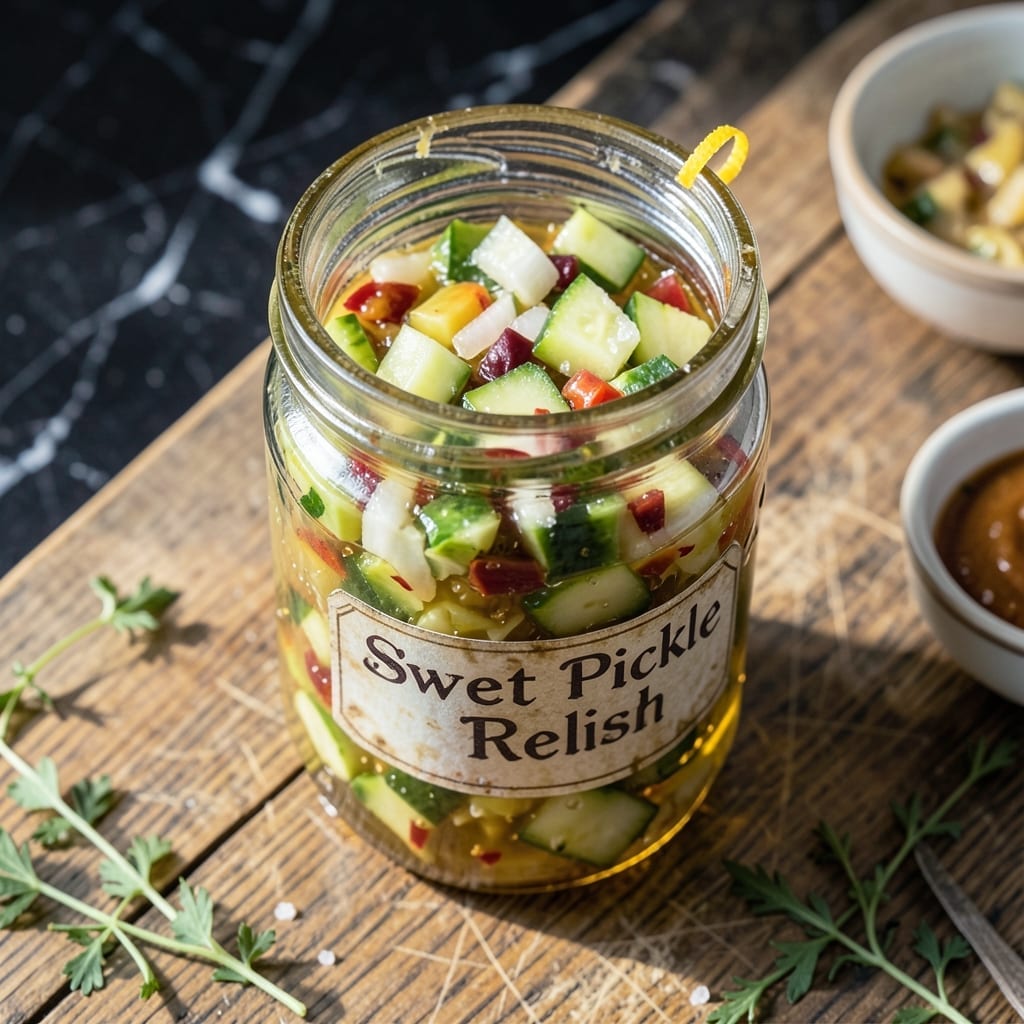
This traditional relish captures the bright, tangy-sweet essence of old-fashioned canning at its best. The process transforms fresh vegetables into a zesty preserve that elevates sandwiches and hot dogs.
With simple ingredients and proven methods, this recipe ensures a homemade condiment that delivers consistent flavor in every jar. Proper canning techniques guarantee shelf-stable results for months of enjoyment.
Ingredients for Old Fashioned Sweet Pickle Relish Recipe for Canning
Ten ingredients transform fresh produce into this tangy, sweet preserve perfect for canning.
| Ingredient | Amount | Notes |
|---|---|---|
| Green Cabbage 🥬 | 4 cups | Finely shredded, tightly packed |
| Cucumbers 🥒 | 4 cups | Peeled, seeded, finely diced |
| White Onion 🧅 | 2 cups | Finely diced, sharp flavor |
| Red Bell Pepper 🌶️ | 1 cup | Finely diced, for color |
| Pickling Salt 🧂 | 1 tbsp | Non-iodized, kosher style |
| Granulated Sugar 🍚 | 2 cups | Fine white sugar preferred |
| Apple Cider Vinegar 🍏 | 2 cups | 5% acidity required |
| Yellow Mustard Seeds 🌿 | 1 tbsp | Whole seeds, not powder |
| Celery Seeds 🌿 | 1 tsp | Essential for authentic flavor |
| Turmeric Powder 🌶️ | ½ tsp | For color and earthiness |
[recipe_ingredient_scaler]
The vegetables are everything here. Farmers market cabbage and cucumbers give the best crunch and flavor—avoid waxed produce as the coating can interfere with pickling. Ball or Kerr jars are the gold standard for canning, and pickling salt is non-negotiable (iodized salt can cloud the brine). Look for 5% acidity vinegar on the label; Heinz or Bragg are reliable brands with consistent quality.
No celery seeds? Dill seeds at half the amount work in a pinch, though the flavor shifts slightly. White vinegar can substitute for apple cider, but it’s sharper—add an extra tablespoon of sugar to balance. For a clearer relish, soak the diced veggies in ice water for an hour before cooking. Turmeric is for color, so skip it if you prefer a paler relish (the taste difference is minimal).
This keeps beautifully on the shelf for 12-18 months if properly canned. Once opened, refrigerate and use within 1 month. The flavor deepens over time—wait at least 24 hours before tasting (worth the patience). Always use clean, dry spoons to prevent contamination.
Why You’ll Love This Recipe
- No-Fuss Canning: Honestly, the most time-consuming part is chopping the cucumbers and cabbage—and even that’s just 10 minutes of work.
- Sweet-Tangy Crunch: That first bite with the red bell pepper’s pop and the onion’s sharpness mellowed by the brine? I keep sneaking spoonfuls straight from the jar.
- Pantry MVP: I stir it into potato salad, top hot dogs, or just eat it with crackers—it’s the one condiment I never run out of.
- Stretches the Harvest: A bushel of cucumbers from the market turns into 8 pints of relish. I’ll be gifting jars all winter.
Step-by-Step Instructions for Old Fashioned Sweet Pickle Relish
This method delivers consistent, shelf-stable results with authentic flavor and texture.
Step 1: Prepare and Salt the Vegetables
Combine the 4 cups Green Cabbage, 4 cups Cucumbers, 2 cups White Onion, and 1 cup Red Bell Pepper in a large non-reactive bowl. The finely diced pieces should be uniform for even pickling and consistent texture in every bite.
Sprinkle the 1 tbsp Pickling Salt evenly over the vegetables. Toss thoroughly to distribute the salt, which will draw out excess moisture through osmosis. Cover and let stand at room temperature for 2 hours—you’ll see a pool of liquid form at the bottom as the salt works its magic.
Step 2: Drain and Rinse the Vegetables
After salting, drain the vegetables in a colander and rinse under cold running water to remove excess salt. This step is critical—failing to rinse properly will result in an unpleasantly salty final product that overpowers the sweet-tangy balance we’re creating.
Press the vegetables gently with your hands to remove as much liquid as possible. You should have about 8 cups of drained vegetable mixture. The pieces will appear slightly wilted but should retain their distinct shapes for proper texture.
Step 3: Create the Pickling Syrup
In a large stainless steel or enameled pot, combine the 2 cups Granulated Sugar, 2 cups Apple Cider Vinegar, 1 tbsp Yellow Mustard Seeds, 1 tsp Celery Seeds, and 0.5 tsp Turmeric Powder. The vinegar’s acidity will balance the sugar’s sweetness while the spices develop their signature flavor profile.
Bring the mixture to a full rolling boil over medium-high heat, stirring constantly until the sugar fully dissolves. This creates a clear syrup that will properly penetrate the vegetables. You’ll notice the turmeric giving the liquid a golden hue—this is normal and contributes to the relish’s characteristic color.
Step 4: Combine and Simmer the Relish
Add the drained vegetable mixture to the boiling syrup. Stir well to ensure all pieces are submerged and coated with the liquid. The volume will be substantial, so use a pot large enough to accommodate everything with 2 inches of headspace to prevent boiling over.
Return to a boil, then reduce heat to medium-low and simmer for 10 minutes, stirring occasionally. The vegetables should become translucent at the edges but retain a slight bite—this indicates they’re properly pickled without being mushy. The liquid will thicken slightly as the natural pectins in the vegetables release.
Step 5: Process for Shelf-Stable Preservation
Ladle the hot relish into prepared, sterilized canning jars, leaving ½-inch headspace. Remove any air bubbles by running a clean knife or bubble tool around the inside of each jar. Wipe the rims with a clean, damp cloth to ensure a proper seal.
Process the jars in a boiling water canner for 10 minutes (adjust for altitude if needed). The lids should seal with a distinct popping sound as they cool, creating a vacuum that preserves the relish for up to 1 year in a cool, dark place. The relish will develop its full flavor profile after resting for at least 24 hours.
Pro Tips For Making Old Fashioned Sweet Pickle Relish Recipe For Canning
- Salt Overnight: Sprinkle the chopped cabbage, cucumbers, and onions with pickling salt and let them sit in a colander for 8-12 hours. I learned this the hard way—skipping this step leaves your relish watery and bland.
- Uniform Dice: Cut all your veggies—cabbage, cucumbers, onion, and bell pepper—into consistent 1/4-inch pieces. Sounds tedious, but it ensures even cooking and a better texture in every bite.
- Avoid Vinegar First: Steer clear of pouring vinegar over the salted vegetables before rinsing. Rinse and drain them thoroughly first, or your relish will taste harsh instead of tangy-sweet.
- Pre-Cook Peppers: Sauté the red bell peppers for 3-4 minutes before mixing them in. My grandmother swore by this, and it softens their crunch just enough without turning them to mush during canning.
Creative Variations of This old fashioned sweet pickle relish recipe for canning
Spicy Kick Variation
For heat lovers, add 1 finely diced jalapeño or ½ tsp red pepper flakes to the vegetable mix. I recommend keeping the seeds for extra spice. The heat will mellow slightly during canning but still provide a pleasant kick. 🌶️
Sweet & Tangy Twist
Replace ½ cup of granulated sugar with ½ cup brown sugar for deeper caramel notes. Add ¼ cup diced pineapple with the veggies for tropical sweetness. The molasses in brown sugar pairs beautifully with the vinegar’s tang.
Zucchini Addition
Swap 1 cup of cucumbers for 1 cup finely diced zucchini. This garden-fresh variation uses summer produce. The zucchini softens nicely while keeping texture. I love this for using up an abundant harvest.
Herb-Infused Version
Add 2 sprigs fresh dill to the syrup while boiling, removing before canning. Alternatively, stir in 1 tsp dried dill weed with the seeds. This gives a subtle herbal note that reminds me of classic deli pickles.
Low-Sugar Option
Reduce sugar by half and add 1 packet stevia or ¼ cup honey to compensate. The texture may be slightly softer, but the tangy flavor remains. Process time stays the same. I find this works best for those watching sugar intake.
Colorful Mix
Add ½ cup diced carrots or ½ cup cauliflower for extra color and crunch. The carrots add natural sweetness while cauliflower absorbs the brine well. Both maintain the relish’s signature texture. 🥕
Nutrition Facts
Frequently Asked Questions
How long does homemade relish last before canning?
Store the cooked relish in the fridge for up to 1 week before canning. For best results, process within 24-48 hours of making to preserve freshness and prevent spoilage.
Why do I need to use pickling salt instead of regular salt?
Pickling salt is pure sodium chloride without additives that can cloud your brine. Regular table salt contains anti-caking agents that may turn your relish murky. The difference is visible in the final product’s clarity.
Can I use a different type of vinegar?
White vinegar works but is sharper—add 1-2 tbsp extra sugar to balance. Avoid balsamic or malt vinegar as their flavors overpower. Always use 5% acidity vinegar for safe canning.
My jars didn’t seal—what went wrong?
Common causes: not enough headspace, food on the rim, or insufficient processing time. Always wipe jar rims clean and use new lids. Reprocess within 24 hours with fresh lids if needed.

Trained in classic French technique but raised on slow-cooked ribs and spicy rubs, she blends culinary skill with smoke and soul.
- Recipe for Boneless Pork Chops in Cast Iron Skillet: Sear and Baste to Juicy Perfection - October 3, 2026
- Recipe for Boneless Cross Rib Roast: Slow-Roasted Beef with Herb Crust - October 3, 2026
- Hamburgers in Sauce Recipe Crock Pot: Slow-Cooked Savory Delight - October 3, 2026