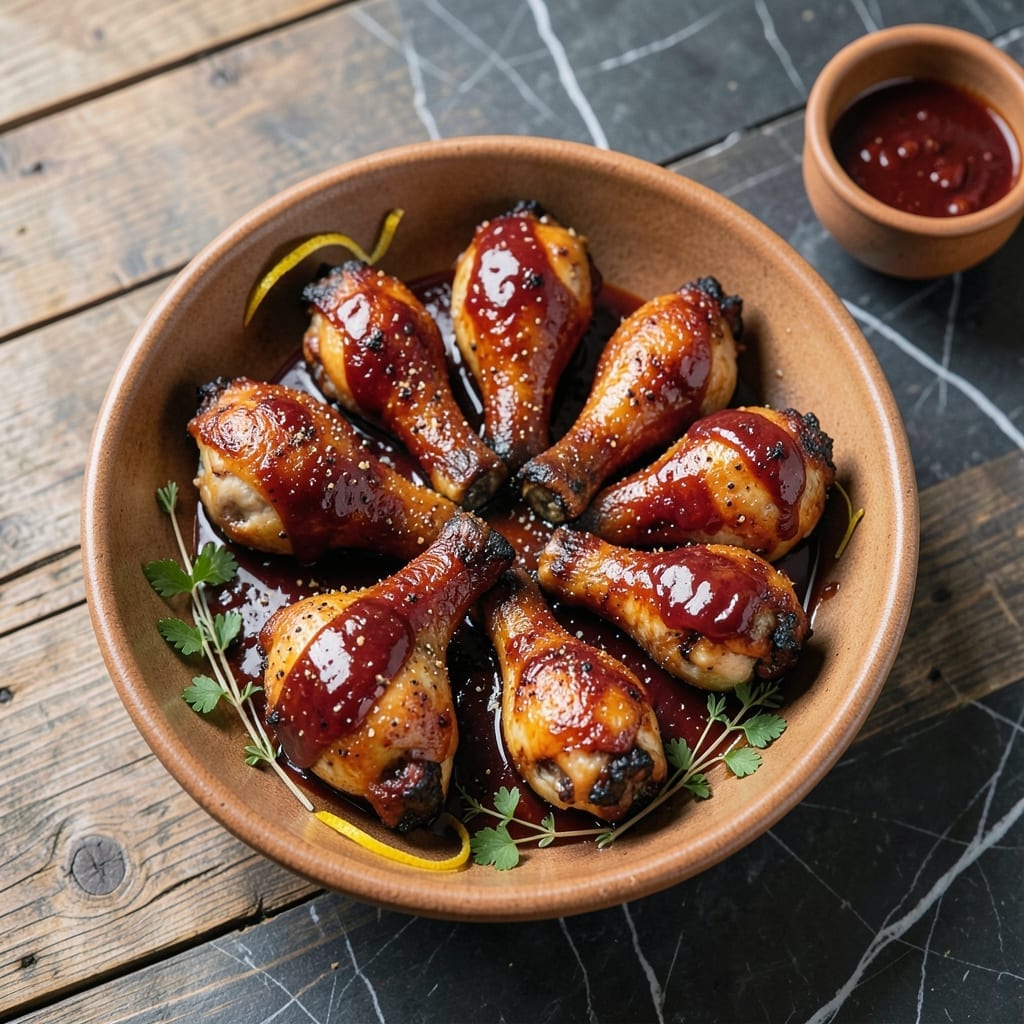
I developed this method to achieve crispy skin on oven-baked chicken without a smoker. The high-heat start locks in juices while creating that coveted texture.
After years of competition BBQ, I know the secret is patience—letting the sauce caramelize in the final minutes for that sticky sweet glaze we all love.
Ingredients for Oven Baked Barbecue Chicken Legs
Pantry staples plus chicken legs. Just a few extras for that competition-worthy crisp.
| Ingredient | Amount | Notes |
|---|---|---|
| Chicken Legs 🍗 | 3 lb | Drumsticks and thighs, skin-on |
| Barbecue Sauce 🍯 | 1 ½ cups | High-quality, thick variety |
| Olive Oil 🫒 | 2 tbsp | For coating chicken skin |
| Kosher Salt 🧂 | 1 ½ tsp | Diamond Crystal preferred |
| Black Pepper 🌶️ | 1 tsp | Freshly ground for best flavor |
| Garlic Powder 🧄 | 1 tsp | Not garlic salt |
| Onion Powder 🧅 | 1 tsp | Adds depth to dry rub |
| Smoked Paprika 🌶️ | 1 tsp | Essential for BBQ flavor |
| Brown Sugar 🧈 | 1 tbsp | Light or dark, packed |
| Apple Cider Vinegar 🍏 | 1 tbsp | Balances sweetness in sauce |
| Dijon Mustard 🟡 | 1 tsp | For tangy depth in rub |
[recipe_ingredient_scaler]
The chicken legs are the star—skin-on, bone-in for maximum crisp and flavor. I get mine from Costco (great value, consistent quality) or the local butcher for special occasions. Look for pieces that are similar in size so they cook evenly. Pat them very dry with paper towels before seasoning—this is non-negotiable for achieving that coveted crispy skin the intro promises.
No smoked paprika? Regular paprika plus a pinch of liquid smoke works in a pinch. Swap Dijon for yellow mustard if needed, but the tang will be milder. The brown sugar can be omitted, but it helps the skin caramelize beautifully. For the barbecue sauce, Stubb’s or Sweet Baby Ray’s are my go-tos, but use whatever you love. Thicker sauces cling better to the chicken.
Raw chicken keeps in the fridge for 1-2 days max—use it or freeze it. Leftovers? They reheat surprisingly well. Store in an airtight container for up to 4 days, or freeze for 3 months. The crispiness won’t survive storage, but the flavor absolutely will.
Why You’ll Love This Recipe
- Set and Forget: I toss the chicken legs with olive oil, salt, and pepper, then let the oven do all the work.
- Sticky, Smoky Bite: The barbecue sauce caramelizes in the oven, giving each leg that perfect sweet-spicy glaze.
- Weeknight Rescue: Honestly, this is my go-to when I need dinner ready between soccer practice and bedtime.
- Budget-Friendly Feast: A pack of chicken legs and a bottle of sauce feed my family for less than takeout.
Step-by-Step Instructions for Oven Baked Barbecue Chicken Legs
Here’s how I achieve fall-off-the-bone tenderness with a sticky glaze and crispy skin every time.
Step 1: Season the Chicken Legs with a Flavorful Dry Rub
Pat the 3 lb chicken legs dry with paper towels—this is non-negotiable for crispy skin. In a small bowl, mix the 1.5 tsp kosher salt, 1 tsp black pepper, 1 tsp garlic powder, 1 tsp onion powder, 1 tsp smoked paprika, 1 tbsp brown sugar, 1 tbsp apple cider vinegar, and 1 tsp Dijon mustard until it forms a thick paste.
Rub this mixture all over the chicken legs, making sure to coat every crevice. The vinegar and mustard might seem odd, but they balance the sweetness and add depth. Let the seasoned chicken sit at room temperature for 15 minutes while the oven preheats.
Step 2: Sear for Crispy Skin Before Baking
Preheat your oven to 425°F. Heat the 2 tbsp olive oil in a large oven-safe skillet over medium-high heat. Once the oil shimmers, add the chicken legs skin-side down. Sear undisturbed for 5-6 minutes until the skin is deep golden brown and crispy.
Flip the chicken and sear the other side for 3-4 minutes. This step locks in juices and ensures the skin stays crispy throughout baking. Don’t skip it—this is what delivers on that crispy promise. Transfer the skillet to the preheated oven.
Step 3: Bake and Glaze for Sticky, Sweet Perfection
Bake the chicken legs for 20 minutes. Then, brush them generously with half of the 1.5 cups barbecue sauce, making sure to coat all sides. Return to the oven and bake for another 10 minutes.
Flip the chicken legs, brush with the remaining barbecue sauce, and bake for a final 5-10 minutes until the internal temperature reaches 175°F and the sauce is caramelized and sticky. The skin should be crispy, and the sauce should cling to the chicken in glossy, finger-licking layers.
Step 4: Rest and Serve
Remove the chicken from the oven and let it rest in the skillet for 5 minutes. This allows the juices to redistribute, ensuring every bite is moist and flavorful. The sauce will thicken slightly as it cools, creating that perfect sticky glaze.
Serve the chicken legs immediately, spooning any extra sauce from the skillet over the top. Garnish with fresh herbs if you like, but honestly, these are so packed with flavor they don’t need much else. The contrast of crispy skin and tender meat with that sweet, tangy glaze is what makes this dish unforgettable.
Pro Tips For Making Oven Baked Barbecue Chicken Legs
- Start Hot, Finish Low: Roast at 425°F for the first 20 minutes to render fat, then drop to 375°F for the remaining time—I learned this the hard way after ending up with dry meat and undercaramelized sauce.
- Pat Dry First: Blot the chicken legs with paper towels before seasoning; excess moisture steams instead of crisps, and I was skeptical until I tried it.
- Skip the Early Sauce: Brush on the barbecue sauce only in the last 15 minutes to prevent burning—after ruining two batches, I finally figured out the timing.
- Rest Before Serving: Let the legs rest 5-10 minutes after baking so the juices redistribute; sounds weird, but it actually changes the outcome.
Pro Cooking Tips for oven baked barbecue chicken legs
High-Heat Start
Always begin at 425°F to render fat quickly and create that crispy skin we promised. I learned this trick at a BBQ competition—lower temps just steam the chicken instead. The initial sear in the skillet at medium-high heat is non-negotiable for texture. 🔥
Sauce Timing
Wait until the 20-minute mark before adding sauce. Adding it too early prevents proper browning and can make the skin soggy. Use a silicone brush for even coverage, and don’t be shy—this is what creates that sticky glaze we all crave.
Double Glaze Method
Brush on half the barbecue sauce, bake 10 minutes, then flip and glaze again. This two-step process builds layers of flavor and ensures every bite gets that sweet, tangy coating. The second glaze caramelizes beautifully during the final 5-10 minutes.
Internal Temp Check
Use an instant-read thermometer to hit 175°F for dark meat. This is higher than standard chicken temp because we want that collagen to melt into the meat. I use a ThermoWorks Mk4—it’s my most trusted kitchen tool after my cast iron skillet.
Resting Matters
Let the chicken rest 5 minutes in the skillet. This lets juices redistribute and the sauce thicken slightly. Skipping this makes the first bite dry and the sauce runny—neither delivers on our crispy, sticky promises. 💡
Skillet Choice
Use a heavy oven-safe skillet like Lodge cast iron. It retains heat better than sheet pans and creates a better sear. The same skillet goes from stovetop to oven, making cleanup easier and flavor deeper.
Nutrition Facts
Frequently Asked Questions
Can I use chicken thighs instead of legs?
Bone-in, skin-on thighs work perfectly with the same method. Keep the 425°F oven temp and 175°F target, but reduce baking time to 25-30 minutes total.
Why do I need to pat the chicken dry first?
Moisture on the skin creates steam, which prevents crispiness. Drying ensures the medium-high heat sear works properly. This non-negotiable step is what delivers that promised crunch.
What if my sauce burns during baking?
Lower the oven to 400°F after applying sauce and tent with foil if needed. Next time, wait until the final 10 minutes to glaze. The sugar in BBQ sauce can burn at high heat.
How can I make this extra crispy?
Broil for 2-3 minutes after glazing, watching closely. Or place chicken on a wire rack over a baking sheet to allow air circulation on all sides.

Trained in classic French technique but raised on slow-cooked ribs and spicy rubs, she blends culinary skill with smoke and soul.
- Recipe for Boneless Pork Chops in Cast Iron Skillet: Sear and Baste to Juicy Perfection - October 3, 2026
- Recipe for Boneless Cross Rib Roast: Slow-Roasted Beef with Herb Crust - October 3, 2026
- Hamburgers in Sauce Recipe Crock Pot: Slow-Cooked Savory Delight - October 3, 2026