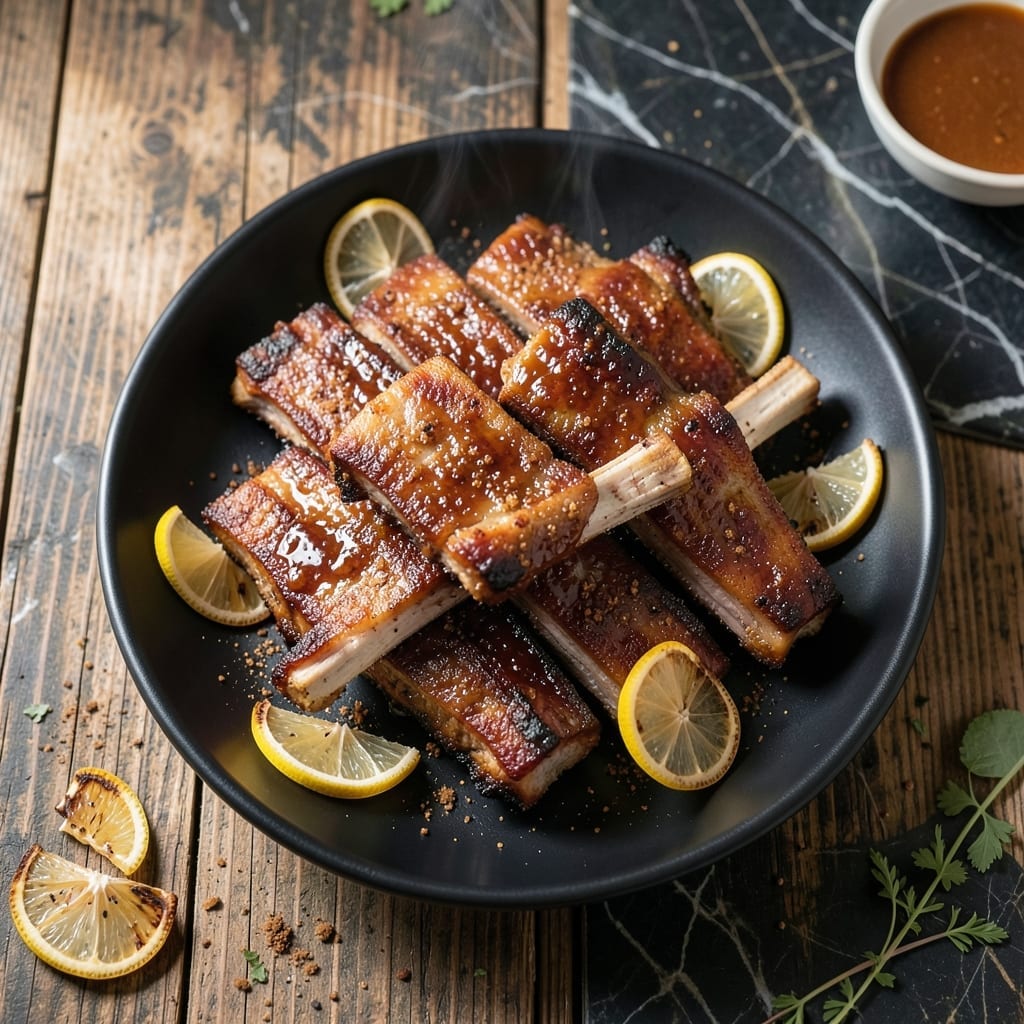
Achieving fall-off-the-bone ribs without a smoker is absolutely possible with this oven method. My years of pitmaster experience led to this precise technique that delivers tender meat and a smoky crust.
Using simple seasonings and careful temperature control, these ribs develop complex flavors. The result is restaurant-quality pork with a caramelized exterior and juicy interior, all in your home kitchen.
Ingredients for Oven Baked Pork Ribs
Transform simple seasonings into restaurant-quality ribs with this precise oven method.
| Ingredient | Amount | Notes |
|---|---|---|
| Pork Baby Back Ribs 🐖 | 4 lb | Full rack, membrane removed |
| Light Brown Sugar 🍚 | ½ cup | Packed, for rub sweetness |
| Smoked Paprika 🌶️ | 2 tbsp | For authentic smoky depth |
| Garlic Powder 🧄 | 1 tbsp | Not garlic salt substitute |
| Onion Powder 🧅 | 1 tbsp | Enhances savory base notes |
| Coarse Kosher Salt 🧂 | 1 tbsp | Diamond Crystal preferred for texture |
| Ground Black Pepper 🌶️ | 1 tsp | Freshly ground for potency |
| Chili Powder 🌶️ | 1 tsp | Mild heat, balanced flavor |
| Ground Cumin 🌿 | 1 tsp | Earthy warmth essential |
| Apple Cider Vinegar 🍏 | ¼ cup | For tangy balance cut |
| Liquid Smoke 💨 | 1 tsp | Hickory flavor recommended |
| Olive Oil 🫒 | 2 tbsp | For binding dry rub |
| Ketchup 🍅 | 1 cup | Base for finishing sauce |
| Worcestershire Sauce 🥫 | 2 tbsp | Adds umami complexity |
[recipe_ingredient_scaler]
The ribs are everything here. Baby back ribs deliver the best texture-to-fat ratio for oven cooking. Source from Costco or Sam’s Club for consistent quality and value. Look for racks with good marbling but avoid excessive fat caps. The membrane must be removed—this step ensures the rub penetrates properly and prevents a chewy bite (worth the extra minute).
No smoked paprika? Regular paprika plus a pinch of chipotle powder can approximate the flavor. Liquid smoke can be omitted, but the result won’t have that signature depth. For the vinegar, white vinegar works in a pinch, though cider vinegar’s fruitiness complements the pork better. The ketchup base can be swapped for barbecue sauce if you prefer a sweeter finish.
The dry rub can be mixed 24 hours ahead—store in an airtight container. Cooked ribs keep in the fridge for 4 days and reheat beautifully. For longer storage, freeze individual portions wrapped tightly in foil for up to 3 months.
Why You’ll Love This Recipe
- Hands-Off Cooking: I just season, pop them in the oven, and let the heat work its magic—no babysitting required.
- Sweet and Smoky: That light brown sugar caramelizes while the smoked paprika adds this deep, rich flavor that’s honestly hard to beat.
- Crowd Pleaser: Between us, I’ve served these at summer BBQs and cozy Sunday dinners, and they disappear every time.
- Budget-Friendly Feast: Pork baby back ribs on sale plus pantry staples means I can feed a hungry group without breaking the bank.
Step-by-Step Instructions for Oven Baked Pork Ribs
This method delivers fall-off-the-bone tenderness with a deeply caramelized crust, no smoker required.
Step 1: Prepare the Dry Rub and Season the Ribs
In a small bowl, combine the 0.5 cup light brown sugar, 2 tbsp smoked paprika, 1 tbsp garlic powder, 1 tbsp onion powder, 1 tbsp coarse kosher salt, 1 tsp ground black pepper, 1 tsp chili powder, and 1 tsp ground cumin. Stir until evenly distributed—the sugar should be fully incorporated with no visible streaks.
Pat the 4 lb pork baby back ribs dry with paper towels, ensuring the membrane has been removed from the bone side. This is critical for the rub to adhere properly and for the ribs to absorb maximum flavor. Rub the 2 tbsp olive oil evenly over both sides of the ribs, then apply the dry rub mixture generously, pressing it into the meat so it forms a thick, even crust.
Step 2: Wrap and Marinate for Maximum Flavor Penetration
Place the seasoned ribs on a large sheet of heavy-duty aluminum foil. Drizzle the 0.25 cup apple cider vinegar and 1 tsp liquid smoke evenly over the ribs, then wrap them tightly in the foil, creating a sealed pocket. This traps the steam and smoke flavor, allowing them to infuse deeply into the meat.
Let the ribs marinate in the refrigerator for at least 2 hours, or ideally overnight. The longer they sit, the more the flavors meld and the spices penetrate. When ready to cook, remove the ribs from the fridge and let them sit at room temperature for 30 minutes to ensure even cooking.
Step 3: Slow-Bake for Tender, Juicy Meat
Preheat your oven to 275°F. This low-and-slow temperature is key—it breaks down the collagen in the ribs without drying them out, resulting in that coveted pull-apart tenderness. Place the foil-wrapped ribs on a baking sheet and bake for 2.5 to 3 hours.
During this time, resist the urge to peek. The sealed foil environment steams the ribs, keeping them moist while the spices work their magic. You’ll know they’re ready when the meat has shrunk slightly from the bones and the internal temperature reaches 195-203°F on an instant-read thermometer.
Step 4: Finish with a Sticky, Smoky Glaze
Carefully remove the ribs from the foil, reserving any accumulated juices, and transfer them to a clean baking sheet. In a small bowl, whisk together the 1 cup ketchup and 2 tbsp Worcestershire sauce until smooth. Brush this mixture generously over the ribs, coating every surface.
Increase the oven temperature to 400°F and return the ribs to the oven, uncovered, for 15-20 minutes. This high-heat finish caramelizes the glaze, creating a sticky, glossy coating. Watch closely toward the end—the edges should be deeply browned but not burnt.
Step 5: Rest and Serve for Optimal Texture
Remove the ribs from the oven and transfer them to a cutting board. Tent loosely with foil and let them rest for 10 minutes. This allows the juices to redistribute throughout the meat, ensuring every bite is moist and flavorful.
Slice the ribs between the bones using a sharp knife. Serve immediately while hot, with extra glaze on the side if desired. The ribs should have a rich, smoky-sweet crust that gives way to tender, juicy meat with each bite.
Pro Tips For Making Oven Baked Pork Ribs
- Preheat to 275°F: Low and slow is non-negotiable for fall-off-the-bone ribs—I learned this the hard way after my first batch came out tough at 350°F.
- Pat ribs dry: Sounds weird, but it works: drying the ribs with paper towels before seasoning makes the rub stick better and the crust crispier.
- Skip the foil too early: After burning three batches, I finally figured out wrapping in foil for the first 2 hours keeps them from drying out—don’t peek.
- Add apple juice: I was skeptical until I tried it, but a quarter cup of apple juice in the foil with the ribs adds sweetness that pairs perfectly with the brown sugar.
Regional Styles of This Dish
Memphis Dry Rub
This Tennessee classic skips the sauce entirely. I use a heavy hand with smoked paprika and add 1 extra tbsp of brown sugar to the dry rub. The ribs emerge with a crunchy, flavorful crust that’s all about the spice blend. 🗺️
Kansas City Style
Here, it’s all about the sauce. I thicken the glaze with 2 tbsp molasses and add 1 tbsp honey to the ketchup base. The result is sticky, sweet ribs that are a staple at local BBQ competitions I frequent.
Carolina Vinegar
For a tangy twist, I replace the ketchup glaze with a mix of 1 cup apple cider vinegar and 2 tbsp Worcestershire. Brush this on during the final 20 minutes at 400°F for a North Carolina-inspired finish.
Texas Style
Big on beef? Try this with spare ribs instead. I add 1 tbsp coffee grounds to the dry rub for depth. The larger ribs need an extra 30 minutes at 275°F to get tender.
Asian Fusion
Swap the dry rub for a marinade of soy sauce, ginger, and garlic. I often forage wild herbs to add to the mix. The glaze becomes a mix of hoisin and honey for a sweet-savory finish.
Nutrition Facts
Frequently Asked Questions
What temperature should my oven be set to?
Start with 275°F for the low-and-slow cooking phase. This breaks down the collagen without drying the meat. Finish at 400°F for caramelizing the glaze.
How long do I need to bake the ribs?
Plan for 2.5 to 3 hours at 275°F, then 15-20 minutes at 400°F. The ribs are done when the meat reaches 195-203°F internally.
Do I need to remove the membrane first?
Removing the membrane allows the rub to penetrate and prevents a chewy texture. Use a butter knife to lift it, then pull it off with a paper towel for grip.
Can I use a different type of ribs?
Yes, but adjust cooking time. Spare ribs may need an extra 30 minutes at 275°F. Baby back ribs are ideal for this method due to their tender texture.

Trained in classic French technique but raised on slow-cooked ribs and spicy rubs, she blends culinary skill with smoke and soul.
- Recipe for Boneless Pork Chops in Cast Iron Skillet: Sear and Baste to Juicy Perfection - October 3, 2026
- Recipe for Boneless Cross Rib Roast: Slow-Roasted Beef with Herb Crust - October 3, 2026
- Hamburgers in Sauce Recipe Crock Pot: Slow-Cooked Savory Delight - October 3, 2026