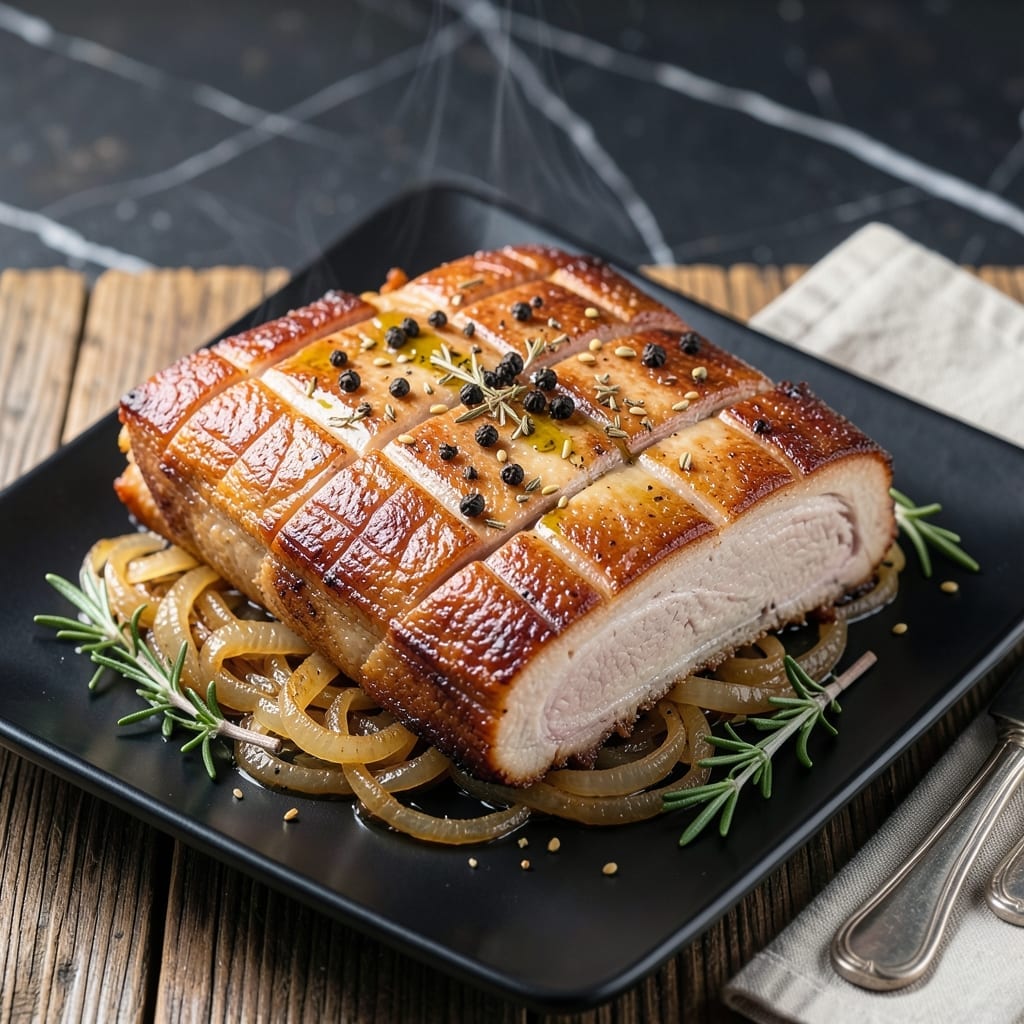
Achieving crispy pork belly at home is simpler than most realize. The key lies in scoring the skin and using precise oven temperatures.
This method delivers golden crackling over tender, flavorful layers. I’ve perfected it through years of pitmaster experience and French training.
Ingredients for Oven Roasted Pork Belly
Pork belly, aromatic spices, and precise technique create this showcase dish at home.
| Ingredient | Amount | Notes |
|---|---|---|
| Pork Belly 🥓 | 2 lb | Skin-on, even thickness |
| Kosher Salt 🧂 | 2 tbsp | Diamond Crystal preferred |
| Black Peppercorns 🌶️ | 1 tbsp | Freshly cracked preferred |
| Fennel Seeds 🌿 | 1 tsp | Lightly crushed |
| Dried Thyme 🍃 | 1 tsp | Rubbed between fingers |
| Dried Rosemary 🌿 | 1 tsp | Finely chopped |
| Garlic Cloves 🧄 | 6 cloves | Smashed, peeled |
| Bay Leaves 🍃 | 2 whole | Fresh or dried |
| Apple Cider Vinegar 🍏 | 2 tbsp | For acidity balance |
| Olive Oil 🫒 | 1 tbsp | Extra-virgin for richness |
| Water 💧 | 1 cup | For roasting pan |
| Honey 🍯 | 2 tbsp | Optional for glaze |
[recipe_ingredient_scaler]
The pork belly must be skin-on and uniformly thick for even cooking. Heritage breed pork from Whole Foods or a trusted butcher offers superior marbling and flavor. Avoid pre-cut strips—a whole slab allows better control over the final texture. The skin should be dry and unblemished, as moisture prevents proper crisping.
No fennel seeds? Coriander seeds at equal volume provide a different but complementary aroma. Fresh rosemary can substitute dried at double the amount. For a sweeter profile, replace honey with maple syrup. The vinegar can be white wine vinegar if apple cider isn’t available, though the latter’s fruitiness pairs exceptionally well with pork.
Store raw pork belly in the coldest part of your refrigerator for up to 3 days or freeze for 6 months. Once cooked, leftovers keep for 4 days refrigerated. Reheat gently in the oven to maintain the crackling’s integrity—microwaving will soften the skin.
Why You’ll Love This Recipe
- Hands-Off Cooking: I just season, pop it in the oven, and let the heat work its magic—no babysitting required.
- Crispy Perfection: That crackling skin with the tender, herb-infused meat underneath? Honestly, it’s the reason I make this every other weekend.
- Feeds a Crowd: One slab of pork belly stretches to serve six, and it’s just as good sliced thin for sandwiches as it is plated for dinner.
- Leftovers Level Up: Between us, the next-day pork belly tacos are even better than the first meal.
Step-by-Step Instructions for Oven Roasted Pork Belly
Achieve perfect crackling and tender meat with this systematic approach to roasting.
Step 1: Score and Cure the Pork Belly
Pat the 2 lb Pork Belly completely dry with paper towels. Using a sharp knife, score the skin in a crosshatch pattern, cutting through the skin and fat but not into the meat. This allows the fat to render properly and creates more surface area for crisping.
Rub the 2 tbsp Kosher Salt aggressively into all surfaces, paying special attention to the scored skin and the flesh side. The salt draws out moisture while seasoning deeply. Let it cure uncovered in the refrigerator for 12-24 hours—this is non-negotiable for achieving that perfect crackle.
Step 2: Prepare the Aromatic Dry Rub
In a mortar and pestle, lightly crush the 1 tbsp Black Peppercorns, 1 tsp Fennel Seeds, 1 tsp Dried Thyme, and 1 tsp Dried Rosemary to release their essential oils. The fennel adds a subtle anise note that complements the richness of the pork beautifully.
Remove the pork belly from the refrigerator and rub this aromatic mixture evenly over the flesh side only. Add the 6 cloves Garlic Cloves and 2 whole Bay Leaves to the roasting pan—they’ll infuse the meat with additional flavor as it cooks. Let the seasoned pork belly sit at room temperature for 30 minutes while you preheat the oven.
Step 3: Begin the Roasting Process
Preheat your oven to 300°F. Place the pork belly skin-side up on a wire rack set in a roasting pan. Pour the 1 cup Water into the bottom of the pan—this creates steam that helps render the fat during the initial cooking phase without drying out the meat.
Roast for 1.5 hours at this lower temperature. This slow start allows the fat to begin rendering gently while the meat cooks through evenly. You’ll notice the skin starting to puff and dry out as the moisture evaporates.
Step 4: Finish with High Heat for Crackling
Remove the pork from the oven and carefully brush the scored skin with a mixture of the 2 tbsp Honey, 2 tbsp Apple Cider Vinegar, and 1 tbsp Olive Oil. The vinegar balances the sweetness while the oil helps the honey spread evenly.
Increase the oven temperature to 425°F and return the pork to the oven for 20-30 minutes. Watch closely during this final phase—the skin should transform into a deep golden, crackling surface. You’ll hear it sizzling when it’s ready.
Remove from the oven when the internal temperature reaches 195°F and the crackling is uniformly crisp. Let it rest for 15 minutes before slicing to allow the juices to redistribute.
Pro Tips For Making Oven Roasted Pork Belly
- Score the Skin: Use a sharp knife to cut 1/4-inch deep slits across the fat cap—this lets the salt and spices penetrate while helping the skin crisp up properly.
- Dry It First: Pat the pork belly completely dry before seasoning, or the salt won’t stick and you’ll end up with soggy skin instead of crackling.
- Start Hot: Roast at 425°F for the first 30 minutes to render fat and jumpstart the crust, then drop to 300°F to cook through slowly.
- Rest Before Slicing: Let it rest 10-15 minutes after roasting so the juices redistribute—otherwise, they’ll all spill out when you cut into it.
Pro Cooking Tips for This Dish
Scoring Perfection
Use a razor-sharp chef’s knife to score the skin in a tight crosshatch—about ¼-inch apart. I learned this from a French butcher: deeper scores render fat better but risk drying the meat. The blade should cut through skin and fat cap, stopping just above the meat. 🔥
Drying is Key
After scoring, pat the pork belly bone-dry with paper towels. Then, leave it uncovered in the fridge for 12-24 hours. This drying phase is what creates that shatteringly crisp crackling. I use a wire rack over a tray to allow airflow on all sides.
Low and Slow Start
Begin roasting at 300°F for 1.5 hours with 1 cup water in the pan. This gentle heat renders the fat without burning the skin. The steam from the water prevents the meat from drying while the fat slowly liquefies.
High Heat Finish
For the final 20-30 minutes, crank the oven to 425°F. Brush the skin with your honey-vinegar glaze at this stage. Watch closely—the crackling can go from perfect to burnt in minutes. I pull mine when it reaches a deep amber color.
Rest Before Serving
Let the pork belly rest for 15 minutes after removing from the oven. This allows the juices to settle back into the meat. Slice between the score marks for perfect portions with maximum crackling on each piece. 💛
Equipment Matters
Use a wire rack in your roasting pan to elevate the pork belly. This ensures even airflow and prevents the skin from steaming in its own fat. My Lodge cast iron pan with a rack gives the best results for even heat distribution.
Nutrition Facts
Frequently Asked Questions
Why do I need to dry the pork belly overnight?
The 12-24 hour uncovered fridge time removes moisture from the skin, which is essential for achieving crispy crackling. Without this step, the skin will steam instead of crisp.
Can I skip the wire rack?
No, the rack elevates the pork so air circulates underneath. Without it, the bottom will steam in its own fat, resulting in soggy skin instead of an even crisp.
How do I prevent the glaze from burning?
Apply it only during the final 20-30 minutes at 425°F and watch closely. The sugar in honey can burn quickly at high heat.
What if my crackling isn’t crispy?
Return it to the 425°F oven for 5-10 minutes. If it still isn’t crisp, the skin may need more drying time before roasting next time.

Trained in classic French technique but raised on slow-cooked ribs and spicy rubs, she blends culinary skill with smoke and soul.
- Recipe for Boneless Pork Chops in Cast Iron Skillet: Sear and Baste to Juicy Perfection - October 3, 2026
- Recipe for Boneless Cross Rib Roast: Slow-Roasted Beef with Herb Crust - October 3, 2026
- Hamburgers in Sauce Recipe Crock Pot: Slow-Cooked Savory Delight - October 3, 2026