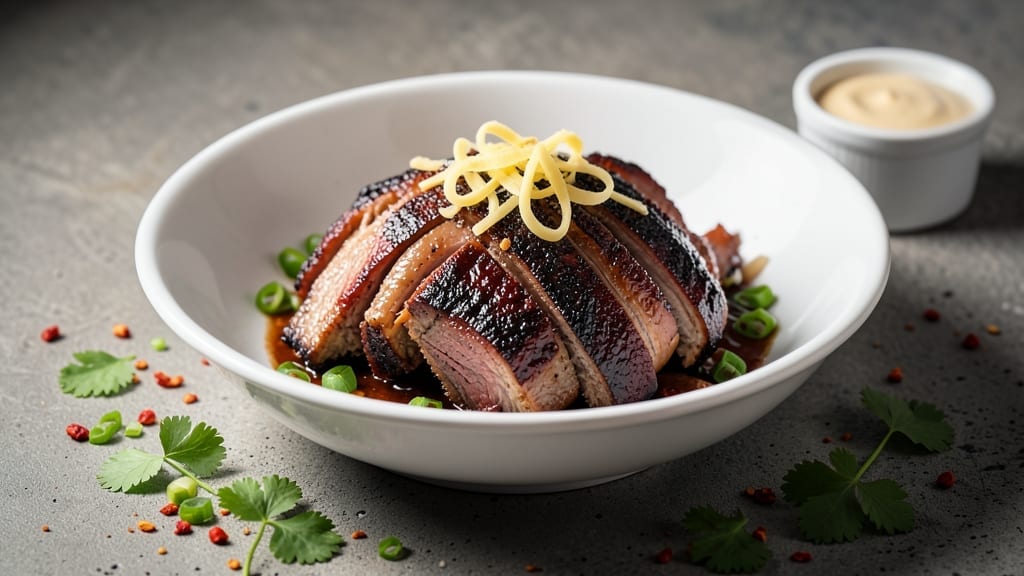
Mastering oven-smoked pulled pork transforms weeknight dinners into showstopping meals without needing a smoker. 🔥 Growing up in small-town Georgia, I learned that slow-cooked pork shoulder delivers melt-in-your-mouth tenderness with deep, smoky flavor—now you can recreate that magic in your home oven.
The secret lies in precise temperature control and proper resting techniques, both of which I’ll walk you through step by step.
This recipe delivers restaurant-quality results using just your oven and a simple setup. We’ll start with a flavorful dry rub that penetrates the meat during the low-and-slow cooking process, ensuring every bite is packed with smoky depth.
The key is maintaining a consistent 250°F temperature for 8 hours, which transforms tough pork shoulder into fork-tender perfection without drying it out.
What you’ll end up with is pulled pork so tender it practically falls apart at the touch, with a rich, smoky aroma that fills your kitchen. The meat will be juicy, flavorful, and ready to shred effortlessly—ideal for sandwiches, tacos, or serving as a main course.
This method preserves all the moisture and flavor that traditional smoking techniques deliver, proving you don’t need specialized equipment for professional results.
Pair it with classic BBQ sides like tangy coleslaw, buttery cornbread, or crisp pickles for the full experience. The beauty of this recipe is its versatility—whether you’re feeding a crowd or prepping for meal prep, the instructions are designed to deliver consistent, foolproof results every time.
Let’s get started on creating that perfect pull-apart texture and smoky flavor.
Ingredients for oven smoked pulled pork
Restaurant-quality pulled pork starts with these simple, flavor-packed ingredients for tender, smoky perfection.
| Ingredient | Amount | Notes |
|---|---|---|
| Pork Shoulder (Bone-In or Boneless) 🐷 | 5 lb | With skin on for crispiness |
| Brown Sugar 🍚 | ½ cup | Packed, for sweetness depth |
| Smoked Paprika 🌶️ | 2 tbsp | Sweet or hot variety |
| Garlic Powder 🧄 | 1 ½ tbsp | Not garlic salt |
| Onion Powder 🧅 | 1 ½ tbsp | Fresh ground preferred |
| Ground Black Pepper 🌶️ | 1 tbsp | Freshly ground for flavor |
| Dried Oregano 🍃 | 1 tbsp | Mexican oregano if available |
| Sea Salt 🧂 | 1 tbsp | Kosher or flaky preferred |
| Apple Cider Vinegar 🍎 | ¼ cup | For tenderizing |
| Unsalted Butter 🧈 | ½ cup | Cubed for basting |
| Chicken Broth 🍲 | 1 cup | Low sodium preferred |
| Honey 🍯 | ¼ cup | For caramelized finish |
| Liquid Smoke 🔥 | 1 tbsp | For authentic smokiness |
[recipe_ingredient_scaler]
The pork shoulder is your star player—bone-in gives you that extra layer of flavor, but boneless works fine too. I always grab freshly butchered pork from my local Whole Foods or Costco for the best marbling. Look for bright red meat with good fat coverage—this is what makes it juicy. If you’re buying pre-cut, ask for the shoulder blade section—it’s the most flavorful part. The skin-on option adds crispiness when cooked low-and-slow, but you can skip it if you prefer all meat.
No liquid smoke? Apple cider vinegar with a dash of Worcestershire sauce mimics that smoky depth. Want to stretch your spices? Double the onion powder and halve the paprika—it’ll still pack flavor. The brown sugar is crucial for that caramelized crust, but if you’re watching sugar, monk fruit sweetener works at half the amount. For the butter, unsalted is non-negotiable—you want to control the saltiness yourself. The chicken broth keeps it moist, but beef broth adds deeper richness if you’ve got it.
This pork needs patience—8 hours at 250°F is non-negotiable for that perfect texture. The apple cider vinegar marinade can be prepped a day ahead, covered in the fridge. Store the dry rub ingredients in an airtight container for up to 3 months. The cooked pork keeps 4 days in the fridge or 3 months frozen. I always make extra—freeze portions in ziplock bags for quick meal prep. The liquid smoke can be added at the end if you’re sensitive to its smell during cooking.
Why You’ll Love This Recipe
- No Smoker Needed: This isn’t some backyard smoker show-off recipe—it’s the same mouthwatering pulled pork I get at BBQ joints, but made right in my oven. The liquid smoke and brown sugar combo tricks your brain into thinking it’s been slow-smoked for hours, while the apple cider vinegar keeps the meat tender without any fuss.
- Caramelized Crust Magic: That crispy, sticky bark on the outside? It’s not an accident—it’s the ½ cup brown sugar and smoked paprika working together to create a sweet, smoky crust that’s addictive. I’ll be honest, the first bite always makes my kids pause mid-chew to ask for seconds. The butter basting in the last hour? Game-changer for that perfect texture.
- Feeds a Crowd (or Your Weeknight): Five pounds of pork shoulder might sound like overkill, but trust me—this is the kind of dish that disappears at potlucks, game days, or even when you’re just craving leftovers for three days straight. Toss it in tacos, slather it on a biscuit, or mix it into mac and cheese, and suddenly you’ve got a meal that’s both impressive and effortless.
- Budget-Friendly Powerhouse: Pork shoulder is one of the most affordable cuts you can buy, and this recipe stretches it into three meals (or more, if you’re sneaky). The dry rub ingredients last forever—store them for months—and the chicken broth and honey are pantry staples. For under $15, you’re getting a dish that’ll have everyone begging for the recipe. No fancy ingredients, no wasted money. Just pure satisfaction.
Step-by-step instructions for oven smoked pulled pork
Here’s the method that delivers melt-in-your-mouth pulled pork with authentic smoky flavor—no smoker required.
🔥 Step 1: Prep and Season the Pork Shoulder
Start by removing the pork shoulder from the fridge and patting it completely dry with paper towels. I can’t stress this enough—dry meat develops that coveted bark. Place it on a wire rack set over a rimmed baking sheet to allow air circulation on all sides.
In a small bowl, combine the ½ cup packed brown sugar, 2 tbsp smoked paprika, 1½ tbsp garlic powder, 1½ tbsp onion powder, 1 tbsp ground black pepper, 1 tbsp dried oregano, and 1 tbsp sea salt. Rub this mixture all over the pork shoulder, working it into the crevices and fat cap. This ensures even flavor penetration and maximum bark development. Let it sit at room temperature for 30 minutes while you preheat the oven.
🍳 Step 2: Create the Smoky Basting Sauce
While the pork seasons, prepare the basting sauce in a small saucepan. Melt the ½ cup unsalted butter over medium-low heat, then whisk in the ¼ cup apple cider vinegar and 1 tbsp liquid smoke. The vinegar helps tenderize the meat while the liquid smoke delivers that authentic smoker flavor. Let this mixture simmer gently for 3 minutes until slightly thickened.
Remove from heat and stir in the ¼ cup honey and 1 cup chicken broth. This creates a sticky, flavorful glaze that will caramelize beautifully during cooking. Keep this sauce warm in a separate bowl—you’ll use it to baste the pork throughout the cooking process.
🔥 Step 3: Cook Low and Slow for Maximum Tenderness
Preheat your oven to 275°F. Place the seasoned pork shoulder in the oven (fat side up) and pour ½ cup of the warm basting sauce directly over the meat. This initial basting jumpstarts the caramelization process. Bake uncovered for 4 hours, basting with another ¼ cup of sauce every 45 minutes. The sauce should bubble and sizzle as it hits the hot meat—this creates that beautiful crust.
After 4 hours, check the internal temperature using a meat thermometer. It should read between 195-200°F—this is the “stall” point where collagen breaks down into gelatin, creating that signature pulled pork texture. If it’s not there yet, continue cooking, basting every 45 minutes until it reaches the target temperature.
⏰ Step 4: Rest and Pull for Perfect Texture
Once the pork reaches 200°F, remove it from the oven and let it rest in its juices for 1 hour. This resting period is crucial—it allows the meat fibers to relax and redistribute juices, preventing dryness. Here’s the thing: the pork will continue cooking slightly during this rest, so don’t rush it.
After resting, transfer the pork to a cutting board and shred it using two forks. Discard any large fat chunks or connective tissue. Taste the meat and adjust seasoning if needed—you might want to add a pinch more salt or a splash of the basting sauce to enhance the flavor. The pork should be fork-tender with just enough resistance to hold its shape when pulled.
Pro Tips For Making Oven Smoked Pulled Pork
- Don’t Skimp on Butter: The ½ cup unsalted butter isn’t just for flavor—it’s what makes that glossy, caramelized crust. I used to use half, thinking I’d save money, but the sauce turns watery and the pork loses that sticky, smoky glaze. Melt it properly over medium-low heat, or it’ll burn before it even coats the meat.
- Check That Thermometer: The recipe says 195-200°F, but I’ve learned the hard way that guessing leads to dry pork. Buy a good instant-read thermometer and probe the thickest part—no fat or bone. Hit 200°F, then rest. The meat will keep cooking during that hour, and you’ll end up with tender, juicy pulled pork instead of something that falls apart like overcooked chicken.
- Save the Vinegar Sauce: That ¼ cup apple cider vinegar in the basting sauce isn’t just for acidity—it tenderizes the meat while you cook. If you’re prepping ahead, mix it with the honey and broth now and store it in the fridge. When you’re ready to cook, just melt the butter and liquid smoke into it. No last-minute scrambling, and the pork will be even more fork-tender.
- Rotate the Pork: After 2 hours at 275°F, pull the pork out, flip it over (fat side up again), and rotate it 180 degrees. I used to leave it in one spot, and one side would get a dark, crispy crust while the other stayed pale. This ensures even cooking and that perfect bark all around—no dry spots, no undercooked centers.
Storing and reheating this oven smoked pulled pork
Fridge Storage Essentials
Once your pork reaches that perfect 200°F internal temperature, let it rest for 1 hour before transferring to an airtight glass container—I swear by Pyrex for even cooling. Store in the fridge at 40°F or below for up to 4 days.
The flavors deepen overnight as the juices redistribute, making it even more tender. Just remember: the pork will continue cooking slightly during storage, so it’s safe to eat when it hits that 200°F mark. 💡
Freezer Prep for Meal Prep
For longer storage, portion your pulled pork into ziplock freezer bags (I use Glad brand) and squeeze out all air before sealing. Label with the date—it keeps 3 months without losing texture or flavor. I always freeze it in 2-pound portions for easy reheating later.
The fat will solidify, but that’s okay—it’ll render back into the meat when reheated. Freezing actually makes the pork easier to shred later! ❄️
Reheating Like a Pro
For best results, reheat your pulled pork in a heavy-bottomed pot over medium-low heat. Add 2 tablespoons of chicken broth per pound of pork to prevent drying. Cover and simmer for 10-15 minutes, stirring occasionally, until it reaches 165°F.
This method keeps it moist and allows flavors to meld beautifully. I always taste and adjust seasoning—sometimes a pinch of salt or a splash of apple cider vinegar makes all the difference. 🔥
Microwave Shortcuts
When time is tight, use your microwave in 2-minute intervals, stirring between each. Start with 1 minute on high, then add 1-minute bursts until fully heated. Add a splash of water to the container to prevent drying.
This method works best for smaller portions—it’s not ideal for large batches, but it gets the job done when you’re in a hurry. Just be prepared for slightly less crispy bark. ⏰
Reviving the Bark
If your reheated pork loses its crispy exterior, don’t worry! Return it to the oven at 350°F for 5-10 minutes uncovered to crisp up the edges. I also like to finish it with a drizzle of basting sauce for extra moisture and flavor.
This little trick brings back that restaurant-quality texture you love. Look at you, turning leftovers into a gourmet experience! 💛
Nutrition facts
Frequently asked questions
Why does my oven smoked pulled pork need so much time?
The 8+ hour cooking time at 275°F is crucial for breaking down tough pork shoulder fibers into tender, juicy meat. This low-and-slow process transforms collagen into gelatin, creating that melt-in-your-mouth texture. Skipping this step results in chewy pork—patience is key for authentic pulled pork perfection!
Can I use bone-in or boneless pork shoulder?
Either works beautifully! Bone-in pork adds extra flavor but requires more cleanup. For convenience, boneless pork shoulder is perfect—just ensure it has good fat marbling for moisture. I personally prefer bone-in for that authentic smoky depth, but both deliver delicious results when cooked properly.
What if my pork reaches 200°F but still feels tough?
This happens when the meat cooks unevenly. Return it to the oven (covered with foil) at 250°F for another 1-2 hours, checking temperature every 30 minutes. The 1-hour rest after cooking is also essential—it lets juices redistribute for that perfect texture. Pork should pull apart easily with minimal effort.
How do I prevent my pulled pork from drying out?
Never skip the 1-hour rest after cooking—this keeps juices locked in! Baste frequently with the butter-honey sauce during cooking, and when reheating, add chicken broth to the pot. The apple cider vinegar in the sauce also helps retain moisture. Even with these steps, dry pork can happen if overcooked beyond 203°F.

Trained in classic French technique but raised on slow-cooked ribs and spicy rubs, she blends culinary skill with smoke and soul.
- Smoked Brisket Recipe: Low and Slow to Fall-Apart Tenderness - November 2, 2026
- Smoked Turkey Breast Recipe: Juicy Pink Center With Crispy Skin Every Time - November 2, 2026
- Leftover Smoked Pulled Pork Chili Recipe: Rustic Flavor Revival in One Pot - November 2, 2026