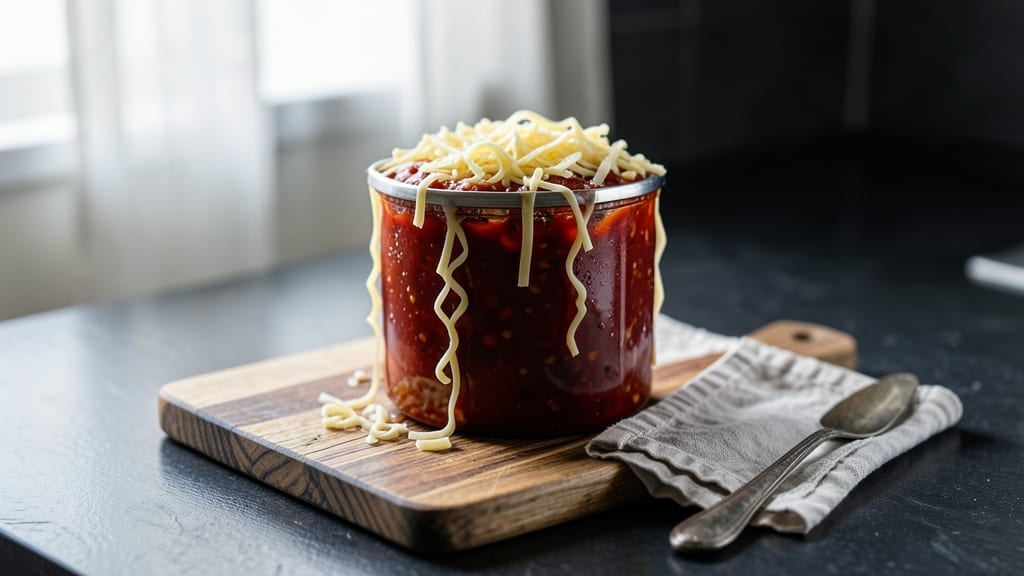
This over-the-top smoker chili recipe transforms your backyard into a smoky flavor factory, where hickory smoke and slow-cooked meat create a dish so rich it becomes the centerpiece of any gathering.
The key lies in layering deep smoky notes with bold spices and letting the meat break down over hours, creating a texture that’s tender yet hearty. I first perfected this technique during a coastal ride home from a local BBQ competition, where the smoker’s aroma had me hooked for life.
The secret to this chili’s intensity is the combination of beef chuck and pork shoulder, slow-smoked until the meat practically falls apart. A blend of chili powder, cumin, and a touch of cayenne builds the heat, while beans absorb the smoky essence for every bite.
The long cook time—six to eight hours—allows flavors to meld into a deep, complex harmony that’s impossible to achieve on the stovetop.
By the time you serve it, you’ll have a chili so flavorful it becomes the star of the meal—thick, smoky, and packed with meat that dissolves at the touch of a spoon.
Top it with melted cheese, sour cream, and fresh jalapeños for the ultimate customizable experience. This isn’t just chili; it’s a smoky, meat-loaded masterpiece that turns a simple meal into an event.
Perfect for game day, potlucks, or when you want to impress without the fuss of a full feast. Let’s get smoking!
Ingredients for over the top chili smoker
Smoky, meaty, and packed with bold flavors—this chili is all about the deep, slow-cooked goodness that turns your smoker into a flavor factory.
| Ingredient | Amount | Notes |
|---|---|---|
| Beef Chuck Roast 🥩 | 3 lb | Trimmed of fat, cut into 1.5-inch cubes |
| Pork Shoulder 🐷 | 2 lb | Bone-in for extra flavor, cut into chunks |
| Onions 🧅 | 3 whole | Yellow or red, roughly chopped |
| Garlic Cloves 🧄 | 8 cloves | Peeled, smashed for intense flavor |
| Chili Powder 🌶️ | ½ cup | Medium heat, not mild |
| Ground Cumin 🌿 | 2 tbsp | Toasted for deeper aroma |
| Smoked Paprika 🌶️ | 1 tbsp | For that authentic smoky kick |
| Cayenne Pepper 🔥 | 1 tsp | Adjust for heat preference |
| Black Peppercorns 🌶️ | 1 tbsp | Freshly cracked, not ground |
| Dark Brown Sugar 🍯 | 2 tbsp | For caramelized depth |
| Beef Broth 💧 | 4 cups | Low-sodium, homemade preferred |
| Tomato Paste 🍅 | ½ cup | High-quality, no sugar added |
| Black Beans 🍲 | 1 lb | Drained and rinsed, no salt added |
| Kidney Beans 🍲 | 1 lb | Drained and rinsed, no salt added |
| Hickory Wood Chips 🌳 | 1 package | For authentic smoky flavor |
| Olive Oil 🫒 | 2 tbsp | Extra-virgin for richness |
| Salt 🧂 | 1 ½ tbsp | Kosher or sea salt |
[recipe_ingredient_scaler]
The meat is the heart of this chili, so don’t skimp. Beef chuck and pork shoulder are non-negotiable—they break down beautifully over hours of smoking. Grab the chuck roast from the butcher counter if you can; it’s usually cheaper and more flavorful than pre-cut. For the pork, look for bone-in pieces—they add extra richness to the broth. If you’re short on time, Costco or Sam’s Club sell pre-cut chunks in bulk. Just make sure to trim any excess fat from the beef to avoid greasy chili. The hickory wood chips? Traeger or Weber sell them in bulk—get the ones labeled ‘100% natural’ for the best smoke flavor.
No chili powder? Mix 2 tbsp of smoked paprika with 1 tbsp of cumin to get close. Fresh peppercorns are a game-changer, but if you only have ground, toast them in a dry pan for 30 seconds first to wake up the flavor. Short on beans? Substitute with lentils or extra meat, but the beans are key for soaking up that smoky goodness. The tomato paste can be a squeeze tube from Trader Joe’s—it’s perfect for this recipe and won’t spoil. And if you’re worried about the heat, reduce the cayenne to half a teaspoon or swap it for a pinch of chipotle powder for a smokier kick without the burn.
This chili tastes even better the next day—seriously, the flavors meld into something magical. Store leftovers in an airtight container in the fridge for up to 5 days, or freeze portions for 3 months. I like to portion it into ziplock bags with a layer of olive oil on top to preserve the smoky aroma. For serving, keep the toppings separate—sharp cheddar, sour cream, and fresh jalapeños turn this into a customizable feast. Double the batch if you’re feeding a crowd; it’s worth the extra effort.
Why You’ll Love This Recipe
- Smoke-Free Weeknights: I’ll admit it—I used to avoid smoking chili at home because it felt like a weekend project. But this recipe? I smoke the meat on Sundays while I’m already prepping other dishes, then finish it off on the stove. The hickory wood chips and that 4-5 hour low-and-slow cook time happen while I’m doing other things, so I’m not tied to the smoker all day.
- Flavor Bomb Combos: The smoked paprika and dark brown sugar? Chef’s kiss. That tomato paste caramelizing in the smoker pan adds a depth that store-bought chili can’t touch. And the beef chuck roast and pork shoulder—smoked to 195-200°F—turns into melt-in-your-mouth shreds that just beg for a spoonful. Honestly, the cayenne and chili powder are medium heat, but the smoky richness makes it feel like you’re getting a full flavor punch without the burn.
- Leftovers That Outlast the Meal: This recipe makes 8 servings, but I swear, I’ll have seconds on day two. The flavors deepen in the fridge—seriously, it tastes even better reheated. And because it stores for up to 5 days or freezes for 3 months, I can meal prep for busy weeks or pack lunches without stress. My kids even ask for leftovers, and that’s a win right there.
- Budget Meal Powerhouse: You’re using budget-friendly cuts like pork shoulder and beef chuck roast, but the hickory wood chips and smoked paprika make it feel like a gourmet dish. The beans stretch the meal further, and because the recipe relies on pantry staples (like the chili powder and cumin), you’re not breaking the bank. I’ve made this for game days, potlucks, and even a last-minute dinner after work—it’s that reliable.
Step-by-step instructions for smoked chili masterpiece
Here’s the method that delivers deep smoky flavor and rich texture every time.
Prepare and Season the Meat
Cut the 3 lb beef chuck roast and 2 lb pork shoulder into 1½-inch cubes and place them in a large bowl. Add the 3 roughly chopped onions and 8 smashed garlic cloves, tossing to coat the meat evenly. In a separate bowl, mix together the ½ cup chili powder, 2 tbsp ground cumin, 1 tbsp smoked paprika, 1 tsp cayenne pepper, 1 tbsp freshly cracked black peppercorns, 2 tbsp dark brown sugar, and 1½ tbsp salt. Sprinkle this spice blend evenly over the meat mixture, pressing it into the cubes so it adheres well.
Let the seasoned meat sit at room temperature for 30 minutes before smoking. This ensures even cooking and maximum flavor penetration. I like to cover the bowl loosely with plastic wrap during this time to prevent drying out, but leave it uncovered for the last 10 minutes to help the spices release their aromas.
Smoke the Meat Low and Slow
Preheat your smoker to 225°F using the 1 package hickory wood chips. Once the temperature stabilizes and you see clean, blue smoke (not thick white), add the seasoned meat in a single layer on the smoker grates. Smoke the meat for 4-5 hours, stirring occasionally, until it’s deeply browned and tender. You’ll know it’s ready when the internal temperature reaches 195-200°F and the meat pulls apart easily with a fork.
During the last 30 minutes of smoking, add the ½ cup tomato paste to the smoker pan. This creates a rich, caramelized base for your chili. The tomato paste will bubble and darken, developing deep, complex flavors that form the foundation of your chili. Keep the smoker lid closed as much as possible to maintain temperature and smoke consistency.
Build the Chili Base
Transfer the smoked meat to a large Dutch oven or heavy pot. In the same pot (don’t clean it—the browned bits are flavor gold), add 2 tbsp olive oil and heat over medium heat. Add any accumulated juices from the meat and scrape up those delicious browned bits from the bottom of the pot. This creates a flavorful roux that thickens your chili.
Pour in the 4 cups beef broth and stir to combine. Bring the mixture to a simmer, then add the 1 lb drained black beans and 1 lb drained kidney beans. Stir everything together and let it cook for 15 minutes to allow the flavors to meld. The beans will absorb some of the smoky meat juices, enhancing their flavor.
Simmer to Perfection
Reduce the heat to low and let the chili simmer uncovered for 2-3 hours. Stir occasionally to prevent sticking and ensure even cooking. The chili should thicken gradually as the liquid reduces. You’re looking for a rich, meaty consistency where the beans are tender but still hold their shape.
Here’s the thing—this is where patience pays off. The long simmer develops deep, complex flavors that you just can’t achieve with quick cooking. Taste the chili after 2 hours and adjust the seasoning if needed. If it needs more heat, add a pinch of cayenne pepper. If it needs more depth, add a splash of beef broth. The chili should be rich, smoky, and full of meaty goodness.
Serve Warm with Toppings
Once the chili reaches your desired consistency, remove it from heat and let it rest for 10 minutes. This resting period allows the flavors to settle and the chili to thicken slightly. Serve the chili hot in bowls, garnished with additional freshly cracked black pepper and a dollop of sour cream if desired.
Each spoonful should deliver layers of smoky, spicy, and sweet flavors with tender meat and hearty beans. The chili should be thick enough to coat the back of a spoon but still be easy to ladle. This recipe makes 8 generous servings, perfect for feeding a crowd or enjoying leftovers for days. The flavors only get better as it sits!
Pro Tips For Making Over The Top Chili Smoker
- Smoke the Tomato Paste: DESCRIPTION:
- Toast the Cumin First: DESCRIPTION:
- Don’t Crowd the Smoker: DESCRIPTION:
- Simmer Uncovered Always: DESCRIPTION:
Flavor customization for these flavors
Spicy Ghost Pepper Kick
If you want to turn this chili into a true flavor explosion, add 1-2 ghost peppers, finely chopped, along with the onions and garlic during the initial meat prep.
Ghost peppers pack 2-3 times the heat of a jalapeño, so use them sparingly—start with 1 pepper and adjust to taste. I like to stuff them with a pinch of salt before chopping to mellow the heat slightly.
For a milder but still bold option, swap in 1-2 habaneros or 1 tbsp of gochujang paste for an Asian-inspired twist. 🌶️
Smoky Maple Glaze
After the long simmer, stir in 2 tbsp of pure maple syrup and 1 tbsp of liquid smoke (like McCormick) during the final 30 minutes of cooking. This adds a deep, caramelized sweetness that balances the smokiness and heat.
The maple syrup also helps thicken the chili naturally while adding a subtle complexity. I’ve found that Wildflower maple syrup works best—it’s pure and doesn’t overpower the flavors.
Creamy Avocado Lime Finish
For a lighter but still rich topping, blend 1 ripe avocado, juice of 1 lime, ¼ cup sour cream, and 1 tsp of honey into a smooth sauce. Drizzle this over the chili just before serving—it adds a creamy, tangy contrast that cuts through the smokiness.
I keep the avocado sauce separate until the last minute so it doesn’t break down in the heat. This topping is especially great if you’re serving the chili to a crowd with varying heat preferences. ✨
Spicy Cornbread Crumble
Make your own spicy cornbread crumble by baking a batch of johnnycake-style cornbread with 1 tbsp of cayenne pepper and 1 tsp of smoked paprika mixed into the batter. Once cooled, crumble it into small pieces and sprinkle it generously over the chili.
The cornbread adds a sweet, crunchy texture that soaks up the smoky juices perfectly. I like to use Stone Ground cornmeal from Bob’s Red Mill for the best texture.
Cheesy Jalapeño Swirl
For a cheesy, spicy twist, stir 1 cup of shredded Monterey Jack cheese and 1 cup of sour cream together, then fold in 2 finely chopped jalapeños (seeds removed for less heat). Swirl this mixture into the chili during the last 10 minutes of cooking so the cheese melts smoothly.
The result is a creamy, spicy swirl that adds another layer of depth. If you want extra heat, add ½ tsp of chipotle powder to the cheese mixture. 🔥
Herbal Wild Foraging Boost
If you’re feeling adventurous, forage for wild garlic or horehound leaves to add a unique herbal note. I often find these along coastal rides during spring—just rinse them thoroughly and chop them finely. Add them to the chili during the final 15 minutes of simmering.
The earthy, slightly bitter flavors pair beautifully with the smokiness and add a touch of local charm. If foraging isn’t an option, use 1 tbsp of dried oregano or thyme for a similar herbal depth.
Nutrition facts
Frequently asked questions
Why does this chili need such a long cooking time?
The 6-8 hours of slow cooking transforms tough cuts like beef chuck and pork shoulder into melt-in-your-mouth tenderness. The low-and-slow process also allows the hickory smoke and spices to deeply penetrate the meat, creating layers of flavor that stovetop methods can’t achieve. Think of it like a French reduction—patience creates magic!
Can I use ground meat instead of chunks?
While you can use ground meat, the texture won’t be the same. The 1½-inch beef cubes and pork chunks break down beautifully during smoking, creating that perfect tender-but-not-mushy consistency. If you’re short on time, try pre-cooking the meat in a slow cooker first, then smoking it for 2-3 hours instead. The flavor will still be amazing, just with slightly different texture.
What’s the best way to adjust the heat level?
Start by tasting after the 2-hour simmer—if it’s too mild, add ½ tsp cayenne or a pinch of chipotle powder for smoky heat. For a milder kick, reduce the cayenne to ½ tsp or omit it entirely. Pro tip: Add heat gradually to avoid overwhelming the dish. The smoked paprika already adds depth, so you might not need extra spice!
Can I make this chili ahead of time?
The flavors actually improve overnight. Store in an airtight container for up to 5 days in the fridge or freeze portions for 3 months. Just reheat gently on the stove—microwaving can make the beans mushy. I like to portion it into ziplock bags with a layer of olive oil on top to preserve that smoky aroma.
What’s the secret to getting that perfect smoky flavor?
The key is blue smoke at 225°F and using the browned bits from the meat. Don’t skip scraping those delicious fond from the pot—they’re flavor gold! Also, let the tomato paste caramelize in the smoker pan during the last 30 minutes—this creates a rich, smoky base that elevates everything. And remember: hickory wood chips are your best friend for authentic smokiness.

Trained in classic French technique but raised on slow-cooked ribs and spicy rubs, she blends culinary skill with smoke and soul.
- Smoked Brisket Recipe: Low and Slow to Fall-Apart Tenderness - November 2, 2026
- Smoked Turkey Breast Recipe: Juicy Pink Center With Crispy Skin Every Time - November 2, 2026
- Leftover Smoked Pulled Pork Chili Recipe: Rustic Flavor Revival in One Pot - November 2, 2026