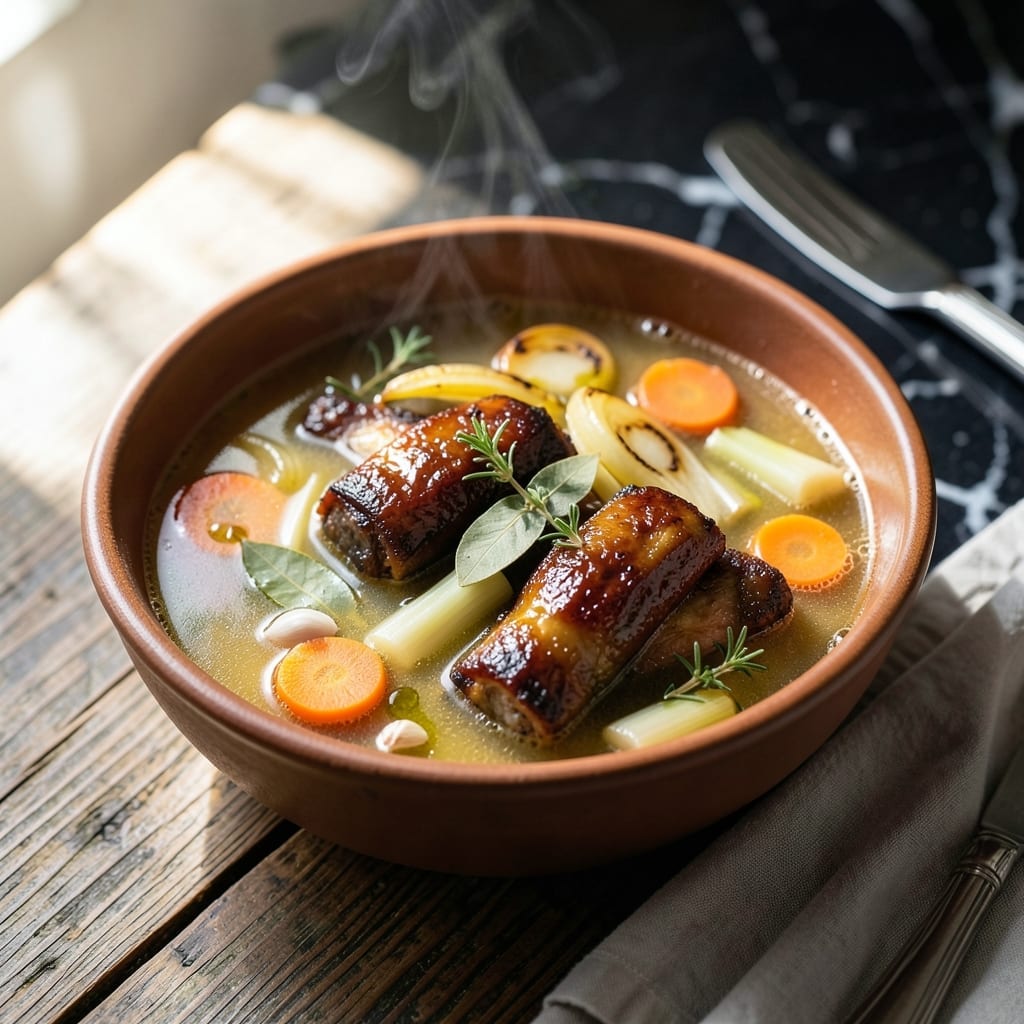
There’s a reason professional kitchens always have bone broth on hand. This oxtail version delivers deep umami that transforms any dish it touches.
Slow simmering extracts collagen and gelatin from the bones, creating a rich, velvety liquid with natural body. The oxtail’s marrow adds unmatched depth that chicken or beef bones simply can’t match.
I’ve refined this method over years of professional cooking, focusing on the perfect balance of bones, vegetables, and simmering time. The result is a golden broth with complex flavor.
Use it as a base for soups, sauces, or simply sip it straight from the mug. The foundation of great cooking starts here.
Ingredients for Oxtail Bone Broth
Professional-grade ingredients create this rich, velvety broth with complex depth and natural body.
| Ingredient | Amount | Notes |
|---|---|---|
| Oxtail 🥩 | 3 lb | Cut into 2-inch pieces by butcher |
| Yellow Onions 🧅 | 2 whole | Quartered with skin on |
| Carrots 🥕 | 3 whole | Cut into 3-inch chunks |
| Celery Stalks 🌿 | 3 whole | Cut into 3-inch chunks |
| Garlic Cloves 🧄 | 6 cloves | Smashed, skin on |
| Bay Leaves 🍃 | 2 whole | Dried, whole leaves |
| Black Peppercorns 🌶️ | 1 tbsp | Whole, not pre-ground |
| Apple Cider Vinegar 🍏 | 2 tbsp | Raw, unfiltered preferred |
| Cold Filtered Water 💧 | 4 cups | Enough to cover bones by 2 inches |
| Fresh Thyme Sprigs 🌿 | 4 whole | Optional, for added depth |
| Fresh Parsley Stems 🌿 | 1 cup | Tied with kitchen twine |
| Kosher Salt 🧂 | 1 tsp | Added at the end |
[recipe_ingredient_scaler]
The oxtail is non-negotiable for this broth. Source from a trusted butcher like Whole Foods or a local purveyor—ask for it cut into 2-inch pieces to save prep time. Look for well-marbled pieces with visible connective tissue, as this is what creates the gelatinous texture. The marrow in the bones is what sets this apart from standard beef broth. Professional kitchens often use grass-fed oxtail for superior flavor.
No oxtail available? Beef shank bones with marrow can substitute, though the flavor will be slightly less complex. The apple cider vinegar is essential—raw unfiltered brands like Bragg work best for extracting minerals from the bones. For herbs, dried thyme at half the amount can replace fresh. The onion skins add color and depth, so don’t peel them. Carrots and celery can be swapped for other root vegetables if needed.
This broth improves with time. Strain and cool completely before refrigerating—fat will solidify on top for easy removal. Stores in the fridge for 5 days or freeze in airtight containers for 6 months. For the best texture, avoid boiling vigorously, which can break down the collagen too quickly. Skim any foam that rises during the first hour of simmering.
Why You’ll Love This Recipe
- Set It and Forget: I toss everything in the pot and let it simmer all day—no babysitting required.
- Rich and Deep: The oxtail and garlic create a flavor so velvety, I swear I could drink it straight from the pot.
- Meal Prep Superstar: I make a big batch and use it for soups, stews, and even cooking grains all week long.
- Budget Stretcher: Honestly, one pack of oxtails makes gallons of broth, and it freezes beautifully for months.
Step-by-Step Instructions for Oxtail Bone Broth
Master the technique for extracting maximum flavor and gelatin from every ingredient.
Step 1: Roast the Oxtail and Vegetables
Preheat your oven to 400°F. Arrange the 3 lb Oxtail pieces on a baking sheet and roast for 30-40 minutes until deeply browned, turning once halfway through. This caramelization develops the rich, complex base flavor that defines this broth.
Simultaneously, place the 2 whole Yellow Onions (quartered with skin on), 3 whole Carrots (cut into 3-inch chunks), and 3 whole Celery Stalks (cut into 3-inch chunks) on another tray. Roast for 20-25 minutes until the edges begin to char. The skin-on onions add depth to the final product.
Step 2: Deglaze and Combine All Ingredients
Transfer the roasted oxtail and vegetables to a large stockpot. Pour 2 tbsp Apple Cider Vinegar into the baking sheets and scrape up all the browned bits with a wooden spoon—this step captures essential flavor compounds.
Add the deglazed liquid, 6 cloves Garlic Cloves (smashed, skin on), 2 whole Bay Leaves, 1 tbsp Black Peppercorns, and 4 whole Fresh Thyme Sprigs to the pot. The vinegar helps break down the bones, ensuring optimal nutrient extraction during simmering.
Step 3: Cover with Water and Simmer
Pour in 4 cups Cold Filtered Water, ensuring the liquid covers the bones by exactly 2 inches. Add the 1 cup Fresh Parsley Stems tied with kitchen twine for easy removal later. Bring to a boil over high heat, then immediately reduce to a gentle simmer.
Partially cover the pot and maintain a low simmer for 12-24 hours. Skim any foam or fat that rises to the surface during the first hour. The long cooking time is crucial for extracting gelatin from the bones, which gives the broth its characteristic body.
Step 4: Strain and Finish the Broth
Carefully strain the broth through a fine-mesh sieve into a clean pot, discarding all solids. Press gently on the vegetables to extract maximum liquid, but avoid squeezing too hard, which can make the broth bitter.
Stir in 1 tsp Kosher Salt and adjust seasoning to taste. Let the broth cool slightly, then skim off any remaining fat from the surface. The finished product should have a deep amber color and a rich, velvety mouthfeel from the collagen breakdown.
Pro Tips For Making Oxtail Bone Broth
- Roast the Bones: I learned this the hard way—always roast your oxtail pieces at 400°F for 30-40 minutes first. The caramelization adds depth that boiling alone just can’t achieve.
- Skip the Peel: Sounds weird, but it works: leave the onion skins on when charring them for the broth. They add a rich golden color and extra nutrients without any bitterness.
- Simmer, Don’t Boil: After burning three batches, I finally figured out that a gentle simmer—just a few bubbles breaking the surface—keeps the broth clear and prevents the fat from emulsifying into a greasy mess.
- Strain Twice: My grandmother swore by this, and she was right: strain the broth first through a colander, then again through a fine-mesh sieve. It’s the only way to get that silky-smooth texture.
Common Mistakes When Making This Dish
Skipping the Roast
Never skip roasting the 3 lb Oxtail and vegetables first. This step develops the deep umami through caramelization that defines this broth. I’ve tried skipping it for convenience, and the resulting broth lacks complexity. 🔥
Boiling Too Hard
A vigorous boil breaks down collagen too quickly, resulting in a cloudy broth. Maintain a gentle simmer—just a few bubbles breaking the surface—to extract gelatin properly. I adjust my burner to the lowest setting that keeps it moving.
Not Enough Water
Always cover the bones by exactly 2 inches with cold filtered water. Too little water exposes bones, causing uneven extraction. I check halfway through and top up if needed. Too much water dilutes the flavor.
Short Cook Time
Simmering for less than 12 hours won’t extract enough gelatin. I set my timer for 18 hours as a sweet spot. The longer time transforms the liquid from thin to velvety. Skim foam only during the first hour.
Overcrowding the Pot
Using a pot that’s too small prevents proper circulation. I recommend a 12-quart stockpot for this quantity. The bones and vegetables need room to release their flavors evenly. Crowding leads to uneven cooking.
Adding Salt Early
Salt reduces as the broth simmers, so add the 1 tsp Kosher Salt only at the end. I learned this the hard way when my first batch tasted like the ocean. Taste and adjust—you can always add more.
Nutrition Facts
Frequently Asked Questions
Can I use a slow cooker instead?
Yes! Use the same ingredients and cook on low for 24 hours. The gentle heat extracts gelatin perfectly. Just ensure the bones stay fully submerged.
How do I know when it’s done?
The broth should be deep amber with a gelatinous texture when cooled. Bones should crumble easily when pressed. If it’s still watery, simmer 4-6 hours longer.
Why roast the vegetables first?
Roasting caramelizes natural sugars, creating the complex depth that defines this broth. Skipping this step results in a flatter flavor profile.
Can I freeze the finished broth?
Pour into airtight containers leaving 1-inch headspace. Freezes beautifully for 6 months without losing quality. Thaw overnight in the fridge.

Trained in classic French technique but raised on slow-cooked ribs and spicy rubs, she blends culinary skill with smoke and soul.
- Recipe for Boneless Pork Chops in Cast Iron Skillet: Sear and Baste to Juicy Perfection - October 3, 2026
- Recipe for Boneless Cross Rib Roast: Slow-Roasted Beef with Herb Crust - October 3, 2026
- Hamburgers in Sauce Recipe Crock Pot: Slow-Cooked Savory Delight - October 3, 2026