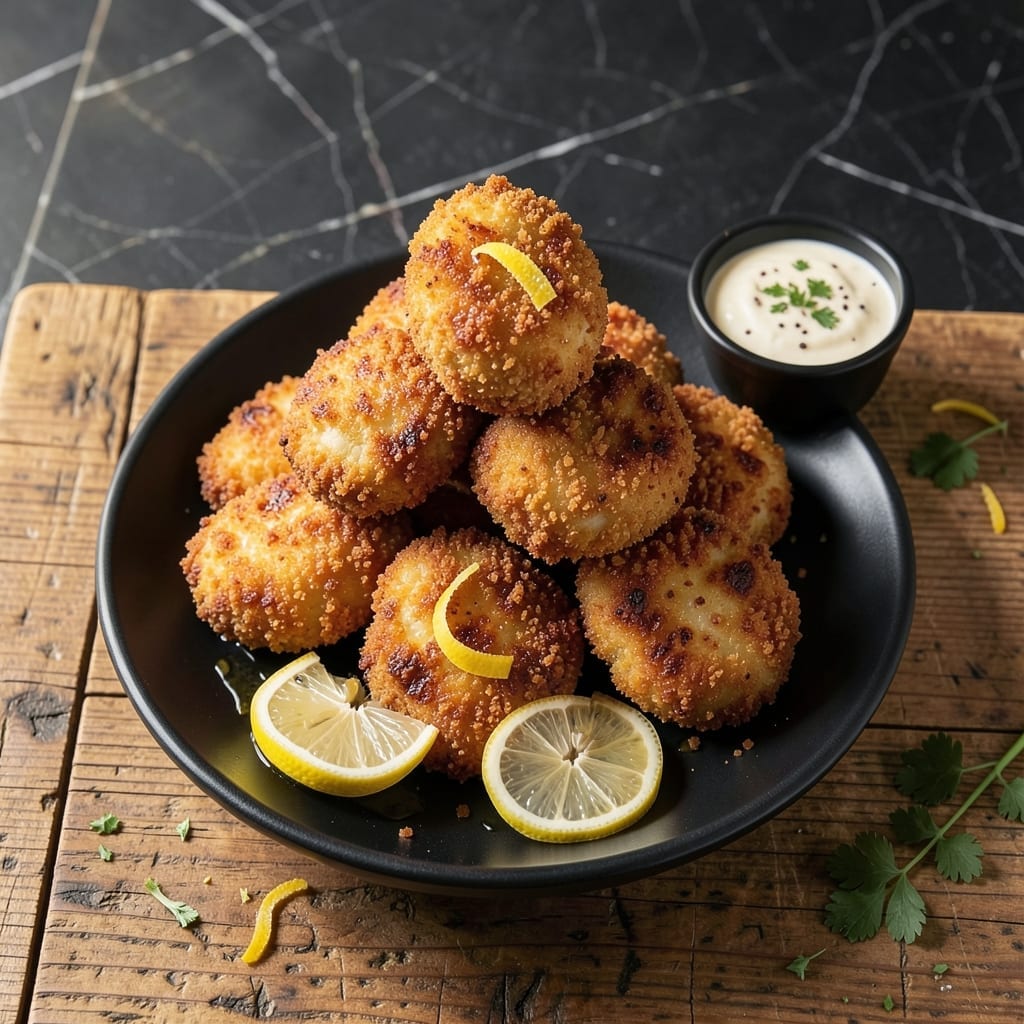
These pan-fried tenders deliver perfectly crispy exteriors with remarkably juicy centers every time. The secret is a two-step breading process and precise oil temperature control.
I developed this method after years of testing different techniques, ensuring each bite maintains that ideal contrast between the golden crust and the tender meat within. Simple ingredients, professional results.
Ingredients for Pan Fried Chicken Tenders
Professional results require quality ingredients and precise breading for these golden pan-fried tenders.
| Ingredient | Amount | Notes |
|---|---|---|
| Chicken Breast Tenders 🍗 | 1 ½ lb | Boneless, skinless, evenly sized |
| All-Purpose Flour 🌾 | 1 cup | For initial dredging step |
| Large Eggs 🥚 | 2 whole | Beaten for egg wash |
| Panko Breadcrumbs 🍞 | 1 ½ cups | For crispy outer coating |
| Cornstarch 🌾 | 2 tbsp | Mixed with flour for extra crisp |
| Garlic Powder 🧄 | 1 tsp | For seasoning breading |
| Onion Powder 🧅 | 1 tsp | For seasoning breading |
| Paprika 🌶️ | 1 tsp | Sweet or smoked variety |
| Salt 🧂 | 1 ½ tsp | Divided for seasoning steps |
| Black Pepper 🌶️ | ½ tsp | Freshly ground preferred |
| Vegetable Oil 🫒 | 1 ½ cups | For frying, neutral high smoke point |
| Buttermilk 🥛 | ½ cup | For marinating chicken |
| Cayenne Pepper 🔥 | ¼ tsp | Optional for heat |
[recipe_ingredient_scaler]
The chicken tenders are the foundation—opt for air-chilled, free-range breasts from Whole Foods or Costco for superior texture and juiciness. Cut them into uniform 1-inch strips to ensure even cooking. Panko breadcrumbs (found in the Asian aisle at most supermarkets) create that signature crispy crust. For the oil, peanut or vegetable oil with a high smoke point is essential for achieving that perfect golden-brown finish without burning.
No buttermilk? Mix 1 tbsp vinegar or lemon juice with enough regular milk to make 1/2 cup and let sit for 5 minutes. Out of panko? Crushed cornflakes or regular breadcrumbs work in a pinch, though the texture won’t be quite as crisp. For extra flavor, add 1/2 tsp of dried thyme or oregano to the breading mixture. The cornstarch can be swapped with arrowroot powder if needed.
Store raw chicken in the coldest part of your fridge and use within 2 days of purchase. The breaded tenders can be refrigerated for up to 24 hours before cooking. Leftovers keep well for 3-4 days in the fridge, though they’re best enjoyed fresh. Reheat in a 350°F oven for 10-12 minutes to maintain crispiness.
Why You’ll Love This Recipe
- 20-Minute Meal: I can go from prep to plate faster than the kids can argue over who sits where. Honestly, the panko-cornstarch combo crises up in minutes.
- Crispy Outside, Juicy Inside: That first bite—the crunch of the panko shell giving way to tender chicken—makes me forget I’m eating a weeknight dinner.
- Budget Stretch: Chicken tenders are cheap, and one pound feeds my family of four with leftovers for sandwiches the next day.
Step-by-Step Instructions for Pan Fried Chicken Tenders
This method delivers perfectly crispy, golden tenders with juicy centers every time.
Step 1: Marinate and Season the Chicken
Pat the 1.5 lb Chicken Breast Tenders completely dry with paper towels. This ensures the breading adheres properly. Season both sides with 1 tsp Salt and 0.5 tsp Black Pepper.
Place the seasoned tenders in a bowl and pour the 0.5 cup Buttermilk over them. Add 0.25 tsp Cayenne Pepper if using heat. Toss to coat evenly and let marinate for 15-20 minutes at room temperature. The buttermilk tenderizes the meat while adding subtle flavor.
Step 2: Prepare the Breading Station
In a shallow bowl, whisk together the 1 cup All-Purpose Flour, 2 tbsp Cornstarch, 1 tsp Garlic Powder, 1 tsp Onion Powder, and remaining 0.5 tsp Salt. The cornstarch creates an extra-crispy texture.
In a second bowl, beat the 2 whole Large Eggs until uniform. In a third bowl, combine the 1.5 cups Panko Breadcrumbs and 1 tsp Paprika. This three-step breading process ensures maximum crunch and flavor in every bite.
Step 3: Bread the Tenders Thoroughly
Remove the chicken from the buttermilk, letting any excess drip off. Dredge each piece in the flour mixture, pressing gently to ensure full coverage. Shake off any excess—this prevents a gummy coating.
Next, dip the floured tenders into the beaten eggs, allowing any excess to drip back into the bowl. Finally, press each piece into the panko mixture, turning to coat completely. For extra crispiness, I press the panko firmly into the surface. Place the breaded tenders on a wire rack to rest for 5-10 minutes.
Step 4: Pan Fry to Golden Perfection
Heat the 1.5 cups Vegetable Oil in a large, heavy skillet over medium-high heat until it reaches 350-375°F. To test readiness, drop a pinch of panko into the oil—it should sizzle immediately and float to the surface.
Carefully place the breaded tenders in the hot oil, working in batches to avoid overcrowding. Fry for 3-4 minutes per side until golden brown and the internal temperature reaches 165°F. Use tongs to flip the tenders gently—don’t pierce them, as this releases juices.
Transfer the cooked tenders to a paper towel-lined plate to drain. The tenders should be crispy on the outside with juicy, tender meat inside. Serve immediately while hot for the best texture.
Pro Tips For Making Pan Fried Chicken Tenders
- Heat the Pan First: I learned this the hard way—crank your pan to medium-high for 2 full minutes before adding oil, then let the oil get shimmery. This prevents that sad, greasy crust that happens when the pan isn’t hot enough.
- Dry the Chicken Well: Pat those tenders bone dry with paper towels before dredging—any moisture left means the coating slides right off. Sounds tedious, but it’s the thing that matters most for crispy results.
- Skip the Overcrowding: Resist the urge to fill the pan. Cook in batches with space between each piece, or the steam will turn your panko soggy instead of golden. I skip this when I’m lazy, but the difference is noticeable.
- Use Cornstarch in Flour: Mix 2 tablespoons of cornstarch into your all-purpose flour for the dredge—it makes the crust extra crispy and helps it brown faster. My grandmother swore by this, and she was right.
Essential Equipment for Great pan fried chicken tenders
Quality Skillet
A heavy-bottomed skillet is essential for even heat distribution. I trust my Lodge cast iron for its heat retention and durability. Avoid thin aluminum pans that create hot spots and burn your breading.
Oil Temperature Control
Use a candy or deep-fry thermometer to maintain oil between 350-375°F. I prefer Taylor Precision brand for accuracy. Too cool, and your tenders absorb oil; too hot, and they burn before cooking through.
Breading Bowls
Wide, shallow bowls make breading easier. I use stainless steel mixing bowls from my local restaurant supply store. They’re durable, easy to clean, and the perfect size for dredging multiple tenders at once.
Draining Rack
A wire rack set over a baking sheet keeps tenders crispy while draining. I line mine with paper towels for easy cleanup. This setup prevents the breading from getting soggy by allowing air circulation underneath.
Tongs for Flipping
Invest in 12-inch locking tongs for safe handling. I use OXO Good Grips for their comfortable grip and precise control. They let you flip tenders gently without piercing the breading.
Paper Towels
Keep a roll of Bounty paper towels nearby for draining and cleanup. The absorbency helps remove excess oil while maintaining crispiness. I go through half a roll making a batch of these tenders. 💪
Nutrition Facts
Frequently Asked Questions
What oil is best for frying?
Use a neutral oil with a high smoke point like vegetable, peanut, or canola oil. These handle the 350-375°F temperature without burning. Avoid olive oil as it can impart unwanted flavor.
Can I bake instead of pan frying?
Yes, bake at 400°F for 15-20 minutes, flipping halfway. Use a wire rack on a baking sheet for air circulation. The texture will be slightly different but still delicious.
How do I keep them crispy?
Drain on a wire rack, not paper towels alone. Keep warm in a 200°F oven on a rack if frying in batches. Serve immediately for maximum crunch.
Why did my breading fall off?
This usually means the chicken wasn’t dry before breading or the oil wasn’t hot enough. Pat the tenders thoroughly and ensure oil reaches 350°F before adding chicken.

Trained in classic French technique but raised on slow-cooked ribs and spicy rubs, she blends culinary skill with smoke and soul.
- Recipe for Boneless Pork Chops in Cast Iron Skillet: Sear and Baste to Juicy Perfection - October 3, 2026
- Recipe for Boneless Cross Rib Roast: Slow-Roasted Beef with Herb Crust - October 3, 2026
- Hamburgers in Sauce Recipe Crock Pot: Slow-Cooked Savory Delight - October 3, 2026