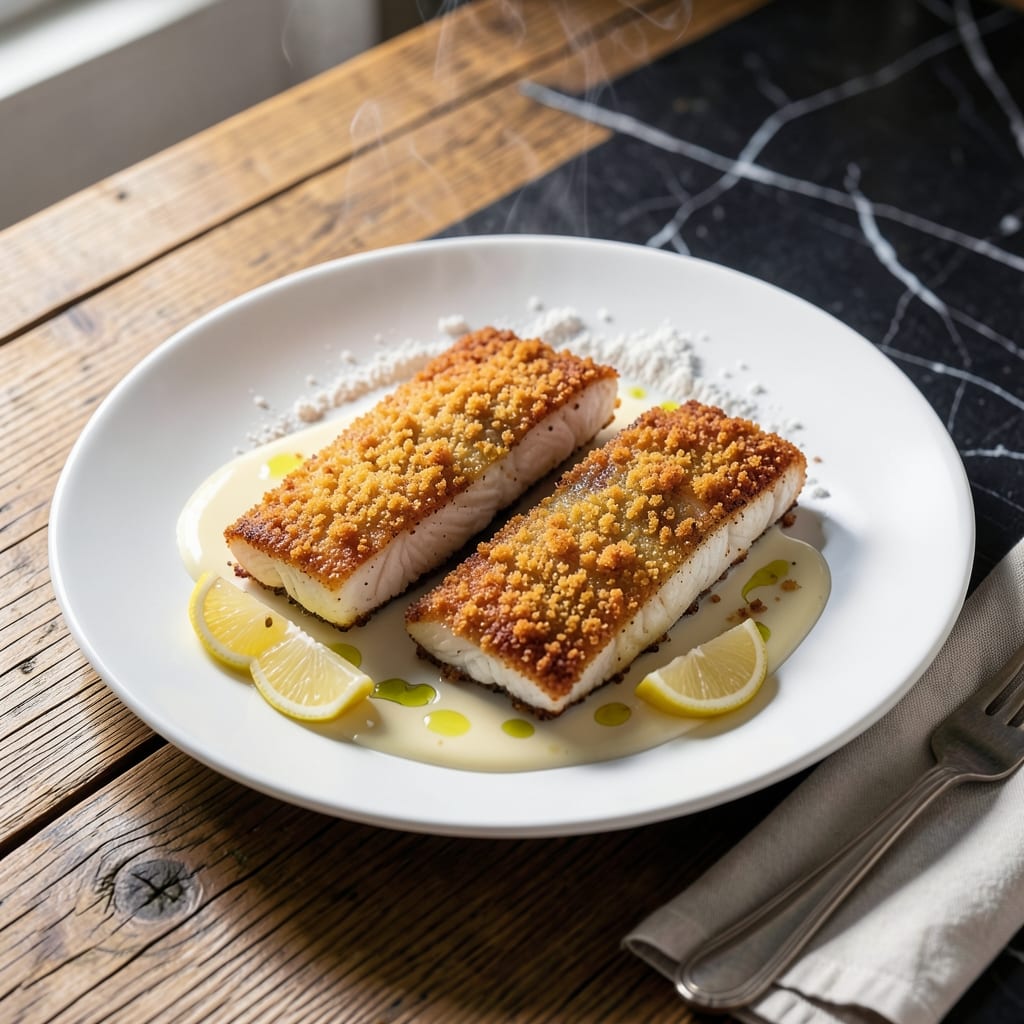
This pan-fried flounder delivers a crispy panko coating with tender, flaky fish inside every time. The key is using the right heat and technique to achieve that golden-brown crust without overcooking the delicate fish.
I’ve tested this method with different breadings and always return to panko for its superior crunch. The flounder stays moist and delicate, while the coating becomes shatteringly crispy—never soggy.
With just a few simple steps, you’ll have restaurant-quality results at home. The contrast between the light, airy panko and the buttery fish is what makes this dish unforgettable.
Serve with lemon wedges and a side of tartar sauce for the perfect finish. This technique guarantees consistent success.
Ingredients for Pan Fried Flounder Recipe Panko
Simple ingredients deliver that signature crispy coating and flaky fish every time.
| Ingredient | Amount | Notes |
|---|---|---|
| Flounder Fillets 🐟 | 1 ½ lb | Skinless, boneless, patted dry |
| Panko Breadcrumbs 🍞 | 1 ½ cups | Japanese-style for extra crunch |
| All-Purpose Flour 🌾 | ½ cup | For initial dredging |
| Large Eggs 🥚 | 2 whole | Beaten for egg wash |
| Unsalted Butter 🧈 | 4 tbsp | For pan-frying to golden |
| Olive Oil 🫒 | 2 tbsp | High smoke point for frying |
| Kosher Salt 🧂 | 1 tsp | Diamond Crystal preferred |
| Freshly Ground Black Pepper 🌶️ | ½ tsp | Coarse grind for texture |
| Garlic Powder 🧄 | ½ tsp | For savory depth |
| Paprika 🌶️ | ½ tsp | Sweet or smoked variety |
| Fresh Lemon 🍋 | 1 whole | Sliced for serving wedges |
| Fresh Parsley 🌿 | 2 tbsp | Chopped, for garnish |
[recipe_ingredient_scaler]
The flounder must be ultra-fresh for this technique to shine. Whole Foods or a trusted fishmonger are ideal—look for fillets with a mild scent, firm texture, and vibrant color. Panko is non-negotiable for the shatteringly crisp crust; Kikkoman brand is widely available and reliable. For the butter, Plugrá or Kerrygold offer superior flavor and browning. Pat the fish dry meticulously—this is what prevents the coating from slipping off.
No flounder? Tilapia or cod work well, though cod may need a minute less cooking. For a gluten-free version, swap panko for gluten-free panko or crushed rice cereal. The egg wash can be replaced with aquafaba (3 tbsp per egg) for a vegan approach. If you’re out of garlic powder, fresh minced garlic at double the amount works, but strain it from the butter to avoid burning.
Leftovers keep 1-2 days in the fridge but are best enjoyed fresh—the coating loses its crispness. Reheat gently in a 350°F oven for 10 minutes to revive some texture. The dry ingredients (flour, panko) can be stored airtight for 3-6 months.
Why You’ll Love This Recipe
- 20-Minute Meal: I can get this from fillet to fork faster than takeout arrives. Honestly, the breading step takes longer to describe than to do.
- Crispy Outside, Tender Inside: That panko crust shatters with every bite while the flounder stays melt-in-your-mouth flaky. Between us, I’ve caught my husband sneaking seconds straight from the pan.
- Weeknight Hero: It’s my go-to for picky eaters and dinner parties alike—fancy enough for guests, simple enough for a Tuesday. My daughter devours it, crust and all.
- Budget-Friendly Luxury: Flounder feels like a splurge but costs less than salon treatments. Plus, one batch feeds four with leftovers that reheat surprisingly well in the toaster oven.
Step-by-Step Instructions for Pan Fried Flounder with Panko
Master the technique for achieving a crispy panko crust and perfectly flaky fish every time.
Step 1: Season and Dredge the Flounder Fillets
Pat the 1.5 lb Flounder Fillets completely dry with paper towels—this is critical for achieving a crisp crust. Season both sides evenly with 1 tsp Kosher Salt, 0.5 tsp Freshly Ground Black Pepper, 0.5 tsp Garlic Powder, and 0.5 tsp Paprika.
Place the 0.5 cup All-Purpose Flour in a shallow dish. Lightly dredge each seasoned fillet in the flour, shaking off any excess. This initial coating creates a base for the egg wash to adhere to, ensuring the panko breadcrumbs stick properly during frying.
Step 2: Coat with Egg Wash and Panko Breadcrumbs
In a second shallow dish, beat the 2 whole Large Eggs until fully combined. Dip each floured fillet into the beaten eggs, allowing any excess to drip off for 5 seconds. This thin, even layer is essential for binding the panko.
Place the 1.5 cups Panko Breadcrumbs in a third shallow dish. Press each fillet firmly into the panko, turning to coat all sides completely. The pressure ensures maximum crumb adhesion. Let the coated fillets rest for 5 minutes to set the coating before frying.
Step 3: Pan-Fry to Golden Perfection
Heat a large skillet over medium-high heat and add 2 tbsp Olive Oil and 2 tbsp Unsalted Butter. Once the butter has melted and the mixture begins to shimmer (but not smoke), carefully add the breaded fillets. Also add the remaining 2 tbsp Unsalted Butter.
Cook for 3-4 minutes per side until the crust is deep golden brown and crispy. Avoid moving the fillets too soon—wait until the bottom releases easily from the pan. The fish is done when it flakes easily with a fork and reaches an internal temperature of 145°F.
Step 4: Rest and Serve
Transfer the cooked fillets to a paper towel-lined plate to drain any excess oil. Let them rest for 2 minutes—this allows the crust to set fully and the fish to retain its moisture.
Garnish with 2 tbsp Fresh Parsley and serve immediately with wedges from the 1 whole Fresh Lemon. The acid from the lemon brightens the rich, buttery flavor of the fish and cuts through the crispy panko crust beautifully.
Pro Tips For Making Pan Fried Flounder Recipe Panko
- Dry the Fillets: Pat the flounder dry with paper towels before dredging—any moisture makes the panko slide right off.
- Chill the Coating: After breading, let the fillets rest in the fridge for 10 minutes so the panko sticks better during frying.
- Use Clarified Butter: Regular butter burns too fast; clarified butter or half butter/half oil gives a golden crust without bitter flavor.
- Skip Overcrowding: Fry in batches with space between fillets—steam from crowding turns panko soggy instead of crisp.
Pro Cooking Tips for pan fried flounder recipe panko
Perfect Heat Control
Getting the temperature right is crucial for this dish. Heat your skillet over medium-high heat and add 2 tbsp olive oil and 2 tbsp butter. The mixture should shimmer but never smoke—this prevents burning the delicate panko coating.
Patience with Frying
Resist the urge to flip too soon. Wait until the edges appear golden and the bottom releases easily, about 3-4 minutes. This ensures maximum crispiness. I learned this the hard way—flipping early means a soggy, uneven crust.
Butter Management
Use Plugrá or Kerrygold butter for the best flavor and browning. Add the remaining 2 tbsp butter as you cook to keep the pan lubricated. If the butter starts browning too quickly, reduce heat slightly to maintain control. 🔥
Resting Time
After frying, let the fillets rest on a paper towel-lined plate for 2 minutes. This allows the crust to set fully and the fish to retain its moisture. Skipping this step can result in a coating that falls apart.
Coating Adhesion
Press the fillets firmly into the 1.5 cups panko to ensure maximum crumb adhesion. Let the coated fish rest for 5 minutes before frying. This rest period helps the coating adhere better during cooking.
Internal Temperature Check
The fish is done when it reaches an internal temperature of 145°F and flakes easily with a fork. Use a quick-read thermometer for accuracy—this prevents overcooking the delicate flounder. 🌡️
Nutrition Facts
Frequently Asked Questions
Why use panko instead of regular breadcrumbs?
Panko creates a lighter, crispier crust due to its larger, flakier texture. Regular breadcrumbs absorb more oil, resulting in a denser coating.
What’s the best oil for pan-frying flounder?
Use a high smoke point oil like vegetable or canola. For extra flavor, mix 2 tbsp olive oil with 2 tbsp butter as in the recipe.
How do I prevent the coating from falling off?
Pat the fish completely dry, press firmly into panko, and let it rest for 5 minutes before frying. Also avoid moving the fillets too soon in the pan.
Can I use a different type of fish?
Yes! Try tilapia or cod using the same method. Cod may need 1 minute less cooking since it’s thicker.

Trained in classic French technique but raised on slow-cooked ribs and spicy rubs, she blends culinary skill with smoke and soul.
- Recipe for Boneless Pork Chops in Cast Iron Skillet: Sear and Baste to Juicy Perfection - October 3, 2026
- Recipe for Boneless Cross Rib Roast: Slow-Roasted Beef with Herb Crust - October 3, 2026
- Hamburgers in Sauce Recipe Crock Pot: Slow-Cooked Savory Delight - October 3, 2026