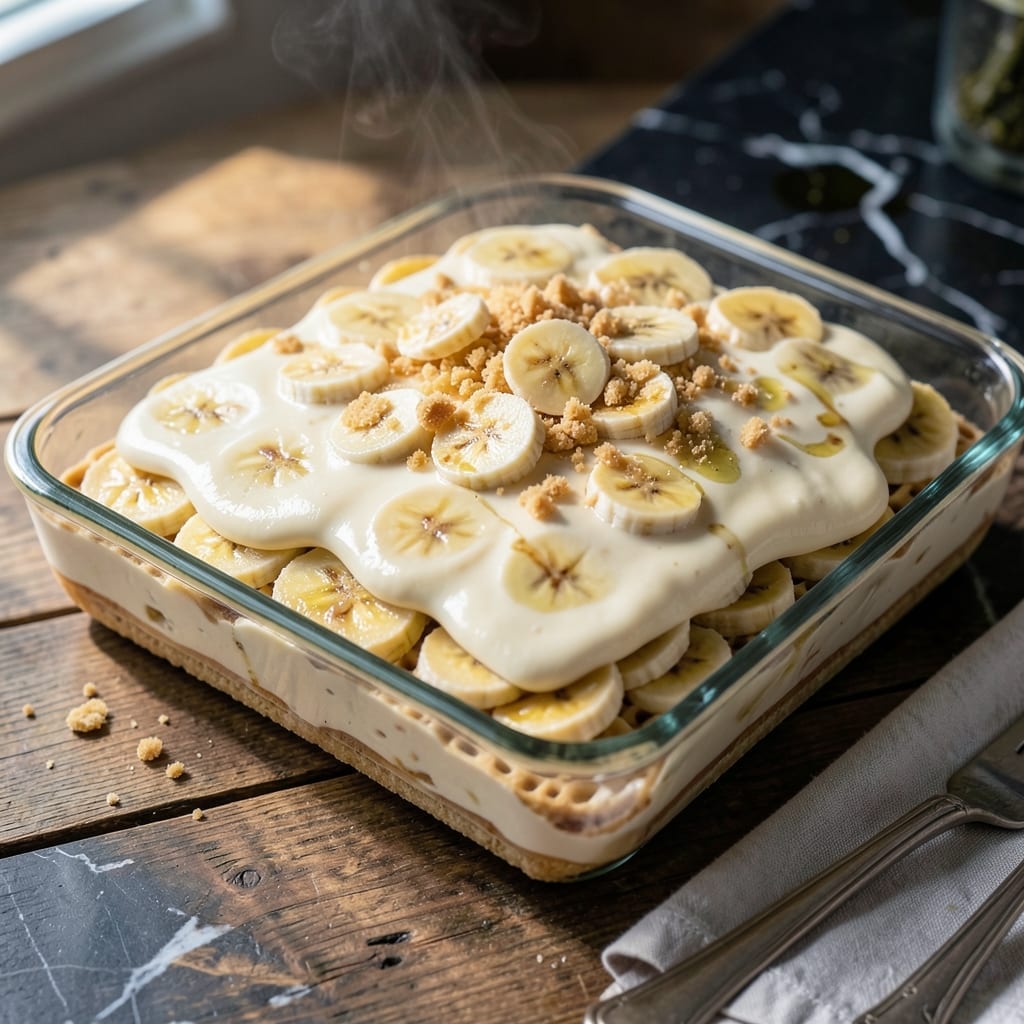
This layered dessert brings together creamy custard, ripe bananas, and crisp vanilla wafers in perfect harmony.
Patti LaBelle’s version elevates classic banana pudding with its rich texture and balanced sweetness. The layers soften just enough to create a perfectly cohesive bite every time.
Ingredients for Patti Labelle Banana Pudding
Creamy custard, ripe bananas, and crisp vanilla wafers create this classic layered dessert.
| Ingredient | Amount | Notes |
|---|---|---|
| Vanilla Wafers 🍪 | 12 oz | About 48 wafers, Nilla brand preferred |
| Ripe Bananas 🍌 | 6 whole | Firm but yellow with brown speckles |
| Whole Milk 🥛 | 2 cups | Full-fat for creaminess |
| Granulated Sugar 🧂 | 1 ½ cups | Divided for custard and meringue |
| All-Purpose Flour 🌾 | ¼ cup | For thickening custard |
| Large Eggs 🥚 | 4 whole | Separated, room temperature |
| Unsalted Butter 🧈 | 2 tbsp | For custard base |
| Vanilla Extract 🫒 | 2 tsp | Pure extract for best flavor |
| Salt 🧂 | ¼ tsp | Fine sea salt preferred |
| Heavy Cream 🥛 | 1 cup | Cold, for whipping |
| Cream of Tartar 🧂 | ½ tsp | Stabilizes meringue |
| Sweetened Condensed Milk 🥛 | 1 can | 14 oz can, standard brand |
[recipe_ingredient_scaler]
The vanilla wafers are non-negotiable for authenticity. Nilla brand offers the perfect crispness and sweetness balance. Most supermarkets carry them in the cookie aisle. Look for boxes with intact wafers—broken ones still work but lack visual appeal. The bananas should be just turning ripe (yellow with slight green) to prevent mushiness during assembly.
No vanilla wafers? Shortbread cookies or graham crackers work in a pinch (adjust sweetness). Out of heavy cream? Whole milk with 2 tbsp cornstarch can substitute for whipping. For a lighter version, Greek yogurt folded into whipped topping replaces the cream layer. The custard thickens best with whole milk—2% or skim may require extra flour.
Assemble this the morning you plan to serve. Vanilla wafers soften within 4-6 hours, but the flavors meld best overnight. Keeps in the refrigerator for 3 days—though it rarely lasts that long. Cover tightly with plastic wrap to prevent a skin from forming on the custard.
Why You’ll Love This Recipe
- No-Fuss Layers: I love how this comes together with just vanilla wafers, bananas, and a simple custard—no baking, no stress.
- Creamy Nostalgia: The warm vanilla and ripe bananas taste like a hug in dessert form, honestly better than any boxed mix.
- Potluck Hero: Between us, I’ve brought this to three gatherings this month and left with an empty dish every time.
- Pennywise Delight: A bag of wafers, a bunch of bananas, and pantry staples feed a crowd without breaking the bank.
Step-by-Step Instructions for Banana Pudding
Master the layers with this professional technique for the ultimate creamy dessert experience.
Step 1: Prepare the Custard Base
In a medium saucepan, combine the 2 cups whole milk, 1 can sweetened condensed milk, 1.5 cups granulated sugar, 0.25 cup all-purpose flour, 4 whole large eggs, 2 tbsp unsalted butter, 2 tsp vanilla extract, and 0.25 tsp salt.
Whisk vigorously until the mixture is completely smooth and no lumps remain. This is critical for a silky custard texture. Place the saucepan over medium heat and cook, stirring constantly with a wooden spoon, for 8-10 minutes.
Watch for the mixture to thicken to the consistency of pudding—it should coat the back of the spoon and leave a clear path when you run your finger through it. Don’t let it boil, or the eggs may curdle.
Step 2: Layer Vanilla Wafers and Bananas
While the custard cooks, prepare your layers. Line the bottom of a 9×13-inch baking dish with a single layer of 12 oz vanilla wafers. I arrange them slightly overlapping to ensure full coverage.
Slice the 6 whole ripe bananas into ¼-inch thick rounds and layer them evenly over the vanilla wafers. The bananas should be just ripe—firm enough to hold their shape but sweet with those characteristic brown speckles. Repeat with another layer of vanilla wafers on top of the bananas.
Step 3: Assemble and Chill
Once the custard reaches the proper thickness, immediately pour it over the vanilla wafer and banana layers. Use a spatula to spread it evenly, ensuring it seeps into all the crevices. The heat from the custard will soften the wafers slightly, which is exactly what you want.
Press plastic wrap directly onto the surface of the pudding to prevent a skin from forming. Refrigerate for at least 4 hours, or preferably overnight. This chilling time allows the vanilla wafers to absorb the custard and transform into that signature soft, cake-like texture.
Step 4: Top with Whipped Cream and Final Layer
Just before serving, whip the 1 cup heavy cream with the 0.5 tsp cream of tartar until stiff peaks form. The cream of tartar stabilizes the whipped cream, keeping it from deflating. Spread this evenly over the chilled pudding.
Finish with a final layer of vanilla wafers, arranged neatly for a polished presentation. For an extra touch, crumble a few additional wafers on top. Serve immediately while the whipped cream is fresh and the layers are distinct.
Pro Tips For Making Patti Labelle Banana Pudding
- Whisk Vigorously: After adding flour to the milk mixture, whisk for a full 2-3 minutes over medium heat—this prevents lumps and guarantees a smooth custard.
- Use Very Ripe Bananas: I learned this the hard way—underripe bananas taste starchy and ruin the texture; go for ones with plenty of brown spots for natural sweetness.
- Layer While Warm: Assemble the pudding while the custard is still warm so the vanilla wafers soften just enough without turning to mush.
- Chill 4 Hours: Sounds like forever, but this pudding needs that full time in the fridge to set properly—I’ve tried rushing it, and it’s always a runny disappointment.
Storing and Reheating patti labelle banana pudding
Refrigerator Storage
Cover your dish tightly with plastic wrap, pressing it directly against the surface to prevent a skin from forming. This dessert keeps beautifully in the fridge for up to 3 days—though it’s so good it rarely lasts that long. I always make extra for late-night cravings. ❄️
Freezing Tips
While not ideal, you can freeze this for up to 1 month in an airtight container. The vanilla wafers will soften completely, but the flavors remain intact. Thaw overnight in the fridge before serving.
Reviving Leftovers
If the top layer of vanilla wafers loses its crispness, simply add fresh ones before serving. A quick 10-minute rest at room temperature helps the layers meld again. I’ve even crumbled stale wafers on top for extra texture.
Make-Ahead Strategy
This dessert actually improves with time as the custard soaks into the vanilla wafers. Assemble it the morning you plan to serve, and let it chill for at least 4 hours. The layers will be perfectly cohesive by dinner.
Serving Temperature
Serve this straight from the fridge for the best texture. The custard stays creamy, and the whipped cream holds its shape. If you’re transporting it, use an insulated cooler with ice packs to keep it chilled.
Nutrition Facts
Frequently Asked Questions
Can I use a different cookie instead of vanilla wafers?
Yes, but stick to light, buttery cookies. Shortbread or graham crackers work well, though they may alter the texture slightly. Avoid chocolate cookies as they’ll overpower the banana flavor.
How do I prevent the bananas from turning brown?
Slice bananas just before assembling. A light brush with lemon juice can help, but the custard layer will mostly protect them. The brown speckles actually add sweetness.
Can I make this without eggs?
For an egg-free version, use cornstarch (3 tbsp) mixed with 1 cup cold milk as a thickener. Cook until it reaches pudding consistency, then proceed with the recipe.
Why is my custard runny after chilling?
This usually means it didn’t cook long enough. Return it to medium heat and cook for another 2-3 minutes, stirring constantly. Chill for at least 4 hours before serving.

Trained in classic French technique but raised on slow-cooked ribs and spicy rubs, she blends culinary skill with smoke and soul.
- Recipe for Boneless Pork Chops in Cast Iron Skillet: Sear and Baste to Juicy Perfection - October 3, 2026
- Recipe for Boneless Cross Rib Roast: Slow-Roasted Beef with Herb Crust - October 3, 2026
- Hamburgers in Sauce Recipe Crock Pot: Slow-Cooked Savory Delight - October 3, 2026