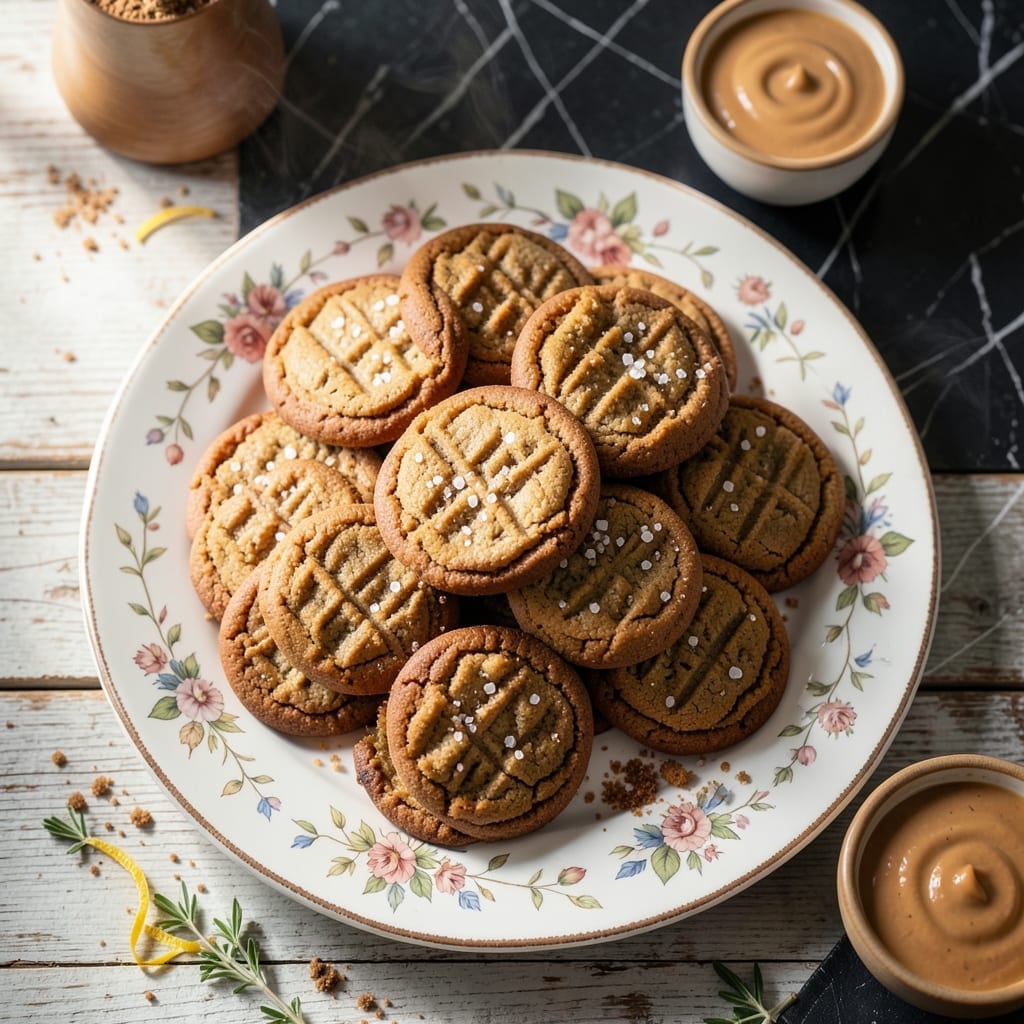
This egg-free recipe delivers classic peanut butter cookies with rich nutty flavor in every bite. The secret lies in using simple pantry staples to achieve the perfect texture without compromising taste.
You’ll get cookies that are tender inside with slightly crisp edges, all while being completely egg-free. The aroma alone will have everyone gathered in the kitchen before the first batch is done.
Ingredients for Peanut Butter Cookie Recipe No Eggs
Simple pantry staples create these egg-free cookies with rich nutty flavor.
| Ingredient | Amount | Notes |
|---|---|---|
| Creamy Peanut Butter 🥜 | 1 cup | Natural or regular, well-stirred |
| All-Purpose Flour 🌾 | 1 ¼ cups | Spooned and leveled |
| Granulated Sugar 🍚 | ¾ cup | For sweetness and texture |
| Brown Sugar 🍚 | ½ cup | Packed, for moisture and chew |
| Vegetable Oil 🫒 | ¼ cup | Neutral-flavored for moisture |
| Baking Soda 🧂 | 1 tsp | For rise and spread |
| Vanilla Extract 💧 | 1 tsp | Pure for best flavor |
| Salt 🧂 | ½ tsp | Fine sea salt preferred |
| Flaxseed Meal 🌿 | 1 tbsp | Mixed with 3 tbsp water for binding |
| Water 💧 | 3 tbsp | For flax egg mixture |
| Dairy-Free Chocolate Chips 🍫 | ½ cup | Optional, for extra richness |
[recipe_ingredient_scaler]
Peanut butter is the star here—Jif or Skippy for consistency, but natural works if well-stirred (the oil separation can mess with texture). King Arthur Flour is my go-to for all-purpose, but any unbleached brand does the trick. The brown sugar adds chew, so don’t skip it. For the flax egg, Golden flaxseed meal (from Bob’s Red Mill) blends in invisibly. Oil replaces eggs’ moisture—use something neutral like vegetable or canola.
No flaxseed? Chia seeds at the same ratio work too (1 tbsp ground chia + 3 tbsp water). Swap the oil for melted coconut oil if you want a hint of flavor. Out of brown sugar? Use all granulated plus 1 extra tbsp of oil. Want crunch? Add chopped peanuts. The chocolate chips are vegan—Enjoy Life or Pascha brands are solid choices.
Dough keeps 3 days in the fridge or 3 months frozen (scoop before freezing for easy baking later). Baked cookies stay fresh 5 days in an airtight container. Freeze baked cookies for up to 2 months—they’ll soften as they thaw, so crisp them up in the oven.
Why You’ll Love This Recipe
- No-Fuss Mixing: I just stir the peanut butter, sugars, oil, and flour together—no eggs, no waiting for them to soften, no extra bowls.
- Rich Nutty Flavor: The creamy peanut butter and brown sugar give these that deep, caramelized taste that’s way better than store-bought.
- Lunchbox Hero: I pack these for school snacks or picnics since they’re sturdy, nutty, and kid-approved (yes, even the picky one).
- Budget Friendly: Honestly, five pantry staples and no specialty items—cheaper than a bakery run and just as satisfying.
Step-by-Step Instructions for Peanut Butter Cookies
Here’s the method. Straightforward, tested, works every time.
Step 1: Prepare the Flax Egg
In a small bowl, combine 1 tbsp Flaxseed Meal and 3 tbsp Water. Stir well and let it sit for 5 minutes to thicken. This mixture replaces eggs in the recipe, providing the necessary binding without compromising the texture.
The flax egg should become gel-like and slightly sticky. If it seems too thin, wait another 2-3 minutes before proceeding. This step is crucial for holding the dough together.
Step 2: Cream the Wet Ingredients
In a large mixing bowl, combine 1 cup Creamy Peanut Butter, 0.75 cup Granulated Sugar, 0.5 cup Brown Sugar, and 0.25 cup Vegetable Oil. Use a hand mixer or stand mixer on medium speed to blend until smooth and creamy.
This should take about 2-3 minutes. You’ll notice the mixture lighten slightly as air is incorporated. The combination of both sugars ensures a perfect balance of sweetness and chewiness in the final cookies.
Step 3: Incorporate Dry Ingredients
Add 1.25 cups All-Purpose Flour, 1 tsp Baking Soda, and 0.5 tsp Salt to the wet mixture. Mix on low speed just until the flour is fully incorporated and no streaks remain. Overmixing can develop gluten, leading to tough cookies.
Once the dry ingredients are combined, add the prepared flax egg and 1 tsp Vanilla Extract. Mix for another 20-30 seconds to ensure everything is evenly distributed. The dough will be thick and slightly sticky at this stage.
Step 4: Fold in Chocolate Chips and Chill
Using a spatula, gently fold in 0.5 cup Dairy-Free Chocolate Chips until evenly dispersed throughout the dough. This step ensures every bite has a touch of chocolate richness.
Cover the bowl with plastic wrap and refrigerate for at least 30 minutes. Chilling the dough prevents excessive spreading during baking and allows the flavors to meld together. For best results, chill for up to 1 hour.
Step 5: Bake to Golden Brown
Preheat your oven to 350°F and line a baking sheet with parchment paper. Scoop the dough into 1.5-tablespoon portions and roll into balls. Place them 2 inches apart on the prepared baking sheet.
Bake for 10-12 minutes until the edges are light golden brown. The centers may still look slightly soft, but they’ll firm up as the cookies cool. Let them rest on the baking sheet for 5 minutes before transferring to a wire rack to cool completely.
Pro Tips For Making Peanut Butter Cookie Recipe No Eggs
- Chill the Dough: After mixing, refrigerate the dough for 30 minutes—I learned this the hard way when my first batch spread into one giant cookie.
- Measure Peanut Butter Right: Pack the peanut butter tightly into the measuring cup, then level it off; the air gaps make a real difference in texture.
- Skip Overmixing: Stir just until the flour disappears—after burning three batches, I finally figured out overworking the dough makes cookies tough.
- Use Parchment Paper: Line your baking sheet with parchment to prevent sticking, especially since there’s no egg to bind these cookies together.
Pro Cooking Tips for This Dish
Perfect Flax Egg
Let your flax egg sit the full 5 minutes—it needs time to thicken properly. I stir mine every 1-2 minutes to prevent clumping. The gel-like consistency should mimic a raw egg, which is crucial for binding your dough together. 💡
Temperature Control
Bake at exactly 350°F—any hotter and the edges will brown too quickly while the centers stay raw. I use an oven thermometer to verify, as many home ovens run 10-15°F off. Rotate your baking sheet halfway through for even cooking.
Dough Chilling
Don’t skip the 30-minute chill—this prevents excessive spreading. I often make the dough the night before and let it chill overnight. When ready to bake, let it sit at room temperature for 10 minutes to soften slightly for easier scooping.
Uniform Portioning
Use a cookie scoop or measuring spoon for consistent 1.5-tablespoon portions. I press a fork into the tops in a crisscross pattern before baking—this classic design helps them bake evenly and adds that nostalgic peanut butter cookie look. 🥜
Baking Time
Start checking at 10 minutes—the edges should be just starting to turn golden. They’ll continue cooking slightly after removal from the oven. If your cookies are spreading too much, your oven may be running too hot, so reduce temperature by 25°F.
Cooling Technique
Let them rest on the baking sheet for 5 minutes before transferring. This brief rest allows them to set without crumbling. I slide the parchment paper with the cookies onto the counter to cool completely—this prevents over-browning on the bottom.
Nutrition Facts
Frequently Asked Questions
Can I use crunchy peanut butter instead?
Crunchy peanut butter adds extra texture and nutty flavor. The bits of peanuts will create a delightful crunch in every bite, but the baking time remains the same.
Why do I need to chill the dough?
Chilling for 30 minutes prevents excessive spreading in the oven. It also lets the flax egg fully bind, ensuring your cookies hold their shape perfectly.
Can I skip the flax egg?
No, the flax egg is essential for binding. Without it, the cookies may crumble. For a quick fix, use 1 tbsp chia seeds + 3 tbsp water as a substitute.
How do I know when they’re done?
The edges should be light golden brown at 10-12 minutes. The centers will look soft but will firm up as they cool on the baking sheet.

Trained in classic French technique but raised on slow-cooked ribs and spicy rubs, she blends culinary skill with smoke and soul.
- Recipe for Boneless Pork Chops in Cast Iron Skillet: Sear and Baste to Juicy Perfection - October 3, 2026
- Recipe for Boneless Cross Rib Roast: Slow-Roasted Beef with Herb Crust - October 3, 2026
- Hamburgers in Sauce Recipe Crock Pot: Slow-Cooked Savory Delight - October 3, 2026