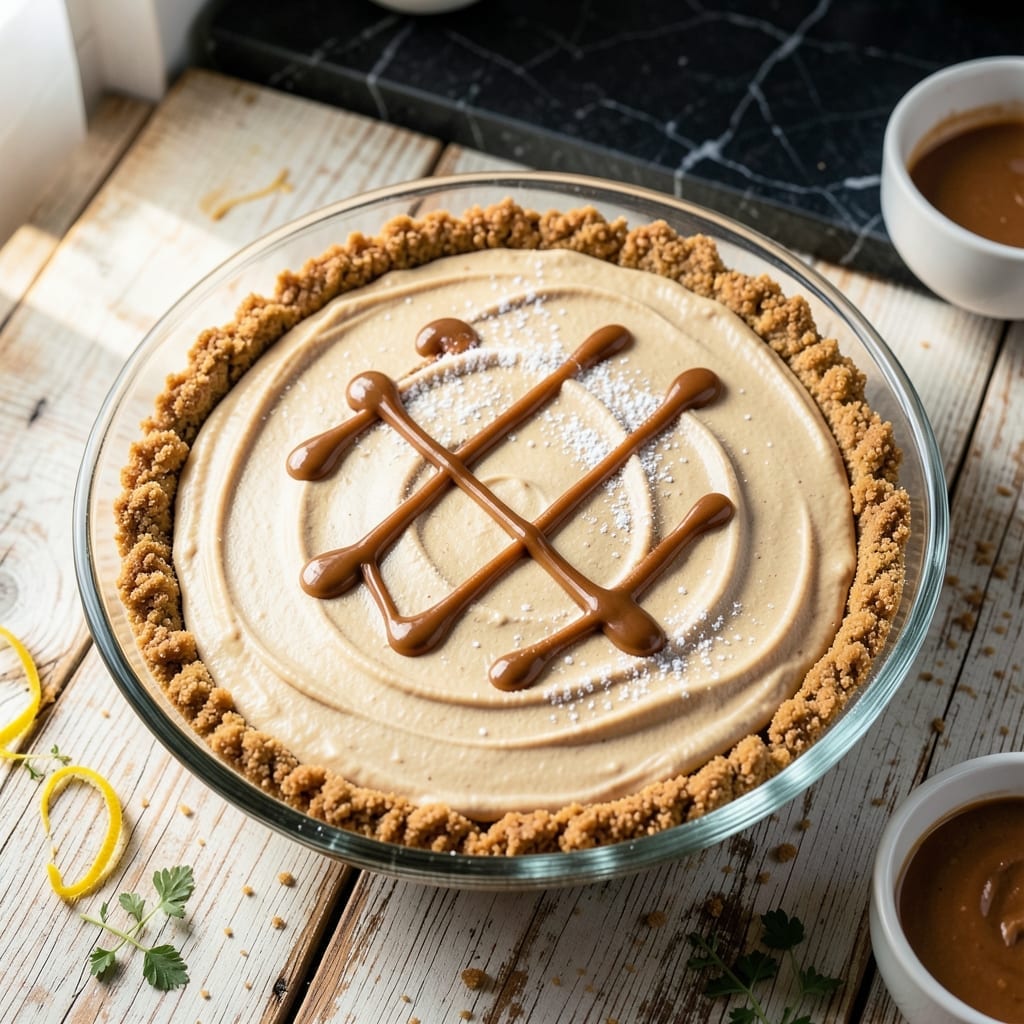
This no-bake peanut butter pie delivers a silky smooth texture without turning on the oven. A game-changer for hot days or busy schedules.
With a creamy peanut butter filling and easy graham crust, it sets up in the fridge while you focus on other things. The result is rich, dreamy, and always impressive.
Ingredients for Peanut Butter Pie Recipe No Bake
Nothing exotic here—just pantry staples and fridge basics for dreamy results.
| Ingredient | Amount | Notes |
|---|---|---|
| Creamy Peanut Butter 🥜 | 1 ½ cups | Natural or commercial style |
| Cream Cheese 🧀 | 8 oz | Full-fat, softened to room temperature |
| Powdered Sugar 🍚 | 1 ¼ cups | Sifted for smooth texture |
| Vanilla Extract 🌿 | 1 tsp | Pure vanilla for best flavor |
| Heavy Whipping Cream 🥛 | 1 cup | Cold, for whipping |
| Graham Cracker Crumbs 🍪 | 1 ½ cups | About 12 full sheet crackers |
| Unsalted Butter 🧈 | ½ cup | Melted for crust binding |
| Granulated Sugar 🍚 | ¼ cup | For crust sweetness |
| Salt 🧂 | ¼ tsp | Fine grain for balance |
| Chopped Peanuts 🥜 | ½ cup | For topping, optional |
| Chocolate Chips 🍫 | ½ cup | Semi-sweet for garnish |
[recipe_ingredient_scaler]
The peanut butter is the star. Jif or Skippy work great—natural styles can separate, but I’ve had luck with Smucker’s Natural. The cream cheese needs to be full-fat (trust me on this), and make sure it’s softened or you’ll get lumps. Graham crackers can be store-brand—Honey Maid or Annie’s both work. For the crust, if you’re in a hurry, pre-made graham crust saves 10 minutes.
No cream cheese? Ricotta at the same amount works in a pinch (texture’s slightly different). Swap powdered sugar for maple syrup if you’re avoiding refined sugar (use 3/4 cup). Heavy cream can be coconut cream for a dairy-free version. The chocolate chips are optional—Reese’s Pieces add a fun crunch. Skip the peanuts if there are allergies.
This sets up in 4 hours in the fridge, but overnight is even better. Keeps covered for 3-4 days—if it lasts that long. Freeze slices for up to 1 month (thaw in the fridge before serving).
Why You’ll Love This Recipe
- I’ll be real: I love that I can make it the night before—it tastes even better after sitting overnight.
- No Oven Needed: No preheating, no baking—just mix, chill, and serve. Honestly, it’s the easiest pie I’ve ever made.
- Creamy Dream: The combo of peanut butter and cream cheese is ridiculously good, with just the right sweetness from the powdered sugar.
- Crowd Pleaser: I’ve brought this to potlucks and family dinners, and it’s always the first to disappear.
Step-by-Step Instructions for Peanut Butter Pie
Here’s the method. Straightforward, tested, works every time.
Step 1: Prepare the Graham Cracker Crust
In a mixing bowl, combine the 1.5 cups Graham Cracker Crumbs, 0.25 cup Granulated Sugar, and 0.5 cup melted Unsalted Butter. Stir until the mixture resembles wet sand and holds together when pressed.
I always add a pinch of the 0.25 tsp Salt here too—it balances the sweetness. Press the mixture firmly into a pie dish, making sure to cover the bottom and sides evenly. Use the back of a spoon or a measuring cup to compact it really well.
Chill the crust in the fridge for 15 minutes while you prep the filling. This prevents it from crumbling when you add the peanut butter layer.
Step 2: Whip the Cream Cheese and Peanut Butter Base
In a large bowl, beat the 8 oz Cream Cheese until smooth and creamy. Add the 1.5 cups Creamy Peanut Butter and mix until fully combined—no streaks should remain.
Gradually add the 1.25 cups Powdered Sugar and 1 tsp Vanilla Extract, mixing on low speed at first to avoid a sugar cloud. Once incorporated, increase to medium speed and beat for 1-2 minutes until fluffy.
This step is key for that silky texture. Don’t rush it—the mixture should be light and airy, almost like a thick frosting.
Step 3: Fold in the Whipped Cream
In a separate chilled bowl, whip the 1 cup Heavy Whipping Cream until stiff peaks form. Be careful not to over-whip—you want it to hold its shape but still be smooth.
Gently fold the whipped cream into the peanut butter mixture using a spatula. Work in thirds, folding just until no white streaks remain. This keeps the filling light and airy rather than dense.
Spoon the filling into the chilled crust, smoothing the top with the spatula. The texture should be thick but still spreadable.
Step 4: Chill and Add Toppings
Refrigerate the pie for at least 4 hours (overnight is best). This gives the filling time to set completely. If you try to slice it too soon, it’ll be runny and won’t hold its shape.
Just before serving, sprinkle the top with the 0.5 cup Chopped Peanuts and 0.5 cup Chocolate Chips. Press them lightly into the filling so they stick. The contrast of textures here is what makes this pie so satisfying.
Slice and serve cold. Each piece should have a firm crust, a creamy filling, and a nice crunch from the toppings.
Pro Tips For Making Peanut Butter Pie Recipe No Bake
- Chill the Bowl: Pop your mixing bowl and beaters in the freezer for 10 minutes before whipping the cream—it holds peaks better and prevents a soupy mess. I learned this the hard way after my pie looked more like peanut butter soup.
- Soften the Cream Cheese: Let it sit out for at least 30 minutes, or microwave in 5-second bursts at 50% power until just pliable. Cold cream cheese means lumps, and nobody wants a clumpy peanut butter pie.
- Skip Low-Fat Peanut Butter: Use full-fat, creamy peanut butter—natural or standard, but not the reduced-fat kind. Sounds weird, but it works: the oil content is what gives the filling its rich, sliceable texture.
- Fold Gently: When combining the whipped cream with the peanut butter mixture, use a spatula and fold just until incorporated. Overmixing deflates the cream and turns your fluffy filling into a dense brick.
Dietary Considerations for peanut butter pie recipe no bake
Gluten-Free Option
Swap graham cracker crumbs for 1.5 cups gluten-free graham crackers or almond flour. I’ve tested with Schar brand—texture stays crisp. Add 1 tbsp xanthan gum to bind if using almond flour. Press firmly into the pan for stability.
Vegan Adaptation
Use 8 oz vegan cream cheese (I like Miyoko’s) and 1 cup coconut cream for whipping. Replace powdered sugar with ¾ cup maple syrup. The coconut cream whips beautifully when chilled overnight. 🌱
Nut-Free Version
Substitute peanut butter with 1.5 cups sunflower seed butter—SunButter works well. Ensure all toppings are nut-free too. The flavor differs slightly but still delivers that rich, creamy texture everyone loves.
Lower Sugar
Cut powdered sugar to ½ cup and add 1 tsp stevia or monk fruit sweetener. The natural sweetness of peanut butter still shines. I often use Swerve for a clean finish without aftertaste.
Dairy-Free Crust
Replace butter with ½ cup melted coconut oil or vegan butter (Miyoko’s is my go-to). The crust sets just as firmly in the fridge. Press crumbs extra tightly to prevent crumbling.
Allergy-Friendly Toppings
Skip chopped peanuts and use toasted oats or dairy-free chocolate chips. Enjoy Life brand chips are free from top allergens. Sprinkle lightly for texture contrast. 💪
Nutrition Facts
Frequently Asked Questions
Can I use natural peanut butter?
Yes, but choose a well-stirred variety like Smucker’s Natural. The oil separation can affect texture, so avoid bottom-of-the-jar natural styles. Commercial brands work most reliably.
How long does it need to chill?
Minimum 4 hours in the fridge, but overnight is ideal. The filling won’t set properly if sliced too soon. For best results, plan ahead.
What if my pie won’t set?
This usually means the cream wasn’t whipped enough or the chilling time was too short. Try re-whipping the cream to stiff peaks and chilling for another 2 hours.
Can I make this ahead of time?
It keeps covered in the fridge for 3-4 days. Add toppings just before serving to maintain crunch.

Trained in classic French technique but raised on slow-cooked ribs and spicy rubs, she blends culinary skill with smoke and soul.
- Recipe for Boneless Pork Chops in Cast Iron Skillet: Sear and Baste to Juicy Perfection - October 3, 2026
- Recipe for Boneless Cross Rib Roast: Slow-Roasted Beef with Herb Crust - October 3, 2026
- Hamburgers in Sauce Recipe Crock Pot: Slow-Cooked Savory Delight - October 3, 2026