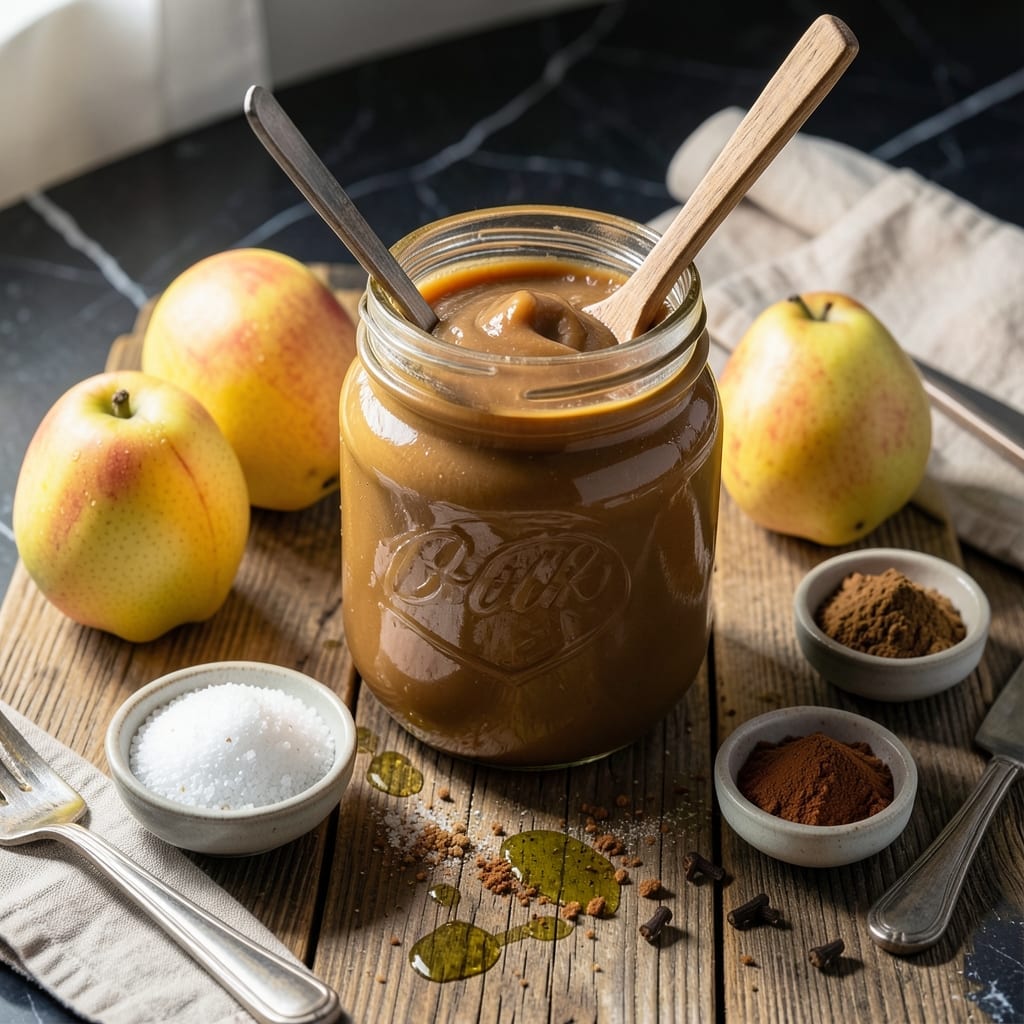
There’s nothing like spreading homemade pear butter on toast in the morning. This small-batch recipe captures peak pear flavor with warm spices.
I developed this for safe canning with tested sugar-to-fruit ratios. The slow cooking transforms pears into a smooth, golden spread that keeps beautifully in jars.
Ingredients for Pear Butter Recipe for Canning
Nine simple ingredients transform into a smooth, spiced spread perfect for canning.
| Ingredient | Amount | Notes |
|---|---|---|
| Ripe Pears 🍐 | 4 lb | Bartlett or Anjou preferred, peeled and cored |
| Granulated Sugar 🥣 | 2 cups | Adjust to taste preference |
| Light Brown Sugar 🟤 | 1 cup | Packed, for depth of flavor |
| Ground Cinnamon 🌿 | 1 ½ tsp | Ceylon or Cassia variety |
| Ground Nutmeg 🌰 | ½ tsp | Freshly grated preferred |
| Ground Cloves 🌼 | ¼ tsp | Just a pinch for warmth |
| Lemon Juice 🍋 | 3 tbsp | Freshly squeezed, for acidity |
| Vanilla Extract 🌿 | 1 tsp | Pure extract, not imitation |
| Water 💧 | ½ cup | To prevent sticking |
[recipe_ingredient_scaler]
The pears are everything. Bartlett or Anjou at peak ripeness give the best texture and sweetness. I grab mine from local orchards in late summer when they’re plentiful and cheap. Skip the super-firm ones—they won’t break down right. For sugar, organic granulated dissolves cleanest, but regular works fine. Just don’t skimp on the brown sugar—it adds that caramel depth.
No Bartletts? Bosc pears work too but need a bit more cooking time. Out of brown sugar? Substitute maple syrup at three-quarters the amount (it’s thinner, so reduce other liquids slightly). Want more spice? Add 1/4 tsp allspice—it plays nice with the cinnamon. The lemon juice isn’t just for flavor; it’s critical for safe canning, so don’t skip it.
This keeps beautifully. Processed jars last 12-18 months in a cool, dark pantry. Once opened, refrigerate and use within 3 weeks. The flavor deepens over time—tastes even better after a month. Pro tip: label jars with the date (worth the extra minute).
Why You’ll Love This Recipe
- One Pot Wonder: I just toss the pears, sugars, and spices in a pot and let the stove do the work—no fancy equipment needed.
- Warm Spice Magic: The cinnamon and nutmeg turn sweet pears into a cozy, spreadable hug in a jar.
- Gift Jar Hero: I can these in pretty jars and suddenly I’m the most popular person at holiday markets.
- Pantry Staple: Honestly, it keeps for ages, so I always have a sweet topping for toast or yogurt on hand.
Step-by-Step Instructions for Pear Butter for Canning
This method transforms ripe pears into a smooth, spiced spread with perfect canning results.
Step 1: Cook the Pears Until Tender
Combine the 4 lb Ripe Pears and 0.5 cup Water in a large, heavy-bottomed pot. Cook over medium heat for 15-20 minutes, stirring occasionally, until the pears soften and break down easily with a wooden spoon.
You’ll notice the fruit releasing its juices as it cooks. Keep the heat steady—too high and the pears will scorch; too low and they’ll take forever. The pears are ready when they mash easily with minimal pressure, and the liquid has reduced slightly.
Step 2: Blend and Add Spices
Use an immersion blender to puree the cooked pears until completely smooth. If you don’t have one, carefully transfer the mixture to a regular blender in batches, then return it to the pot. This step ensures a velvety texture without lumps.
Stir in the 2 cups Granulated Sugar, 1 cup Light Brown Sugar, 1.5 tsp Ground Cinnamon, 0.5 tsp Ground Nutmeg, and 0.25 tsp Ground Cloves. The spices should be fully incorporated, and the mixture will look slightly thicker as the sugars dissolve.
Step 3: Simmer Until Thickened
Bring the mixture to a gentle boil over medium-high heat, then reduce to medium-low heat. Cook for 45-60 minutes, stirring frequently to prevent sticking, especially as the mixture thickens.
You’ll know it’s ready when the pear butter mounds slightly on a spoon and leaves a clear path when you run your finger through it. The color will deepen to a rich amber, and the volume will reduce by about a third. Stir in the 3 tbsp Lemon Juice and 1 tsp Vanilla Extract during the last 5 minutes of cooking.
Step 4: Test for Doneness and Adjust
To confirm the pear butter is ready for canning, place a small spoonful on a chilled plate. If it thickens and holds its shape after a minute, it’s done. If it’s too runny, continue simmering and retest every 5 minutes.
Taste and adjust sweetness if needed, though the measurements provided yield a balanced flavor. The lemon juice brightens the sweetness, while the vanilla adds a warm, aromatic finish that complements the spices beautifully.
Step 5: Prepare for Canning
Ladle the hot pear butter into sterilized jars, leaving ¼ inch headspace at the top. Remove any air bubbles by gently tapping the jars on the counter. Wipe the rims clean with a damp cloth to ensure a proper seal.
Process the jars in a water bath canner for 10 minutes (adjust for altitude if necessary). Once processed, place the jars on a towel-lined countertop and let them cool undisturbed for 12-24 hours. You’ll hear the satisfying ping of the lids sealing as they cool. Store in a cool, dark place for up to 1 year.
Pro Tips For Making Pear Butter Recipe For Canning
- Cook Down Slowly: I learned this the hard way—rushing the cooking process leaves you with runny butter. Keep it at a low simmer for 1-2 hours, stirring often, until it thickens enough to mound on a spoon.
- Use Overripe Pears: Sounds weird, but it works: the softest, spottiest pears break down fastest and sweeten naturally, so you can cut back on sugar if needed.
- Skip the Blender: After burning a batch trying to puree hot pear butter, I finally figured out that an immersion blender or potato masher right in the pot gives the perfect texture without the mess.
- Test for Doneness: My grandmother swore by this, and she was right: spoon a bit onto a chilled plate—if it holds its shape and doesn’t weep liquid, it’s ready for canning.
Storing and Reheating Leftovers
🍳 Refrigerator Storage
Once your pear butter has cooled to room temperature, transfer it to clean, airtight containers. For short-term storage, place it in the refrigerator, where it will stay fresh for 3-4 days. Use glass jars or BPA-free plastic containers to maintain flavor and prevent absorption of odors.
❄️ Freezer Storage
For longer storage, freeze your pear butter in freezer-safe containers or heavy-duty freezer bags. Leave about ½-inch headspace to allow for expansion. Properly stored, it will retain its quality for 2-3 months. Label containers with the date to keep track of freshness.
🔥 Reheating Methods
To enjoy your pear butter, reheat it gently to preserve its texture. In the microwave, warm it in 15-20 second intervals, stirring between each. For the oven, preheat to 300°F (150°C) and warm in an oven-safe dish for 10-15 minutes, stirring occasionally. For a smoky twist, reheat on a smoker at 225°F (107°C) for 20-25 minutes in a heatproof pan.
💡 Quality Preservation
To maintain the best texture and flavor, avoid adding extra liquid before reheating. Thaw frozen pear butter overnight in the refrigerator. If it separates slightly, simply stir it well before serving. Store in small portions to minimize repeated thawing and refreezing, which can degrade quality. Pro tip: A splash of lemon juice before storage can help preserve color and freshness!
Nutrition Facts

Trained in classic French technique but raised on slow-cooked ribs and spicy rubs, she blends culinary skill with smoke and soul.
- Recipe for Boneless Pork Chops in Cast Iron Skillet: Sear and Baste to Juicy Perfection - October 3, 2026
- Recipe for Boneless Cross Rib Roast: Slow-Roasted Beef with Herb Crust - October 3, 2026
- Hamburgers in Sauce Recipe Crock Pot: Slow-Cooked Savory Delight - October 3, 2026