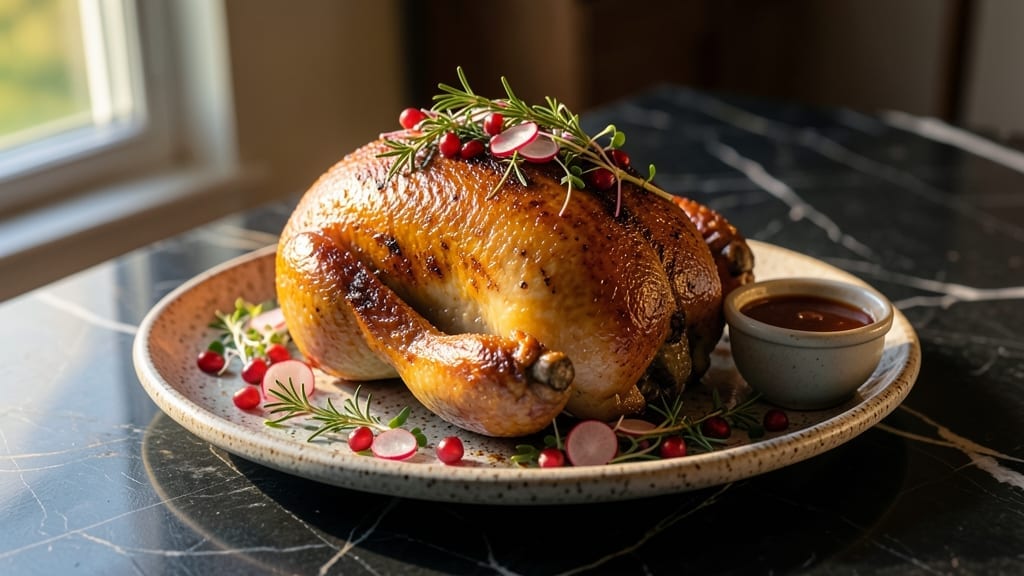
This pellet smoked spatchcock turkey recipe delivers crispy skin and juicy meat with minimal fuss—no basting required, just smoky perfection. 🔥 The secret lies in how spatchcocking transforms a whole turkey into an even, golden-brown masterpiece while wood pellets infuse that unmistakable depth.
I first discovered this technique at a coastal BBQ competition where the judges couldn’t believe how tender the meat was without overcooking.
This method eliminates guesswork by flattening the turkey for even cooking and letting the pellets maintain a precise temperature throughout. You’ll start with a simple brine to keep the meat moist, then let the smoker work its magic—no flipping or fussing.
The result? A turkey that’s crispy on the outside, tender on the inside, and infused with that rich, smoky flavor that makes every bite unforgettable.
What makes this recipe truly special is how it combines two techniques—spatchcocking for perfect doneness and pellet smoking for that signature flavor. The skin gets crispy without drying out the meat, while the wood pellets ensure a consistent, aromatic smoke that permeates every bite.
It’s the kind of turkey that turns a holiday meal into a showstopper.
Serve with classic sides like mashed potatoes, cranberry sauce, and roasted vegetables for the full experience. The smoky notes pair beautifully with traditional flavors, making this the centerpiece of any gathering. Ready to smoke a turkey that’ll impress even the most seasoned cooks?
Ingredients for pellet smoked spatchcock turkey
A whole turkey plus a few key ingredients transform into smoky, crispy perfection with pellet magic.
| Ingredient | Amount | Notes |
|---|---|---|
| Whole Turkey 🦃 | 12 lb | Fresh, spatchcocked (breastbone removed) |
| Kosher Salt 🧂 | ½ cup | For dry brine, coarse grain |
| Granulated Sugar 🍚 | ¼ cup | Brown sugar works too |
| Black Peppercorns 🌶️ | 2 tbsp | Freshly cracked, coarse grind |
| Garlic Cloves 🧄 | 8 cloves | Minced for brine mixture |
| Fresh Thyme Sprigs 🌿 | 4 whole | Or 1 tbsp dried thyme |
| Fresh Rosemary Sprigs 🌿 | 4 whole | Or 1 tbsp dried rosemary |
| Wood Pellets 🔥 | 2 lb | Hickory or applewood preferred |
| Unsalted Butter 🧈 | ½ cup | Melted for basting finish |
| Olive Oil 🫒 | ¼ cup | For skin crisping |
| Apple Cider Vinegar 🍎 | ¼ cup | For basting liquid |
| Fresh Sage Leaves 🌿 | ½ cup | Chopped for final garnish |
[recipe_ingredient_scaler]
The turkey is the star—12 pounds gives you a generous bird for six servings. Look for a fresh turkey with good marbling (that white fat under the skin) at Whole Foods or your local butcher. If spatchcocking feels intimidating, most grocery stores now offer pre-spatchcocked turkeys in the holiday section. For the brine, Diamond Crystal kosher salt (coarse grain) is my go-to—it dissolves better than table salt. The wood pellets? Traeger’s hickory blend delivers that classic BBQ flavor, but applewood adds a subtle sweetness that pairs beautifully with turkey. Fresh herbs matter here—Costco’s bulk herb section is perfect for stocking up.
No fresh thyme or rosemary? Dried works at one-third the amount, but fresh gives that bright, aromatic punch. Short on time? Pre-minced garlic from the jar saves steps—just drain it well. For the basting liquid, apple cider vinegar adds tang that cuts through the richness. No vinegar? Lemon juice or even chicken broth will work in a pinch. The butter finish is non-negotiable—full-fat, unsalted butter (like Land O’Lakes) creates that golden, crispy skin. Pro tip: Mix your dry brine ingredients in a sealed container and shake it up for even distribution. The turkey absorbs the flavor better when the salt and sugar dissolve completely.
This turkey reheats beautifully—cover with foil and warm at 300°F for 20 minutes. For leftovers, store in the fridge for up to 4 days or freeze for 3 months. The skin stays crispy if you reheat uncovered at high heat for 5 minutes, then cover. Portion the meat into airtight containers with some of the pan juices for extra flavor. The wood pellets can be stored in a cool, dry place for up to a year—just keep them away from moisture. Fresh herbs? Wrap them in damp paper towels and store in a resealable bag for up to a week.
Why You’ll Love This Recipe
- Let’s talk practicality: this recipe feeds a crowd but also plays nice with leftovers. Store those slices in a damp paper towel for up to a week, or freeze for three months. Sandwiches? Yes. Fried rice? Absolutely. My go-to lunch for days. And because you’re using a 12 lb turkey, you’ve got enough for seconds without guilt. Plus, the granulated sugar in the brine caramelizes just enough to keep things interesting—no sad, dry turkey here.
- No Fuss Feast: I’ll admit it—weekends used to mean stressing over turkey prep. But this spatchcock method? Game-changer. The dry brine with ½ cup kosher salt and 8 minced garlic cloves does all the heavy lifting while you nap. Just slap it on the smoker at 225°F, ignore it for 3-4 hours, and boom—dinner’s ready. The 2 lb wood pellets keep it low and slow, so you’re not babysitting it. Honestly, the hardest part is resisting peeking.
- Smoky Crispy Magic: That ½ cup melted butter and ¼ cup apple cider vinegar basting? It’s not just flavor—it’s texture. The skin becomes so crispy it practically shatters, while the inside stays juicy. The fresh sage finish? A little herby punch that makes it feel special, even on a Tuesday. Between the rosemary and thyme in the brine and that final sage garnish, every bite is layered with depth. My kids won’t even notice it’s turkey—they’ll just ask for seconds.
- Leftovers That Last: Let’s talk practicality: this recipe feeds a crowd but also plays nice with leftovers. Store those slices in a damp paper towel for up to a week, or freeze for three months. Sandwiches? Yes. Fried rice? Absolutely. My go-to lunch for days. And because you’re using a 12 lb turkey, you’ve got enough for seconds without guilt. Plus, the granulated sugar in the brine caramelizes just enough to keep things interesting—no sad, dry turkey here.
Step-by-step instructions for smoked spatchcock turkey
Here’s the method for achieving perfectly crispy skin and juicy meat every time.
🔥 Step 1: Prepare the Dry Brine for Maximum Flavor
In a large bowl, combine the ½ cup kosher salt, ¼ cup granulated sugar, 2 tbsp black peppercorns, 8 garlic cloves (minced), and 4 fresh thyme sprigs. Crush the peppercorns lightly with your hands to release their oils. Add the 4 fresh rosemary sprigs and toss everything together.
Spread this mixture evenly over the entire surface of the 12 lb spatchcock turkey, including inside the cavity. Press the seasoning firmly into the meat so it adheres well. Place the turkey on a wire rack set over a baking sheet and refrigerate uncovered for 24 hours. This dry brine process ensures deep flavor penetration and creates that coveted crispy skin. Real talk: don’t skip this step—it makes all the difference in texture and taste.
🔥 Step 2: Set Up the Smoker for Optimal Smoke Circulation
Fill your pellet smoker with 2 lb wood pellets (hickory or applewood) and preheat to 225°F. The reason we use this low temperature is to allow the turkey to cook slowly and evenly without drying out. Place a water pan in the smoker to maintain moisture throughout the cooking process.
Once the smoker reaches temperature and you see clean, thin blue smoke (not thick white smoke), you’re ready to proceed. Position the turkey breast-side up on the smoker grates. The spatchcock shape allows for even heat exposure and faster cooking time compared to a whole turkey. Here’s the thing—resist the temptation to open the smoker lid during cooking. Every time you peek, you lose heat and add 15-20 minutes to your cook time.
🍳 Step 3: Smoke Until Probe-Tender with Perfect Bark
Smoke the turkey for 3-4 hours until the internal temperature reaches 150°F in the thickest part of the thigh. You’ll notice the skin starting to develop a deep golden-brown bark—this is your visual cue that the turkey is progressing well. The low and slow method ensures the meat stays juicy while the skin becomes crispy.
During the last 30 minutes of cooking, prepare a basting mixture by combining the ½ cup unsalted butter, ¼ cup olive oil, and ¼ cup apple cider vinegar in a small saucepan. Heat over low heat until just melted, then brush this mixture over the turkey every 15 minutes during the final cooking stage. This basting creates an additional crispy layer on the skin and adds incredible flavor. Watch for the skin to become deep golden brown and crispy to the touch—this is when you know it’s ready.
⏰ Step 4: Rest and Garnish for Maximum Juiciness
Once the turkey reaches the desired internal temperature of 165°F in the thickest part of the thigh, remove it from the smoker and transfer to a cutting board. Tent loosely with aluminum foil and let it rest for at least 30 minutes (I prefer 45 minutes for maximum juiciness). This resting period allows the juices to redistribute throughout the meat, preventing them from running out when you carve.
While the turkey rests, chop the ½ cup fresh sage leaves finely. Just before serving, brush the turkey with any remaining basting mixture and sprinkle the chopped sage evenly over the top. The sage adds a fresh, aromatic finish that complements the smoky flavors perfectly. Here’s where it gets fun—slice the turkey against the grain for the most tender pieces, and serve immediately with your favorite sides.
Pro Tips For Making Pellet Smoked Spatchcock Turkey
- Crack Pepper Like a Pro: Don’t just throw those 2 tbsp black peppercorns into the mix whole—give them a good crush with the flat of your knife or palm before mixing with the salt and sugar. You’re not grinding them into powder; just release those oils so they cling to the turkey skin. I used to skip this, and the pepper flavor was half as strong—now it’s the first thing guests notice.
- Keep That Lid Shut: I know you want to check on your turkey, but every time you open the smoker at 225°F, you’re adding 15-20 minutes to cook time—and risking uneven bark. Set a timer for the 3-4 hour window and trust the process. The turkey will tell you when it’s ready (150°F thigh temp, golden skin), not the smoke color.
- Brine the Night Before: That 24-hour dry brine with ½ cup kosher salt isn’t optional—it’s the difference between dry turkey and a juicy, flavor-packed centerpiece. Place the spatchcocked bird on a wire rack uncovered in the fridge so moisture evaporates and the skin crisps during brining. I learned this the hard way after a soggy Thanksgiving turkey.
- Baste Hot, Not Cold: When you heat the basting mix of ½ cup butter, ¼ cup olive oil, and ¼ cup apple cider vinegar, make sure it’s just melted—not boiling. Cold butter will steam the skin instead of crisping it. Brush it on in the last 30 minutes, and you’ll get that restaurant-quality sheen and snap. (Pro move: Keep the pan warm on the smoker’s side burner.)
Make-ahead tips for leftovers
Prep the Night Before
I always start the dry brine mixture the day before cooking—it’s a game-changer for flavor and texture. Combine the ½ cup kosher salt, ¼ cup sugar, 2 tbsp cracked peppercorns, and minced garlic in a bowl.
Press this mixture firmly into the 12 lb spatchcock turkey, including inside the cavity, then refrigerate uncovered on a wire rack. This overnight dry brine ensures the skin crisps perfectly and the meat stays juicy.
Trust me, this step is worth the wait—it’s the secret to that restaurant-quality bark! 🔥
Pellet Prep for Even Heat
Fill your pellet smoker with 2 lb hickory or applewood pellets and preheat to 225°F the morning of cooking. I like to use a Traeger smoker because it maintains consistent temps, but any quality pellet grill works.
Place a water pan in the smoker to keep moisture levels steady—this prevents the turkey from drying out while developing that smoky flavor. Pro tip: Load the pellets into a hopper the night before to save time in the morning.
Basting Liquid Pre-Mix
Prepare your basting mixture ahead of time by melting ½ cup unsalted butter with ¼ cup olive oil and ¼ cup apple cider vinegar in a saucepan. Store it in an airtight container in the fridge until ready to use.
This liquid helps crisp the skin and adds depth of flavor during the final 30 minutes of smoking. I keep a small spray bottle nearby to apply it easily without making a mess. The vinegar’s tang balances the richness beautifully! 🍯
Herb Garnish Prep
Chop the ½ cup fresh sage leaves and store them in a small container with a damp paper towel to keep them fresh. I like to keep these ready in the fridge so I can sprinkle them on just before serving.
Fresh sage adds that final aromatic touch that makes the turkey taste like it came from a smokehouse. If you’re short on time, dried sage works too—just use 1 tbsp instead. The key is having everything prepped so you can focus on the cooking process.
Smoker Setup Checklist
Before you start smoking, do a quick checklist: ensure your smoker is clean, the water pan is filled, and the temperature gauge is working. I also like to test the probes to make sure they’re reading accurately.
If you’re cooking outdoors, check the weather forecast for any sudden temperature changes that could affect your cook time. A little prep work now means no stress during the actual smoking process. The goal is to let the turkey do its thing without any interruptions! ⏰
Nutrition facts
Frequently asked questions
Why does the dry brine step take 24 hours?
The 24-hour dry brine is key for two reasons: it draws moisture to the surface for crispy skin while deeply seasoning the meat. This process also tenderizes the turkey naturally, ensuring juicy results. Skipping it means missing out on that perfect texture and bold flavor infusion—trust the wait!
Can I use a different wood pellet flavor?
While hickory is classic, applewood adds sweetness or cherry brings fruity notes. Just avoid strong flavors like mesquite, which can overpower the turkey. Experiment to find your favorite smoke profile!
What if my turkey cooks faster than expected?
If the turkey hits 165°F before 3-4 hours, pull it early—it’ll keep warming in the smoker. Cover loosely with foil to retain moisture. The skin will crisp further while resting. Always use a meat probe for accuracy!
How do I store leftovers without drying out the meat?
Let the turkey cool slightly, then slice against the grain. Store portions in airtight containers with some pan juices. For crispy skin, reheat uncovered at 350°F for 5 minutes before covering. Freeze for up to 3 months if needed.

Trained in classic French technique but raised on slow-cooked ribs and spicy rubs, she blends culinary skill with smoke and soul.
- Smoked Brisket Recipe: Low and Slow to Fall-Apart Tenderness - November 2, 2026
- Smoked Turkey Breast Recipe: Juicy Pink Center With Crispy Skin Every Time - November 2, 2026
- Leftover Smoked Pulled Pork Chili Recipe: Rustic Flavor Revival in One Pot - November 2, 2026