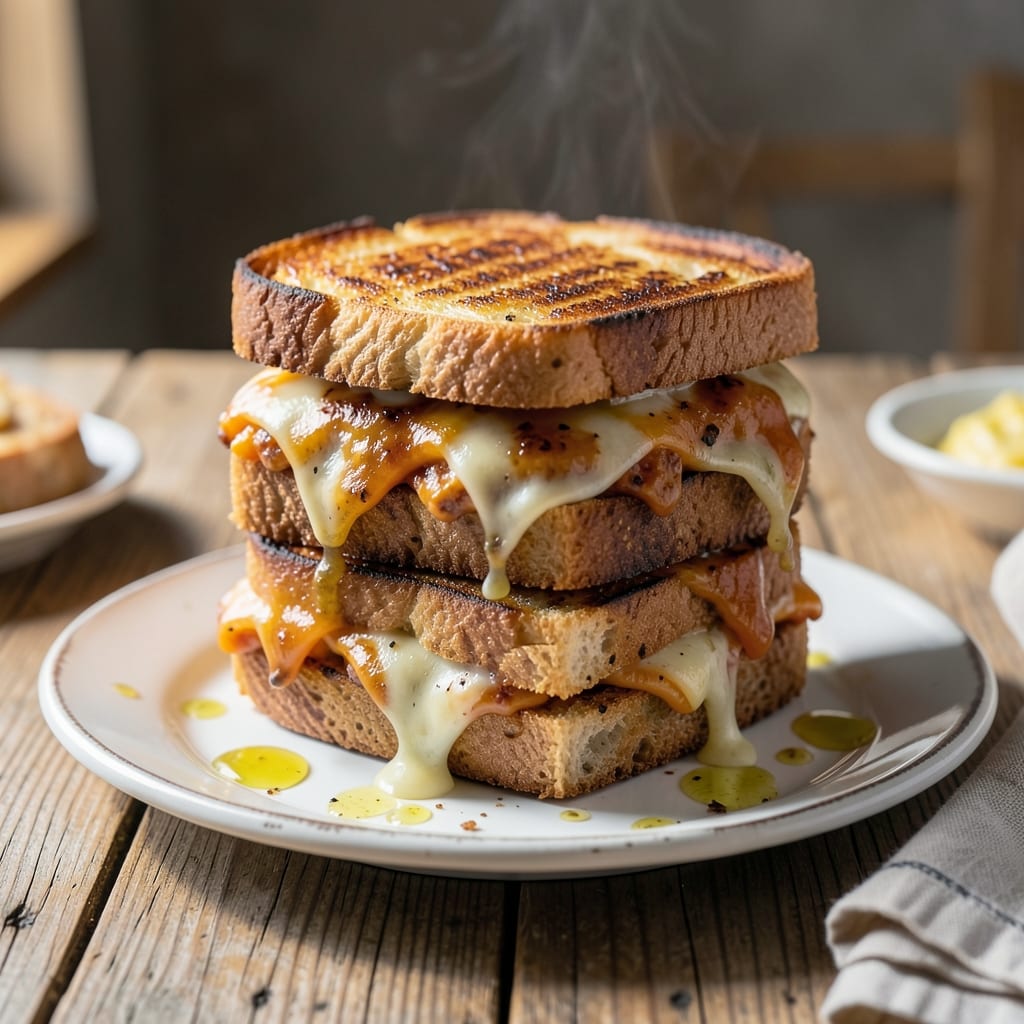
This grilled cheese sandwich gets a gourmet upgrade with fresh pesto that transforms simple ingredients into something extraordinary. The herb-infused spread adds depth without overpowering the melted cheese.
I developed this recipe for days when comfort food needs a touch of sophistication. The pesto creates a golden crust while keeping the cheese creamy inside. Ready in just 10 minutes, it’s vegetarian-friendly without sacrificing flavor.
Ingredients for Pesto Grilled Cheese Sandwich
Elevate classic comfort with fresh pesto and premium cheeses between artisanal bread slices.
| Ingredient | Amount | Notes |
|---|---|---|
| Sourdough Bread 🍞 | 4 slices | Artisan loaf, 1-inch thick |
| Sharp Cheddar Cheese 🧀 | 4 oz | Freshly sliced from block |
| Gruyère Cheese 🧀 | 2 oz | Aged, for nutty depth |
| Fresh Basil Pesto 🌿 | ¼ cup | Homemade or high-quality store-bought |
| Unsalted Butter 🧈 | 2 tbsp | Room temperature for even spreading |
| Garlic Cloves 🧄 | 1 clove | Minced, optional for extra bite |
| Extra-Virgin Olive Oil 🫒 | 1 tsp | For pesto enhancement |
| Parmesan Cheese 🧀 | 1 tbsp | Freshly grated for pesto |
| Pine Nuts 🥜 | 1 tbsp | Toasted, for pesto texture |
| Fresh Basil Leaves 🌿 | ½ cup | Packed, for pesto base |
| Kosher Salt 🧂 | ¼ tsp | Diamond Crystal preferred |
| Freshly Ground Black Pepper 🌶️ | 0.125 tsp | For seasonal balance |
[recipe_ingredient_scaler]
The bread sets the foundation. Sourdough from a local bakery offers the right chew and tang. For cheese, sharp cheddar provides meltability while Gruyère adds complexity. Avoid pre-shredded cheese—it contains anti-caking agents that inhibit smooth melting. Whole Foods or a specialty cheese shop will have the best selections for this application.
No Gruyère? Fontina or Emmental substitute beautifully. Fresh pesto can be replaced with sun-dried tomato spread for a different but equally delicious profile. For a nut-free pesto, sunflower seeds work instead of pine nuts. The butter must be unsalted to control seasoning—European-style cultured butter adds a subtle tang that complements the pesto.
Assemble sandwiches just before cooking to prevent sogginess. Leftovers? Unlikely, but if needed, store components separately in the fridge for up to 3 days. The pesto itself keeps for 1 week refrigerated with a thin oil layer on top to prevent browning.
Why You’ll Love This Recipe
- 5-Minute Lunch: I can have this on the table faster than it takes to argue with the kids about what they want to eat. Just throw sourdough, cheddar, gruyère, and basil pesto together, butter the outside, and grill.
- Flavor Bomb: That sharp cheddar melts into the nutty gruyère while the fresh basil pesto cuts through with a bright, herby kick. Honestly, it’s like a party in every bite.
- Crowd Pleaser: From picky toddlers to dinner guests, everyone devours this. I’ve served it at picnics, packed it for work lunches, and even made a batch for a last-minute potluck.
- Budget Stretcher: A little pesto and fancy cheese go a long way. I use one block of gruyère for multiple meals, and the leftovers taste just as good the next day.
Step-by-Step Instructions for Pesto Grilled Cheese Sandwich
Master the technique for achieving a perfectly crisp exterior with a rich, herbaceous melt.
Step 1: Prepare the Cheese and Pesto Mixture
Thinly slice the 4 oz Sharp Cheddar Cheese and 2 oz Gruyère Cheese from the block for even melting. In a small bowl, combine the 0.25 cup Fresh Basil Pesto with 1 tbsp Parmesan Cheese, 1 tsp Extra-Virgin Olive Oil, 0.25 tsp Kosher Salt, and 0.125 tsp Freshly Ground Black Pepper.
This step enhances the pesto’s flavor depth and ensures the seasoning is evenly distributed throughout the sandwich. Stir until fully incorporated, then set aside. The mixture should be thick but spreadable—this consistency guarantees optimal coverage on the bread.
Step 2: Butter the Bread and Assemble the Sandwiches
Lay out all 4 slices Sourdough Bread on a clean surface. Spread a generous layer of the pesto mixture on the interior side of each slice. Divide the Sharp Cheddar and Gruyère evenly between two slices, layering them directly over the pesto.
Top each with a second slice of bread, pesto-side down, to create two complete sandwiches. Press gently to adhere. Spread the 2 tbsp Unsalted Butter evenly on the outer sides of the bread, ensuring full coverage for maximum crispiness.
Step 3: Grill to Golden Perfection
Heat a large skillet or griddle over medium heat. Once hot, add the sandwiches and cook for 3-4 minutes per side. Press down lightly with a spatula during the first minute to encourage even contact with the pan.
The bread should turn a deep golden brown with visible grill marks. Watch for the cheese to begin melting at the edges—this indicates it’s time to flip. Avoid moving the sandwiches too soon; patience ensures a crisp, buttery crust.
Step 4: Rest and Serve Immediately
Transfer the sandwiches to a cutting board and let them rest for 1-2 minutes. This brief pause allows the cheese to fully set, preventing it from oozing out when sliced.
Cut each sandwich diagonally and serve while hot. The exterior should be crisp and buttery, while the interior reveals a gooey, herb-infused cheese pull. The pesto’s aromatic basil and nutty Parmesan should shine through in every bite.
Pro Tips For Making Pesto Grilled Cheese Sandwich
- Butter the Outside: Use room-temperature unsalted butter and spread it all the way to the edges of the sourdough—this guarantees even browning and that crispy crust everyone loves.
- Grate the Cheese: I learned this the hard way—shredding the sharp cheddar and gruyère yourself (instead of pre-shredded) melts smoother and avoids that weird, grainy texture.
- Low and Slow: After burning three batches, I finally figured out medium-low heat is the sweet spot for melting the cheese through without charring the pesto or bread.
- Pesto on the Inside: Sounds weird, but it works: spread the basil pesto on the inner sides of the bread before adding cheese—this keeps it from leaking out and ensures every bite has that herby punch.
Essential Equipment for This Dish
Nonstick Skillet
A 10-inch nonstick skillet is my go-to for even browning without sticking. I love my Scanpan Classic—it handles medium heat perfectly and cleans up easily. The nonstick surface ensures your sandwiches release cleanly with that golden crust. 🔥
Cast Iron Alternative
For extra crispiness, use a cast iron skillet like Lodge 10-inch. It retains heat beautifully and creates a deeper sear. Just be sure to preheat it for 3-4 minutes to avoid hot spots.
Spatula Choice
A thin, flexible metal spatula is essential for pressing sandwiches without tearing the bread. I use a Fish Spatula from Mercer Culinary—it slides under the sandwich effortlessly and handles flipping with precision.
Cutting Board
Use a large wooden cutting board for resting and slicing. The wood won’t dull your knife like plastic can. I prefer maple or walnut for both durability and looks—plus, it doubles as a serving platter for that rustic touch.
Cheese Slicer
For even melting, slice cheese thinly with a mandoline or adjustable cheese slicer. My OXO Good Grips model handles both cheddar and Gruyère with ease. Uniform slices ensure every bite has the perfect cheese-to-pesto ratio.
Pesto Tool
A small silicone spatula helps spread pesto evenly without tearing the bread. I keep one dedicated to herbs—it’s perfect for scraping every last bit from the jar. The flexibility gets into every corner of your sandwich. ✨
Nutrition Facts

Trained in classic French technique but raised on slow-cooked ribs and spicy rubs, she blends culinary skill with smoke and soul.
- Recipe for Boneless Pork Chops in Cast Iron Skillet: Sear and Baste to Juicy Perfection - October 3, 2026
- Recipe for Boneless Cross Rib Roast: Slow-Roasted Beef with Herb Crust - October 3, 2026
- Hamburgers in Sauce Recipe Crock Pot: Slow-Cooked Savory Delight - October 3, 2026