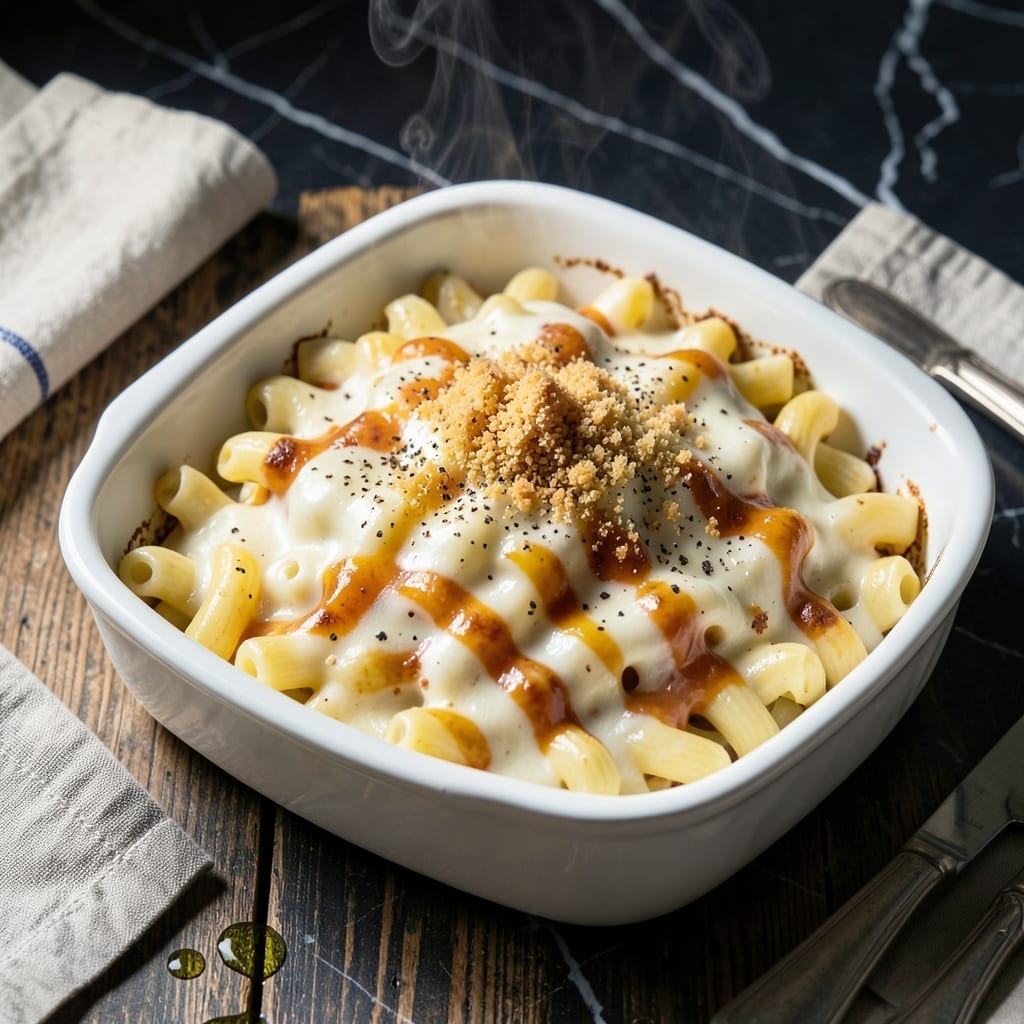
This recipe delivers the creamy comfort of Piccadilly’s famous mac and cheese at home. The signature cheese blend creates a velvety sauce that clings to every pasta shape.
Simple ingredients and a precise method ensure restaurant-quality results. The baked topping adds a subtle crispness to the rich, smooth dish.
Ingredients for Piccadilly Mac and Cheese
Quality ingredients create that signature velvety cheese sauce and baked crisp topping at home.
| Ingredient | Amount | Notes |
|---|---|---|
| Elbow Macaroni 🍝 | 12 oz | Or cavatappi for texture |
| Unsalted Butter 🧈 | ½ cup | For roux base |
| All-Purpose Flour 🌾 | ¼ cup | Creates velvety sauce |
| Whole Milk 🥛 | 3 cups | Full-fat for creaminess |
| Sharp Cheddar Cheese 🧀 | 2 cups | Freshly grated, block preferred |
| American Cheese 🧀 | 8 oz | Melts ultra-smooth |
| Parmesan Cheese 🧀 | ½ cup | Freshly grated from wedge |
| Dijon Mustard 🟡 | 1 tbsp | Adds subtle tang |
| Garlic Powder 🧄 | ½ tsp | Enhances cheese flavor |
| Onion Powder 🧅 | ½ tsp | Balances richness |
| Salt 🧂 | 1 tsp | Diamond Crystal preferred |
| Black Pepper 🌶️ | ½ tsp | Freshly ground |
| Panko Breadcrumbs 🍞 | ½ cup | For crispy topping |
| Melted Butter 🧈 | 2 tbsp | Tossed with breadcrumbs |
[recipe_ingredient_scaler]
The cheese blend is non-negotiable for authentic Piccadilly texture. Sharp cheddar from a block (not pre-shredded) provides body, while American cheese—yes, the processed kind—delivers that ultra-smooth melt. Parmigiano-Reggiano adds depth. Source from Whole Foods or a specialty cheese shop for best quality. Avoid pre-grated cheeses as they contain anti-caking agents that prevent proper melting.
Substitutions require care to maintain the signature creaminess. Monterey Jack can replace American cheese in a pinch, though the texture won’t be identical. Use whole milk only—lower fat versions will make the sauce grainy. No Dijon? Yellow mustard at half the amount works. For the topping, regular breadcrumbs substitute for panko, but the crispiness won’t be as pronounced.
The baked dish holds beautifully. Assemble completely, cover, and refrigerate for up to 24 hours before baking. Leftovers keep 4-5 days refrigerated, though the sauce may thicken—reheat with a splash of milk. Freezes well for 3 months if baked before freezing.
Why You’ll Love This Recipe
- One Pot Wonder: I love that this comes together in a single pot—no colander, no extra bowls, just macaroni, butter, flour, and milk transforming into creamy goodness.
- Sharp Cheddar Magic: That tangy bite from the sharp cheddar cuts through the richness of the whole milk sauce. Honestly, it’s the reason I make this weekly.
- Feeds the Crew: Between us, this stretches to feed six without breaking the bank, and leftovers taste even better the next day.
- Weeknight Hero: I can start this after work and have it on the table before the kids finish their squabbling. (Yes, even on a Tuesday night)
Step-by-Step Instructions for Creamy Mac and Cheese With Signature Cheese Blend
Master the technique for ultra-smooth, restaurant-quality results every time.
Step 1: Cook the Elbow Macaroni to Al Dente
Bring a large pot of salted water to a rolling boil. Add the 12 oz Elbow Macaroni and cook according to package instructions until just al dente—about 1 minute less than the suggested time. You want the pasta slightly underdone since it will finish cooking in the cheese sauce.
Drain the pasta in a colander, but do not rinse it. The light starch coating on the pasta helps the sauce cling better. Return the pasta to the pot and set it aside while you prepare the cheese sauce. This step ensures your final dish has the perfect bite without turning mushy.
Step 2: Create a Velvety Roux for the Sauce Base
In a separate large saucepan, melt the 0.5 cup Unsalted Butter over medium heat. Once melted and foaming subsides, whisk in the 0.25 cup All-Purpose Flour to form a smooth paste. Cook this roux for 1-2 minutes, stirring constantly, until it turns a light golden color and emits a nutty aroma.
This cooking step removes the raw flour taste and builds the foundation for your sauce. The mixture should bubble gently but not brown—if it starts to darken too quickly, reduce the heat. The roux is ready when it has the consistency of wet sand and coats the back of a spoon.
Step 3: Build the Creamy Cheese Sauce
Gradually whisk in the 3 cups Whole Milk, about ½ cup at a time, ensuring each addition is fully incorporated before adding more. This prevents lumps from forming. Once all the milk is added, increase the heat to medium-high and cook, whisking constantly, until the mixture thickens and begins to simmer.
Reduce the heat to low and stir in the 2 cups Sharp Cheddar Cheese, 8 oz American Cheese, 0.5 cup Parmesan Cheese, 1 tbsp Dijon Mustard, 0.5 tsp Garlic Powder, 0.5 tsp Onion Powder, 1 tsp Salt, and 0.5 tsp Black Pepper. Stir until all the cheeses are completely melted and the sauce is smooth. The American cheese ensures ultra-creamy texture while the sharp cheddar provides depth of flavor.
Step 4: Combine Pasta and Sauce
Pour the cheese sauce over the cooked Elbow Macaroni in the pot. Stir gently but thoroughly to ensure every piece of pasta is evenly coated. The sauce should be thick enough to cling to the pasta but still pourable. If it seems too thick, add a splash of warm milk to reach your desired consistency.
Let the mixture sit for 2-3 minutes off the heat. This allows the pasta to absorb some of the sauce, creating that perfect creamy texture. Taste and adjust seasoning if needed—remember that the cheeses are already salty, so go easy on additional salt.
Step 5: Add the Crispy Panko Topping and Finish
In a small bowl, combine the 0.5 cup Panko Breadcrumbs with the 2 tbsp Melted Butter. Stir until the breadcrumbs are evenly coated. This buttery mixture will create a golden, crispy contrast to the creamy pasta underneath.
Sprinkle the buttered panko evenly over the mac and cheese. For an extra-touch of browning, place the dish under a preheated broiler for 1-2 minutes until the topping is golden brown. Watch it closely to prevent burning. Serve immediately while the topping is still crisp and the sauce is at its creamiest.
Pro Tips For Making Piccadilly Mac And Cheese
- Cook Pasta Al Dente: Boil the elbow macaroni for 1 minute less than package instructions—it’ll finish cooking in the cheese sauce, and you’ll skip the mushy texture I learned this the hard way after serving gluey mac a few times.
- Grate Your Own Cheddar: Skip the pre-shredded sharp cheddar; the anti-caking agents make the sauce grainy. I was skeptical until I tried it, but fresh-grated melts like a dream every time.
- Temper the Milk: Warm the whole milk slightly before adding it to the roux—cold milk can cause the sauce to seize up. Sounds weird, but it works.
- Salt the Water Well: Use more salt than you think in the pasta water, especially since you’re using unsalted butter. My grandmother swore by this, and she was right.
Health Benefits of This Dish
Calcium Boost
This dish delivers a serious calcium punch—the 2 cups sharp cheddar and 8 oz American cheese provide about 600mg per serving, nearly half your daily needs. Dairy is one of the most bioavailable sources of this bone-strengthening mineral. 💪
High-Quality Protein
The cheese blend offers 15-20g of protein per serving, complete with all essential amino acids. This supports muscle maintenance and keeps you feeling full longer. The whole milk adds additional protein and healthy fats for sustained energy.
B Vitamin Complex
Cheese is naturally rich in B vitamins, particularly B12 for nerve function and riboflavin for energy metabolism. One serving provides a significant portion of your daily B12 needs, which is especially important for vegetarians.
Comfort Food Energy
The 12 oz elbow macaroni provides complex carbohydrates for steady energy release. This makes the dish satisfying without causing blood sugar spikes. I always feel a comforting warmth after enjoying a bowl. 🥗
Energy-Sustaining Fats
Healthy fats from whole milk and cheese provide long-lasting energy. These fats help your body absorb fat-soluble vitamins like A, D, E, and K present in the dairy. The 0.5 cup unsalted butter adds richness while maintaining nutritional balance.
Minimal Additives
When you use block cheeses and make it from scratch, you avoid the preservatives and stabilizers found in boxed versions. This means more natural ingredients and better control over what goes into your body. 💛
Nutrition Facts
Frequently Asked Questions
Can I use pre-shredded cheese instead of block?
No, pre-shredded cheese contains anti-caking agents that prevent smooth melting. Always grate block cheddar and Parmesan fresh for the creamiest sauce. The difference in texture is noticeable!
Why does the recipe include American cheese?
American cheese melts ultra-smoothly, creating that signature velvety texture. It balances the sharpness of cheddar while ensuring the sauce clings perfectly to pasta. Skip it and you risk a grainy sauce.
How do I prevent a grainy cheese sauce?
Cook the roux until golden, then add milk slowly while whisking. Use medium-low heat when melting cheese and stir constantly. These steps guarantee a silky, lump-free sauce every time.
Can I make this ahead of time?
Yes! Assemble completely, cover, and refrigerate for up to 24 hours before baking. Add 5-10 minutes to baking time if cold. Leftovers reheat best with a splash of milk.

Trained in classic French technique but raised on slow-cooked ribs and spicy rubs, she blends culinary skill with smoke and soul.
- Recipe for Boneless Pork Chops in Cast Iron Skillet: Sear and Baste to Juicy Perfection - October 3, 2026
- Recipe for Boneless Cross Rib Roast: Slow-Roasted Beef with Herb Crust - October 3, 2026
- Hamburgers in Sauce Recipe Crock Pot: Slow-Cooked Savory Delight - October 3, 2026