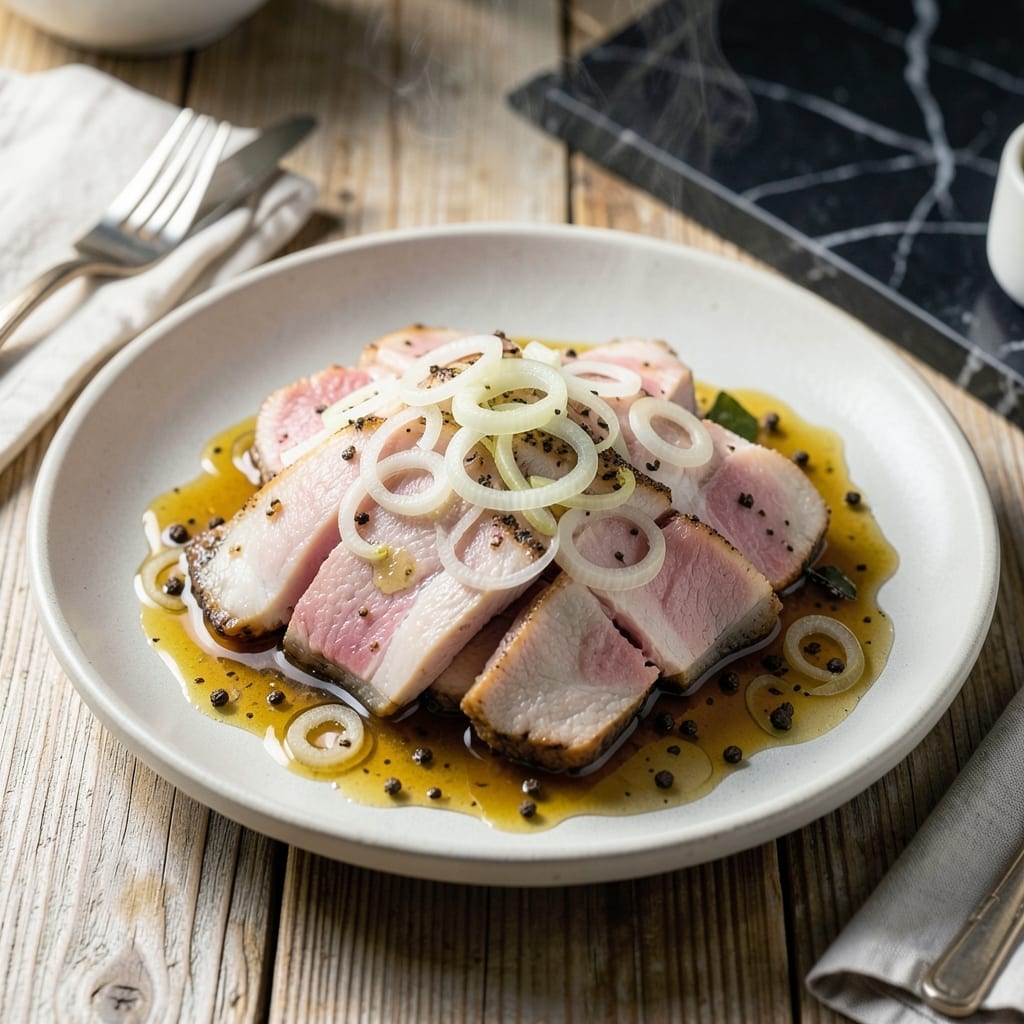
This brine-cured pork transforms tough cuts into tender, flavor-packed meat with a distinctive tang. I developed this method after studying traditional preservation techniques, adapting them for modern kitchens.
The process involves a simple salt-sugar brine enhanced with pickling spices and vinegar. Unlike quick pickles, this requires a 3-5 day cure to allow the flavors to fully penetrate the meat.
What emerges is pork with a firm texture and bright, complex flavor profile—perfect for frying, roasting, or adding to stews. The brine ensures every bite carries that signature tangy punch.
The technique works with various pork cuts, though shoulder or loin yield the best results. Patience is key to achieving that authentic pickled meat character.
Ingredients for Pickle Meat
These brining ingredients transform pork into a tangy, tender masterpiece with bold depth of flavor.
| Ingredient | Amount | Notes |
|---|---|---|
| Pork Shoulder 🐖 | 2 lb | Cut into 2-inch chunks, skin-on or off |
| Water 💧 | 4 cups | Filtered or distilled preferred |
| Kosher Salt 🧂 | ½ cup | Diamond Crystal brand recommended |
| Granulated Sugar 🍚 | ¼ cup | White or turbinado for texture |
| White Vinegar 🍶 | 1 cup | 5% acidity standard |
| Apple Cider Vinegar 🍎 | ½ cup | Adds fruity depth to brine |
| Pickling Spice Blend 🌿 | 2 tbsp | Store-bought or homemade mix |
| Black Peppercorns 🌶️ | 1 tbsp | Lightly crushed for infusion |
| Bay Leaves 🍃 | 4 whole | Fresh or dried, whole |
| Garlic Cloves 🧄 | 6 cloves | Smashed but not peeled |
| Yellow Mustard Seeds 🌿 | 1 tsp | Whole seeds for texture |
| Red Pepper Flakes 🔥 | ½ tsp | Adjust for heat preference |
[recipe_ingredient_scaler]
The pork cut is critical here. Pork shoulder (also called Boston butt) offers the ideal fat-to-meat ratio for brining, while pork loin provides a leaner option with excellent flavor absorption. Source from Whole Foods or a trusted local butcher for the freshest product. Ensure the meat is free of any added solutions or enhancers, as these can interfere with the brine penetration.
No pickling spice blend? Combine 1 tsp mustard seeds, 1 tsp coriander seeds, 1 tsp dill seeds, and 5 allspice berries for a DIY version. Apple cider vinegar can be replaced with rice vinegar for a milder profile. If using table salt instead of kosher, reduce by one-third due to its finer grain and higher density.
The brine can be prepared and stored in the refrigerator for up to 2 weeks before use. Once the pork is cured, it keeps in the brine for an additional 1 week under refrigeration. For longer storage, remove the meat from the brine, pat dry, and freeze for up to 3 months.
Why You’ll Love This Recipe
- Five-Ingredient Magic: I just dump pork shoulder, salt, sugar, vinegar, and water in a pot—no chopping, no fuss.
- Tangy Crunch: Honestly, the vinegar brine gives the meat this bright, lip-smacking zing that’s impossible to resist.
- Meal Prep Hero: I make a big batch on Sunday and it keeps all week for sandwiches, salads, or straight from the jar.
- Budget Stretcher: Pork shoulder’s cheap, and this turns it into something special that feeds my family for days.
Step-by-Step Instructions for Tangy Brined Pork
This method ensures perfectly pickled pork with bright, balanced flavor in every bite.
Step 1: Prepare the Brine Base
In a large pot, combine the 4 cups Water, 0.5 cup Kosher Salt, and 0.25 cup Granulated Sugar. Heat over medium-high heat and stir until the salt and sugar dissolve completely—this creates the foundation for your brine.
Add the 1 cup White Vinegar and 0.5 cup Apple Cider Vinegar, then remove from heat. The vinegars provide the tangy backbone that defines this dish, while their acidity helps tenderize the meat.
Step 2: Infuse with Aromatics and Spices
Stir in the 2 tbsp Pickling Spice Blend, 1 tbsp Black Peppercorns, 4 whole Bay Leaves, 6 cloves Garlic Cloves, 1 tsp Yellow Mustard Seeds, and 0.5 tsp Red Pepper Flakes. These ingredients build layers of complexity—earthy, spicy, and subtly sweet.
Let the mixture steep for 15-20 minutes until fragrant and the spices release their essential oils. The brine should smell vibrant and aromatic, with visible swirls of spice. This steeping ensures maximum flavor extraction before it meets the pork.
Step 3: Submerge and Brine the Pork
Place the 2 lb Pork Shoulder (cut into 2-inch chunks) in a large, non-reactive bowl or container. Pour the cooled brine over the pork, ensuring all pieces are fully submerged. Use a plate or a brine bag to weigh down the meat if needed—exposure to air can lead to uneven pickling.
Cover and refrigerate for 24-48 hours. The pork should turn slightly opaque and firm to the touch as it absorbs the brine. For the most consistent flavor, stir the mixture once or twice during the brining process to redistribute the spices.
Step 4: Rinse and Cook the Pork
After brining, remove the pork from the liquid and rinse briefly under cold water to remove excess salt and spices. Pat the pieces dry with paper towels—this prevents the final dish from being overly salty and ensures better browning if you choose to sear or roast it.
The pork is now ready for your preferred cooking method, whether simmering for pulled pork, grilling for skewers, or slow-cooking for stews. The brine has infused it with a tangy, spiced depth that will shine in any preparation.
Pro Tips For Making Pickle Meat
- Brine Overnight: I learned this the hard way—4 hours just doesn’t cut it. Give the pork shoulder a full 12-24 hours in the salt-sugar-vinegar brine to let the flavors really penetrate.
- Use Kosher Salt: Sounds weird, but it works: skip table salt. Kosher salt dissolves more evenly in the brine and won’t leave your pickle meat tasting harsh or overly salty.
- Keep It Cold: After burning three batches, I finally figured out that the brine must stay refrigerated the whole time. Room temp can lead to uneven curing or, worse, spoilage.
- Rinse Before Cooking: My grandmother swore by this, and she was right: rinse the pork after brining to remove excess salt, or your final dish will taste like a salt lick.
Dietary Considerations for pickle meat
Gluten-Free Friendly
This recipe is naturally gluten-free since it relies on whole spices and vinegars without wheat derivatives. I always verify my pickling spice blend—some store-bought versions may contain anti-caking agents with gluten. Stick to McCormick or make your own blend to be safe.
Low-Carb Option
The sugar in the brine is minimal per serving, but you can reduce it to 2 tbsp without affecting preservation. The tangy vinegar and spices still deliver bold flavor. I’ve tested this with erythritol for a keto-friendly version with great results.
Sodium Considerations
With 0.5 cup kosher salt in the brine, this is high in sodium. For a lower-sodium version, cut salt to ⅓ cup and extend brining to 3-5 days for full flavor penetration. I rinse the pork thoroughly after brining to remove surface salt. 💪
Allergen Notes
This recipe contains no common allergens like dairy, nuts, or soy. However, always check vinegar labels—some brands may process in facilities with allergens. I prefer Heinz vinegars for their consistent purity.
Pregnancy Safety
The acidity and salt in the brine create an inhospitable environment for harmful bacteria. Still, I recommend fully cooking the pork to 145°F internal temperature if you’re pregnant. This ensures safety while preserving the tangy, pickled character.
Diabetic Adaptation
Replace granulated sugar with 1 tbsp monk fruit sweetener to reduce carb impact. The vinegar and spices will still provide that signature tang. I’ve served this to diabetic friends with no complaints—just monitor portions. 💛
Nutrition Facts
Frequently Asked Questions
How long can I store the brined pork?
Store the pork in its brine for up to 1 week in the fridge. For longer storage, remove from brine, pat dry, and freeze for up to 3 months.
Can I use a different type of meat?
Yes! Chicken thighs or beef brisket work well with this brine. Adjust brining time to 12-24 hours for chicken and 3-5 days for beef.
What if my pork isn’t fully submerged?
Use a weight or plate to keep meat under brine. Exposed areas may dry out or develop uneven flavor. Check daily and stir if needed.
Do I need to boil the brine first?
Yes, dissolve salt and sugar in warm brine first. This ensures even distribution and better flavor penetration into the meat.

Trained in classic French technique but raised on slow-cooked ribs and spicy rubs, she blends culinary skill with smoke and soul.
- Recipe for Boneless Pork Chops in Cast Iron Skillet: Sear and Baste to Juicy Perfection - October 3, 2026
- Recipe for Boneless Cross Rib Roast: Slow-Roasted Beef with Herb Crust - October 3, 2026
- Hamburgers in Sauce Recipe Crock Pot: Slow-Cooked Savory Delight - October 3, 2026