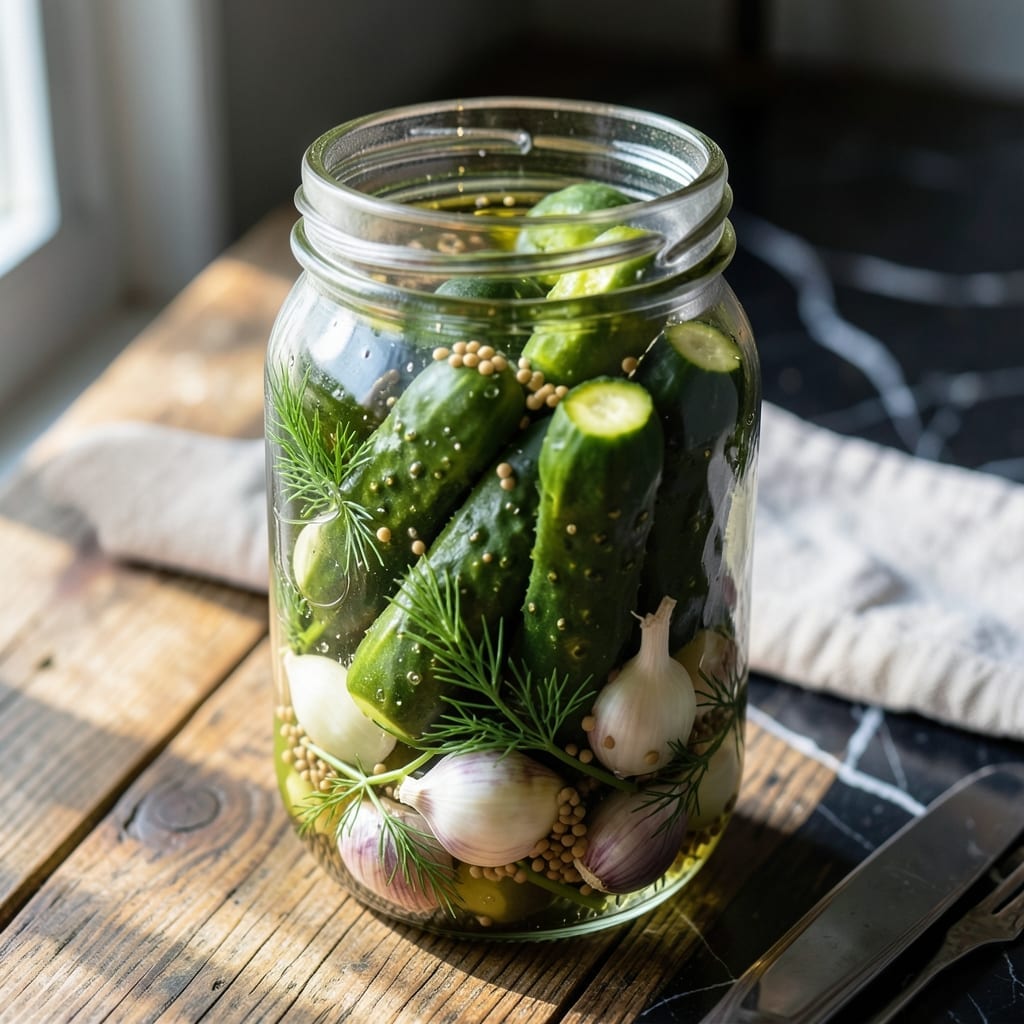
Forget vinegar—this traditional fermentation method creates tangy, crisp pickles through natural lactic acid. The process preserves vegetables while enhancing their flavor and nutritional value.
With just salt, water, and time, you’ll produce probiotic-rich pickles that stay fresh for months. The simple brine encourages beneficial bacteria to thrive, delivering that signature fermented crunch.
Ingredients for Pickle Recipe Without Vinegar
Simple ingredients transform into probiotic-rich, crisp fermented pickles with natural tang.
| Ingredient | Amount | Notes |
|---|---|---|
| Cucumber 🥒 | 2 lb | Kirby or Persian, small and firm |
| Filtered Water 💧 | 4 cups | Chlorine-free for fermentation |
| Pickling Salt 🧂 | 3 tbsp | Non-iodized, no additives |
| Garlic Cloves 🧄 | 6 cloves | Peeled, lightly crushed |
| Dill Sprigs 🌿 | 4 whole | Fresh, with flower heads |
| Mustard Seeds 🌱 | 1 tbsp | Yellow or brown variety |
| Black Peppercorns 🌶️ | 1 tsp | Whole, not ground |
| Red Pepper Flakes 🔥 | ½ tsp | Optional for heat |
| Bay Leaves 🍃 | 2 whole | Dried, for depth |
| Grape Leaves 🍇 | 2 whole | Optional, adds crispness |
| Coriander Seeds 🌿 | 1 tsp | Lightly crushed |
[recipe_ingredient_scaler]
The cucumbers are critical here—Kirby or Persian varieties hold their crunch best during fermentation. Seek out farmers markets or specialty grocers for the freshest options. The salt must be pickling or sea salt without iodine or anti-caking agents, which inhibit fermentation. Diamond Crystal is a reliable brand. Avoid tap water if chlorinated—use filtered or bottled to protect the beneficial bacteria.
No dill sprigs? Dill seeds at half the amount work in a pinch. Short on mustard seeds? Coriander or fennel seeds add a different but pleasant note. The garlic can be adjusted to taste—more for bold flavor, less for subtlety. If you lack grape leaves, a tannin-rich alternative like oak or cherry leaves maintains crispness. Always keep vegetables fully submerged in brine to prevent mold growth.
Fermented pickles improve with age—wait at least 3 days for basic tang, but 2-4 weeks develops full flavor. Store in a cool, dark place during fermentation, then refrigerate. They’ll keep for 6-12 months in the fridge. The brine can be reused once with fresh vegetables for a second, milder batch.
Why You’ll Love This Recipe
- No-Fuss Ferment: I just toss cucumbers, garlic, and dill into a jar with saltwater and forget about it for a few days.
- Garlic-Dill Punch: The combination of fresh dill and garlic cloves gives these pickles a bright, bold flavor that’s way more complex than store-bought.
- Snack Stash: I keep a jar in the fridge for quick snacks, sandwich toppings, or even a tangy side with dinner.
- Budget-Friendly Brine: Honestly, it costs pennies compared to fancy pickles, and I reuse the brine for the next batch.
Step-by-Step Instructions for Fermented Pickles Without Vinegar
This fermentation method relies on saltwater brine to transform cucumbers into tangy, probiotic-rich pickles.
Step 1: Prepare the Cucumbers and Aromatics
Thoroughly wash the 2 lb Cucumber and trim off the blossom end (the tiny stem opposite the main stem). This end contains enzymes that can soften pickles. Leave small cucumbers whole or spear larger ones lengthwise. I keep the skin on for texture and color.
In a clean quart-sized jar, combine the 6 cloves Garlic Cloves, 4 whole Dill Sprigs, 1 tbsp Mustard Seeds, 1 tsp Black Peppercorns, 0.5 tsp Red Pepper Flakes, 2 whole Bay Leaves, 2 whole Grape Leaves, and 1 tsp Coriander Seeds. These create the flavor foundation.
Step 2: Create the Saltwater Brine
In a saucepan, heat 4 cups Filtered Water until just boiling. Remove from heat and dissolve the 3 tbsp Pickling Salt completely. I stir vigorously to ensure no grains remain. The water should taste like seawater—salty but not unbearably so.
Let the brine cool to room temperature. This is critical—adding hot brine to cucumbers would start cooking them rather than fermenting. The ideal temperature is 70-75°F for fermentation to proceed properly without risking spoilage.
Step 3: Submerge and Begin Fermentation
Pack the cucumbers tightly into the jar with the aromatics. Pour the cooled brine over them until completely submerged. The cucumbers must stay below the liquid surface throughout fermentation to prevent mold growth. I use a fermentation weight or a zip-top bag filled with water to keep them down.
Cover the jar loosely with a lid or cloth to allow gases to escape. Place it in a cool, dark spot away from direct sunlight. You should see bubbles forming within 24-48 hours—this is the fermentation starting.
Step 4: Monitor and Taste Test
Check the jar daily for the first week, skimming off any scum that forms on the surface. This is normal and should be removed to prevent mold. The cucumbers will change from bright green to a duller olive color as they ferment.
Begin taste testing after 5-7 days. The pickles are ready when they have a pleasing tang and crunch. Fermentation time depends on temperature and personal preference—warmer conditions speed up the process. I find 10-14 days at 70°F produces the ideal balance of sourness and texture.
Step 5: Store and Enjoy
Once the pickles reach your desired flavor, secure the lid tightly and transfer the jar to the refrigerator. This slows the fermentation process significantly. The pickles will keep for several months refrigerated, though their texture may soften over time.
Serve chilled for maximum crunch. The flavor continues to develop even in cold storage, becoming more complex over time. Always use clean utensils when removing pickles to prevent contamination of the remaining batch.
Pro Tips For Making Pickle Recipe Without Vinegar
- Use Small Cucumbers: I learned this the hard way—bigger cucumbers get mushy. Stick to Kirby or Persian varieties, no thicker than your thumb, for a crisp bite every time.
- Boil Then Cool Water: Bring your filtered water to a full boil to dissolve the pickling salt completely, then let it cool to room temp before pouring over cucumbers. Hot water kills the good fermentation bacteria.
- Pack Tightly: Sounds weird, but it works: cram those cucumbers, garlic, and dill into the jar as snugly as possible to keep them submerged and prevent mold from forming on exposed bits.
- Burp Your Jars: After 24 hours, loosen the lid slightly to release built-up gas, then retighten. I skip this when I’m lazy, but the jars seal better when I don’t.
Dietary Considerations for This Dish
Keto-Friendly Options
Fermented pickles without vinegar are naturally low in carbs, making them a great fit for keto diets. Focus on using cucumber, salt, and water as the base, and avoid adding sugars or high-carb vegetables. For extra flavor, try garlic or dill, which are keto-approved.
Gluten-Free
This recipe is inherently gluten-free since it relies on fermentation rather than vinegar or additives. Ensure all spices and herbs used, like mustard seeds or black peppercorns, are certified gluten-free to avoid cross-contamination.
Allergen Information
Pickles made without vinegar typically contain no major allergens, but always check ingredients like garlic or onions for potential sensitivities. If using store-bought salt, confirm it’s free from additives that may trigger allergies.
Vegetarian Modifications
This recipe is vegetarian by default, but you can enhance it with vegetable-based seasonings like celery seeds or red pepper flakes. For a vegan version, ensure no animal-derived additives are used in fermentation.
Low-Sodium Alternatives
To reduce sodium, use less salt or a low-sodium salt substitute in the brine. Keep in mind that fermentation requires some salt for safety, so avoid eliminating it entirely. Rinsing pickles before eating can also lower sodium content.
Nutrition Facts

Trained in classic French technique but raised on slow-cooked ribs and spicy rubs, she blends culinary skill with smoke and soul.
- Recipe For Fried Pork Chops In An Iron Skillet: Crispy Crust With Juicy Centers - October 3, 2026
- Recipe for Fully Cooked Spiral Ham: Sweet Glaze and Effortless Elegance - October 3, 2026
- Recipe for Cream of Rice: Silky Smooth Breakfast Comfort - October 3, 2026