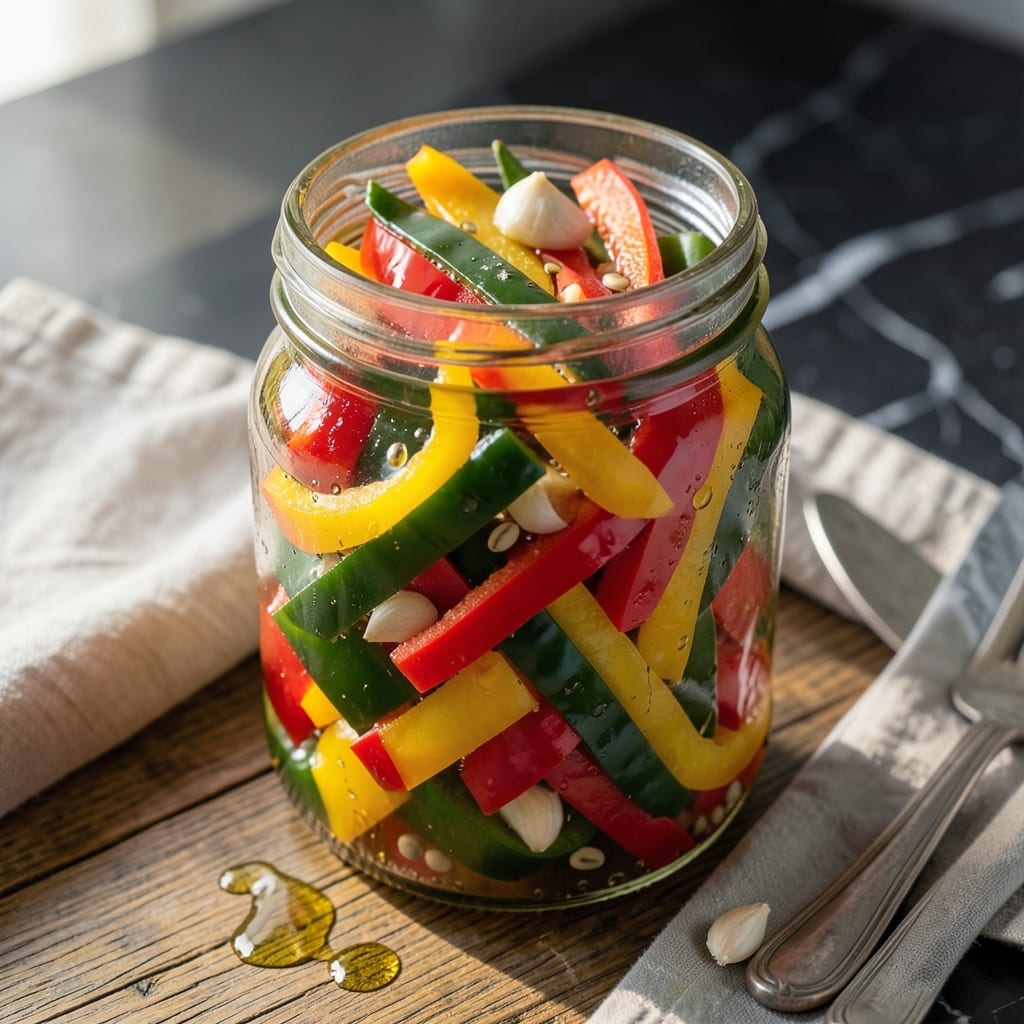
Preserving summer’s sweetness in a jar is simpler than you might think. This brining method transforms fresh bell peppers into tangy, crunchy condiments with minimal effort.
Garlic and herbs infuse the vinegar solution, creating a bold flavor profile that enhances everything from sandwiches to charcuterie boards. The process takes less than 30 minutes of active time.
Ingredients for Pickled Bell Peppers
Bright, crunchy peppers meet bold garlic and herb-infused brine for perfect pickling every time.
| Ingredient | Amount | Notes |
|---|---|---|
| Bell Peppers 🌶️ | 2 lb | Mixed colors, sliced into strips |
| White Vinegar 💧 | 2 cups | 5% acidity for preservation |
| Water 💧 | 2 cups | Filtered for best clarity |
| Granulated Sugar 🍚 | 2 tbsp | Dissolves completely in brine |
| Kosher Salt 🧂 | 1 tbsp | Diamond Crystal preferred |
| Garlic Cloves 🧄 | 8 cloves | Smashed, peeled |
| Black Peppercorns 🌶️ | 1 tsp | Whole for slow infusion |
| Mustard Seeds 🌿 | 1 tsp | Yellow or brown variety |
| Dried Red Pepper Flakes 🔥 | ½ tsp | Adjust for heat preference |
| Fresh Dill Sprigs 🌿 | 4 whole | Or substitute thyme |
[recipe_ingredient_scaler]
The peppers are everything—select firm, unblemished bell peppers with vibrant color. I source mine from local farmers markets in late summer when they’re at peak sweetness. For the vinegar, Heinz or store-brand white vinegar at 5% acidity works perfectly. Kosher salt is non-negotiable here; Diamond Crystal is my go-to for its clean taste and quick dissolution in the brine.
No fresh dill? Dried dill weed at one-third the amount works, though the flavor is more concentrated. Want more heat? Double the red pepper flakes or add a sliced jalapeño to the jar. The sugar can be swapped for maple syrup or agave if avoiding refined sugar—just ensure it’s fully dissolved. For a milder garlic flavor, slice the cloves instead of smashing.
These keep beautifully in the fridge for up to 3 months. The flavor deepens over time, so wait at least 48 hours before digging in. Always use clean, sterilized jars. For longer storage, process in a water bath for shelf-stable pickles that last 1 year.
Why You’ll Love This Recipe
- 5-Minute Prep: I just slice the peppers, boil the brine, and pour—no fancy steps.
- Tangy Crunch: The vinegar-sugar balance hits that sweet-and-sour spot every time.
- Pantry Hero: A handful of cheap staples turns a bushel of peppers into weeks of flavor.
Step-by-Step Instructions for Pickled Bell Peppers
These techniques ensure optimal flavor development and proper preservation for your peppers.
Step 1: Prepare the Bell Peppers and Aromatics
Begin by slicing the 2 lb Bell Peppers into uniform ¼-inch strips. Consistency in cutting ensures even pickling and a professional presentation. Remove all seeds and white pith, as these can introduce bitterness to your final product.
Smash the 8 cloves Garlic Cloves with the flat side of your knife—this releases their essential oils for maximum flavor infusion. Leave the cloves whole after smashing to maintain visual appeal in the jars.
Step 2: Create the Pickling Brine
In a medium saucepan, combine the 2 cups White Vinegar, 2 cups Water, 2 tbsp Granulated Sugar, and 1 tbsp Kosher Salt. Place over medium-high heat and bring to a gentle boil, stirring occasionally until the sugar and salt fully dissolve—this should take 3-4 minutes.
The brine should be clear with no visible granules. This proper dissolution ensures even seasoning throughout the peppers and prevents any grainy texture in your finished pickles.
Step 3: Add Flavorings to the Brine
Once the brine reaches a boil, add the 1 tsp Black Peppercorns, 1 tsp Mustard Seeds, 0.5 tsp Dried Red Pepper Flakes, and 4 whole Fresh Dill Sprigs. Reduce heat to medium-low and let the mixture simmer for 5 minutes to allow the spices to bloom and infuse the liquid.
Watch for the peppercorns to become slightly plump and the dill to brighten in color—these visual cues indicate the spices are releasing their flavors into the brine. The aroma should be fragrant and slightly pungent.
Step 4: Combine Peppers and Brine
Pack the sliced bell peppers and smashed garlic cloves into clean, sterilized jars. Pour the hot brine over the peppers, ensuring they are completely submerged. Use a clean spoon to press down gently, removing any air bubbles trapped between the pepper strips.
The peppers should be fully covered by at least ½ inch of liquid to prevent spoilage. If needed, prepare additional brine using the same ratios to top off the jars. The peppers will begin to soften slightly and brighten in color almost immediately.
Step 5: Cool and Store for Optimal Flavor
Let the jars cool to room temperature, which typically takes 30-45 minutes. As they cool, you’ll notice the peppers becoming more translucent as they absorb the brine. The liquid may appear slightly cloudy at first but will clear as the spices settle.
Once cooled, seal the jars and refrigerate for at least 24 hours before consuming. The peppers will develop their full tangy flavor after 3-4 days in the refrigerator and will keep for up to 1 month stored properly. The garlic cloves will turn a beautiful blue-green color, which is a normal reaction and indicates proper pickling.
Pro Tips For Making Pickled Bell Peppers
- Slice Evenly: Cut the bell peppers into uniform strips—about 1/4-inch thick—so they pickle at the same rate and stay crisp.
- Boil the Brine: Heat the vinegar, water, sugar, and salt just until the sugar dissolves, then cool before pouring over the peppers to avoid soggy results.
- Skip the Seeds: Remove all seeds and white pith from the peppers—I learned this the hard way after my first batch turned out bitter.
- Use a Clean Jar: Sterilize your jars with boiling water first to prevent mold, especially if storing longer than a week.
Make-Ahead Tips for This pickled bell peppers
Prep Ahead Strategy
I always slice my 2 lb Bell Peppers and prep the aromatics the night before. Store the cut peppers in a sealed container in the fridge to maintain freshness. This saves 15-20 minutes on pickling day and ensures you can jump straight into making the brine. 💡
Brine Pre-Mixing
You can prepare the brine solution up to 24 hours ahead and store it in the fridge. Just reheat it gently before pouring over the peppers. This works especially well if you’re pickling multiple batches throughout the week.
Jar Sterilization
Sterilize your jars while the brine simmers. I use the dishwasher’s highest heat cycle or boil them for 10 minutes. Having them hot prevents temperature shock when adding the boiling brine, which could crack the glass.
Batch Processing
Double or triple the recipe to make multiple jars at once. With 4 lb Bell Peppers, you’ll fill about 3 quart-sized jars. These make fantastic gifts—just add a ribbon and a handwritten label with the date. 💛
Flavor Development
For best results, let the sealed jars sit in the fridge for at least 48 hours before using. The peppers will gradually absorb the garlic and herb flavors, becoming more complex over time. I find they peak at about 2 weeks.
Long-Term Storage
For shelf-stable pickles, process the sealed jars in a water bath for 15 minutes after filling. This extends their shelf life to 1 year when stored in a cool, dark place. Always check the seal before storing.
Nutrition Facts
Frequently Asked Questions
How long do they need to sit before eating?
Wait at least 24 hours for basic flavor, but 3-4 days brings out the best tang. For peak taste, let them develop for 2 weeks in the fridge.
Can I use different vinegar types?
Yes, but stick to 5% acidity. Apple cider vinegar adds fruitiness, while rice vinegar gives a milder taste. Avoid balsamic—it’s too sweet and dark for this recipe.
Why did my garlic turn blue-green?
This is normal! A chemical reaction between sulfur in garlic and the vinegar’s acidity creates the color. It’s safe to eat and means the pickling process worked.
Do I need to sterilize the jars?
For fridge storage, clean jars are fine. For shelf-stable pickles, sterilize by boiling jars for 10 minutes or using a dishwasher’s highest heat cycle.

Trained in classic French technique but raised on slow-cooked ribs and spicy rubs, she blends culinary skill with smoke and soul.
- Recipe for Boneless Pork Chops in Cast Iron Skillet: Sear and Baste to Juicy Perfection - October 3, 2026
- Recipe for Boneless Cross Rib Roast: Slow-Roasted Beef with Herb Crust - October 3, 2026
- Hamburgers in Sauce Recipe Crock Pot: Slow-Cooked Savory Delight - October 3, 2026