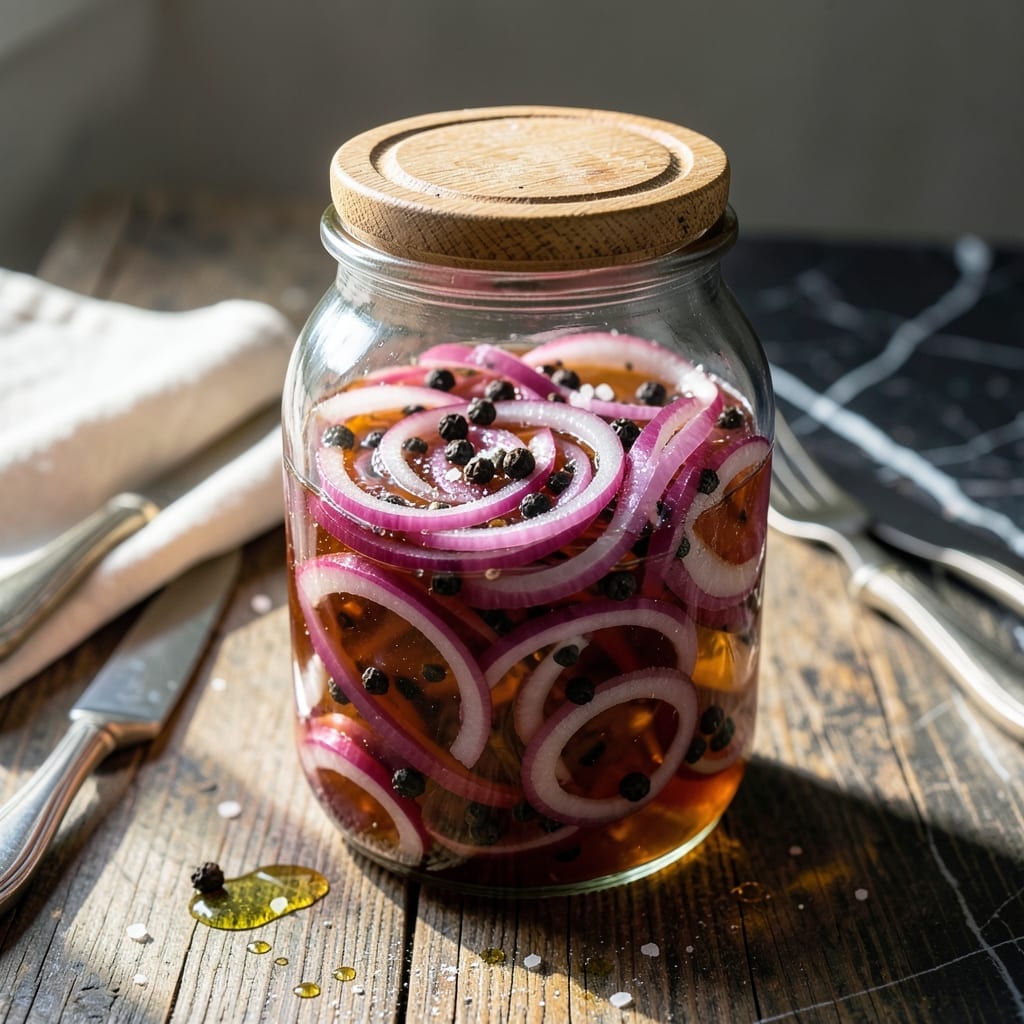
This quick pickling method transforms raw red onions into vibrant, tangy toppers in just 15 minutes. The secret lies in a simple brine of vinegar, sugar, and salt that works fast without sacrificing flavor.
Perfect for tacos, sandwiches, or salads, these pickled onions deliver restaurant-quality results with minimal effort. They keep well in the fridge, ready to brighten any dish on demand.
Ingredients for Pickled Red Onion Recipe Quick
Nine ingredients create that bright, tangy topping in minutes flat.
| Ingredient | Amount | Notes |
|---|---|---|
| Red Onion 🧅 | 1 whole | Medium, thinly sliced |
| White Vinegar 💧 | 1 cup | 5% acidity preferred |
| Apple Cider Vinegar 🍏 | ½ cup | For depth of flavor |
| Granulated Sugar 🍚 | 2 tbsp | Dissolves easily in brine |
| Kosher Salt 🧂 | 1 ½ tsp | Diamond Crystal preferred |
| Black Peppercorns 🌶️ | 1 tsp | Lightly crushed for aroma |
| Mustard Seeds 🌿 | 1 tsp | Optional for extra zing |
| Red Pepper Flakes 🔥 | ½ tsp | Adjust for heat preference |
| Water 💧 | 1 cup | Filtered or boiled |
[recipe_ingredient_scaler]
The onion quality matters—firm, unblemished red onions yield the best texture. Most grocery stores carry them year-round. For vinegar, Heinz or store-brand white vinegar works perfectly, while Bragg makes a great organic apple cider vinegar. Look for 5% acidity on the label to ensure proper pickling. The sugar and salt dissolve faster if heated slightly, but room temp works too.
No white vinegar? Rice vinegar or distilled vinegar at a 1:1 ratio. Swap apple cider vinegar for white wine vinegar if that’s what you have. Skipping the peppercorns? Coriander seeds or a bay leaf add subtle complexity. For less heat, omit the red pepper flakes entirely. The mustard seeds can be skipped, but they add a nice pop of texture.
Store in a clean glass jar in the fridge for up to 3 weeks. The onions soften over time but retain their tang. For best flavor, wait at least 24 hours before using. Perfect for tacos, sandwiches, or straight from the jar.
Why You’ll Love This Recipe
- 5-Minute Magic: No cooking required—just slice, mix the vinegars with sugar and salt, and let time do the work.
- Tangy Crunch: That sharp vinegar bite mellows into something bright and sweet, with a crispness that stays for days.
- Taco Night MVP: Honestly, I toss these on everything—tacos, sandwiches, even scrambled eggs for a pop of color and zing.
- Pantry Staple: A jar costs pennies, lasts weeks in the fridge, and saves me from last-minute grocery runs.
Step-by-Step Instructions for Pickled Red Onions
This method delivers vibrant, tangy pickled onions in the time it takes to brew a cup of tea.
Step 1: Thinly Slice the Red Onion
Cut the 1 whole Red Onion in half from root to stem, then peel off the paper-thin outer skin. Place each half cut-side down on your cutting board and slice as thinly as possible using a sharp chef’s knife.
For the most even slices, I use a mandoline set to 1/8-inch thickness. This thinness ensures the onions soften quickly in the brine while maintaining a pleasant crunch. Separate the slices into rings as you go.
You should have about 2 cups of thinly sliced red onion when finished. If your onion is particularly large, you may have slightly more, but the brine quantity remains sufficient.
Step 2: Prepare the Brine Mixture
In a medium saucepan, combine the 1 cup White Vinegar, 0.5 cup Apple Cider Vinegar, 2 tbsp Granulated Sugar, 1.5 tsp Kosher Salt, 1 tsp Black Peppercorns, 1 tsp Mustard Seeds, and 0.5 tsp Red Pepper Flakes.
Add the 1 cup Water and stir to begin dissolving the sugar and salt. Place the saucepan over medium-high heat and bring to a gentle boil, stirring occasionally until the sugar and salt are completely dissolved.
Once boiling, remove from heat immediately. The brine should be clear with visible spices suspended throughout. This quick heating ensures the sugar and salt dissolve properly while preserving the bright flavor of the vinegars.
Step 3: Combine Onions and Brine
Pack the sliced red onions into a clean 16-ounce jar or other heat-safe container. Pour the hot brine over the onions, using a spoon to press them down and remove any air bubbles.
The brine should completely cover the onions. If needed, use the back of a spoon to submerge any floating slices. The onions will begin to soften and turn vibrant pink almost immediately upon contact with the hot brine.
Step 4: Cool and Store
Let the jar sit at room temperature for 15 minutes to begin the pickling process. You’ll see the onions transform from stark white to a beautiful bright pink as they absorb the vinegar mixture.
After 15 minutes, seal the jar with a lid and transfer it to the refrigerator. The onions will continue to develop flavor as they cool. For best results, wait at least 30 minutes before serving, though they’re delicious after just 15 minutes if you’re in a hurry.
Store in the refrigerator for up to 2 weeks. The onions will maintain their crisp texture and bright flavor throughout this time, making them perfect for adding a tangy crunch to tacos, sandwiches, salads, or charcuterie boards.
Pro Tips For Making Pickled Red Onion Recipe Quick
- Slice Thin and Even: Use a sharp knife or mandoline to cut the onion into paper-thin half-moons—this speeds up the pickling process and guarantees every bite is tender, not crunchy.
- Heat the Vinegar: Warm the vinegar, sugar, and salt mixture just until the sugar dissolves, then pour it hot over the onions. I learned this the hard way—cold brine takes forever to work.
- Skip the Soak: Resist the urge to rinse the onions after slicing. That starchy edge actually helps them soften faster in the vinegar, and you’ll lose flavor if you wash it away.
- Use Both Vinegars: Mixing white vinegar for sharpness with apple cider vinegar for depth gives a more balanced pickle. Sounds weird, but it works—like a flavor shortcut without extra effort.
Pro Cooking Tips for This Dish
Slice Like a Pro
Use a sharp chef’s knife or mandoline for paper-thin slices—1/8-inch thick is ideal. Cut from root to stem for consistent rings. This ensures even pickling and that perfect crunch. I always use my OxO mandoline for safety and precision. 💡
Brine Boiling Hack
Bring your brine to a boil just until sugar and salt dissolve, then remove from heat immediately. Overboiling can mellow the vinegar’s brightness. A medium saucepan prevents spills during stirring.
Jar Selection
Use a clean 16-ounce mason jar or similar heat-safe container. The onions should be fully submerged in brine within 30 seconds of pouring. Press down gently with a spoon to remove air bubbles.
Color Transformation
Watch the magic happen—the onions turn vibrant pink within 5 minutes of hitting the hot brine. For deepest color, use red wine vinegar instead of white, though the flavor will be different.
Flavor Boost
For extra zing, add 1 tsp coriander seeds or a bay leaf to your brine. Toast the spices lightly in a dry pan before adding to release their oils. This small step makes a noticeable difference. ✨
Quick Cooling
After 15 minutes at room temp, transfer to the fridge to halt the pickling process. This prevents the onions from becoming too soft. They’ll keep their crisp texture for up to 2 weeks refrigerated.
Nutrition Facts
Frequently Asked Questions
Can I use a different type of vinegar?
Yes! Swap white vinegar for rice vinegar at a 1:1 ratio. For deeper flavor, try white wine vinegar instead of apple cider vinegar. Just maintain 5% acidity for best results.
How long do they stay crisp?
They’ll keep their crunch for up to 2 weeks refrigerated. After that, they soften but remain flavorful. For maximum texture, consume within the first week.
Can I make them less sharp?
Reduce the vinegar by 2 tablespoons and add 1 tablespoon more water. Or add 1 teaspoon more sugar to balance the acidity.
Do I need to sterilize the jar?
For short-term fridge storage, a clean jar is sufficient. For longer storage, sterilize by boiling the jar and lid for 10 minutes before use.

Trained in classic French technique but raised on slow-cooked ribs and spicy rubs, she blends culinary skill with smoke and soul.
- Recipe for Boneless Pork Chops in Cast Iron Skillet: Sear and Baste to Juicy Perfection - October 3, 2026
- Recipe for Boneless Cross Rib Roast: Slow-Roasted Beef with Herb Crust - October 3, 2026
- Hamburgers in Sauce Recipe Crock Pot: Slow-Cooked Savory Delight - October 3, 2026