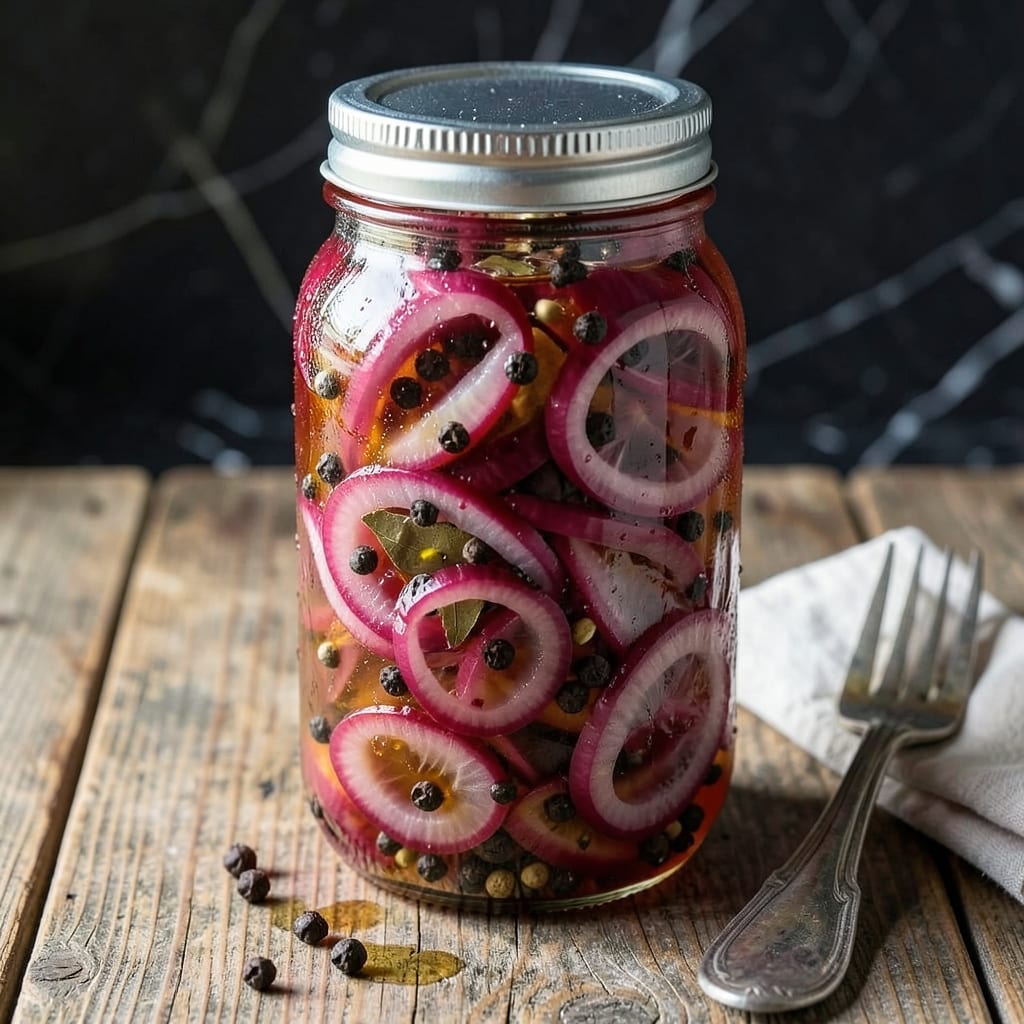
This quick-pickle method transforms raw red onions into vibrant, tangy condiments in under 30 minutes. The vinegar brine softens the bite while preserving their crisp texture.
Use these to brighten tacos, sandwiches, or salads. They keep for weeks in the fridge, ready to add a pop of color and flavor to any dish.
Ingredients for Pickled Red Onion
Nine ingredients transform raw red onions into that vibrant tangy condiment in minutes.
| Ingredient | Amount | Notes |
|---|---|---|
| Red Onion 🧅 | 2 whole | Medium, thinly sliced |
| Apple Cider Vinegar 🍏 | 1 cup | 5% acidity for tang |
| White Vinegar 💧 | ½ cup | For extra sharpness |
| Granulated Sugar 🍚 | 2 tbsp | Balances acidity fully |
| Kosher Salt 🧂 | 1 ½ tsp | Diamond Crystal preferred |
| Black Peppercorns 🌶️ | 1 tsp | Whole, lightly crushed |
| Mustard Seeds 🌿 | 1 tsp | Yellow or brown variety |
| Red Pepper Flakes 🔥 | ½ tsp | Adjust for heat preference |
| Water 💧 | ½ cup | Filtered for clarity |
[recipe_ingredient_scaler]
The onions are everything here. Opt for firm, deep red globes with smooth skins—avoid any with soft spots or sprouting. Organic if possible, as conventionally grown can have a harsher bite. For vinegars, Bragg makes a reliable apple cider vinegar, but any brand with 5% acidity works. The spices should be fresh; if your mustard seeds smell dusty, replace them.
No apple cider vinegar? Rice vinegar or white wine vinegar work in a pinch (use the same amount). Skip the sugar entirely for a sharper pickle, or swap in maple syrup for depth. Out of mustard seeds? Coriander seeds add a different but pleasant warmth. The water can be tap if your local supply is clean—filtered just gives a crisper appearance.
These keep beautifully. Store in a sterilized glass jar in the fridge for up to 4 weeks. The flavor develops over the first few days, so make them ahead. Always use clean, dry utensils to prevent spoilage.
Why You’ll Love This Recipe
- 5-Minute Chop: I slice one red onion, toss it in a jar with vinegar, sugar, and salt—done. Honestly, it’s faster than making toast.
- Tangy Crunch: The apple cider vinegar gives it that bright, slightly fruity zing that cuts through rich dishes like tacos or burgers.
- Fridge Stable: I keep a jar in my fridge for weeks, ready to add to sandwiches, salads, or even straight from the jar when I need a quick bite.
- Pennywise Punch: Red onions are cheap, and a single batch costs less than a fancy condiment but tastes way better.
Step-by-Step Instructions for Pickled Red Onions
This streamlined method delivers restaurant-quality results with minimal hands-on time.
Step 1: Thinly Slice the Red Onions
Using a sharp chef’s knife, slice the 2 whole Red Onion into very thin half-moons. I recommend cutting them as evenly as possible—about ⅛-inch thick—so they soften uniformly in the brine.
Uniform slices ensure even pickling and a consistent texture. Place the sliced onions in a clean, heatproof jar or bowl. This preparation step is the foundation for achieving that signature vibrant magenta color and crisp-tender bite.
Step 2: Create the Pickling Brine
In a small saucepan, combine 1 cup Apple Cider Vinegar, ½ cup White Vinegar, ½ cup Water, 2 tbsp Granulated Sugar, and 1½ tsp Kosher Salt. Heat over medium-high heat until the sugar and salt fully dissolve, stirring occasionally.
This balanced brine delivers the perfect tangy-sweet profile. The apple cider vinegar provides depth, while the white vinegar adds sharpness. Once the mixture comes to a gentle simmer and the last grains of sugar disappear, remove it from the heat immediately to prevent evaporation.
Step 3: Add Aromatics and Infuse
Stir in the 1 tsp Black Peppercorns, 1 tsp Mustard Seeds, and ½ tsp Red Pepper Flakes. These whole spices will infuse the brine with subtle complexity as the onions pickle.
I lightly crush the peppercorns with the flat side of my knife before adding them—this releases their aromatic oils without pulverizing them. Let the brine sit off heat for 2 minutes to allow the flavors to meld before pouring it over the onions.
Step 4: Combine and Quick-Pickle
Carefully pour the hot brine over the sliced onions, ensuring they’re completely submerged. Use a spoon to press them down gently if needed. The liquid should cover the onions by at least ½ inch.
Let the mixture cool to room temperature—this takes about 30 minutes. As it cools, you’ll see the onions begin to soften and take on that beautiful pickled hue. For quick results, you can use them after 1 hour, but for the best flavor development, refrigerate for at least 24 hours before serving.
Pro Tips For Making Pickled Red Onion
- Slice Evenly: Use a mandoline or sharp knife to cut the red onions into consistent 1/8-inch thick slices—this ensures even pickling and a better texture in every bite.
- Heat the Brine: Warm the vinegar, sugar, and salt mixture just until the sugar dissolves (about 2-3 minutes on medium), then let it cool before pouring over the onions. I learned this the hard way—hot brine can make the onions mushy.
- Skip the Rinse: Resist the urge to rinse the onions after slicing, even if they seem strong. That raw bite softens in the brine, and rinsing washes away the natural compounds that give them color and flavor.
- Use Both Vinegars: Sounds weird, but it works: mixing apple cider vinegar with white vinegar balances the sharpness and adds depth. After trying just one or the other, I finally figured out the combo is what makes these onions pop.
Regional Styles of This Recipe
Mexican Taquería Style
In Oaxaca, they add 1 tsp dried oregano and 2 bay leaves to the brine for earthy depth. I also toss in 3 thin orange slices for citrus brightness. This version is essential for tacos al pastor—just like at my favorite coastal taquería.
Southern BBQ Style
For pulled pork sandwiches, I boost the sweetness with 1 extra tbsp brown sugar and add 1 tsp celery seeds to the brine. The molasses notes in brown sugar complement smoked meats beautifully. 🔥
Asian-Inspired Variation
Replace white vinegar with rice vinegar and add 1 tbsp grated ginger plus 2 star anise pods. This works wonders with Vietnamese banh mi or Korean bulgogi. I forage wild ginger near the coast for extra zing.
French Bistro Style
My French training kicks in here—I use white wine vinegar instead of apple cider and add 1 sprig fresh thyme plus 1 tsp pink peppercorns. Perfect with charcuterie boards or a sharp cheddar sandwich.
Texas Border Style
For a spicier kick, I add 1 sliced jalapeño and 1 tsp cumin seeds to the brine. This pairs especially well with breakfast tacos or grilled meats. The cumin adds that warm, earthy note I grew up with.
Mediterranean Style
Add 1 tsp coriander seeds and 1 strip orange peel to the brine. This bright, citrusy version elevates falafel wraps and gyros. I love this with a sprinkle of za’atar before serving. ✨
Nutrition Facts
Frequently Asked Questions
How long do quick-pickled onions last?
They stay fresh in the fridge for up to 4 weeks in a sealed jar. The flavor deepens over the first few days, making them even more delicious after 24 hours.
Can I use a different type of vinegar?
Yes! Rice vinegar or white wine vinegar work well as substitutes. Each adds a unique twist—rice vinegar is milder, while white wine vinegar offers a sharper tang.
Why did my onions turn blue or green?
This happens when natural pigments react with the brine’s acidity. It’s harmless and doesn’t affect taste. To prevent it, use filtered water and ensure your utensils are stainless steel.
Do I need to sterilize the jar?
For short-term fridge storage, a clean jar is fine. For longer storage, sterilize by boiling the jar and lid for 10 minutes to prevent spoilage.

Trained in classic French technique but raised on slow-cooked ribs and spicy rubs, she blends culinary skill with smoke and soul.
- Recipe for Boneless Pork Chops in Cast Iron Skillet: Sear and Baste to Juicy Perfection - October 3, 2026
- Recipe for Boneless Cross Rib Roast: Slow-Roasted Beef with Herb Crust - October 3, 2026
- Hamburgers in Sauce Recipe Crock Pot: Slow-Cooked Savory Delight - October 3, 2026