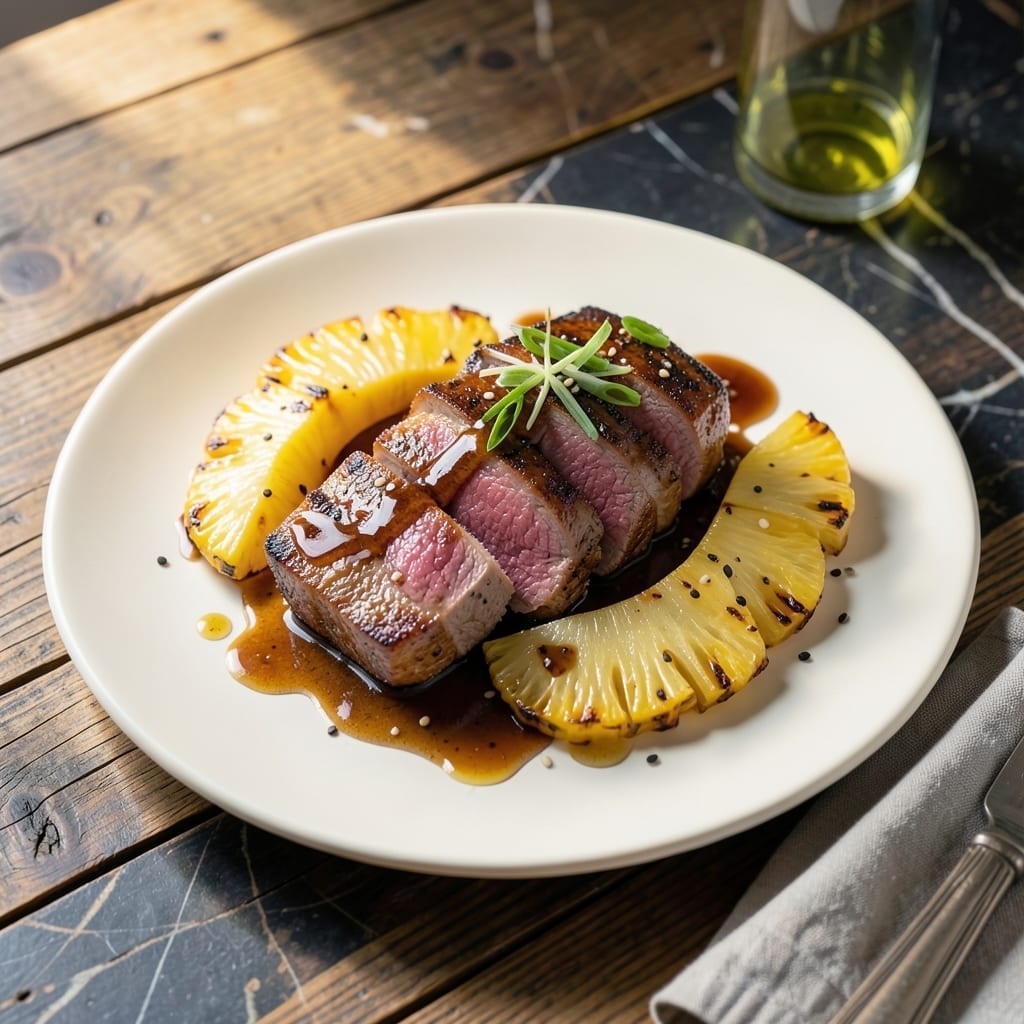
This dish proves that sweet and savory belong together. The pineapple glaze creates a tender, caramelized crust that complements the pork perfectly.
I developed this method to ensure the pork stays juicy while the glaze reduces to a sticky, glossy finish. It’s a foolproof way to elevate a simple cut.
Ingredients for Pineapple Pork Tenderloin
Pineapple and pork create a perfect balance of sweet and savory flavors in this dish.
| Ingredient | Amount | Notes |
|---|---|---|
| Pork Tenderloin 🥩 | 1 ½ lb | Trimmed of silver skin |
| Fresh Pineapple 🍍 | 2 cups | Diced, plus extra for garnish |
| Pineapple Juice 💧 | ½ cup | Unsweetened, reserved from fresh |
| Brown Sugar 🍚 | ¼ cup | Light or dark, packed |
| Soy Sauce 🫒 | 3 tbsp | Low-sodium preferred |
| Apple Cider Vinegar 🍏 | 1 tbsp | For balance and tang |
| Garlic Cloves 🧄 | 3 cloves | Minced finely |
| Fresh Ginger 🌿 | 1 tbsp | Grated, peeled |
| Olive Oil 🫒 | 1 tbsp | For searing pork |
| Cornstarch 🌾 | 1 tsp | For thickening glaze |
| Salt 🧂 | 1 tsp | Kosher or sea salt |
| Black Pepper 🌶️ | ½ tsp | Freshly ground preferred |
| Red Pepper Flakes 🔥 | ¼ tsp | Optional for heat |
| Fresh Cilantro 🌿 | ¼ cup | Chopped, for garnish |
[recipe_ingredient_scaler]
The pork tenderloin should be uniformly thick for even cooking. Whole Foods or Costco typically carry high-quality options with good marbling. Look for a pale pink color with minimal fat—this indicates freshness. The pineapple should be ripe but firm; overripe fruit can make the glaze too watery. Fresh ginger and garlic are non-negotiable for depth of flavor.
No fresh pineapple? Canned pineapple in juice (not syrup) works in a pinch—just drain well. Substitute honey for brown sugar if needed, though the flavor profile will shift slightly. For a gluten-free version, use tamari instead of soy sauce. The vinegar can be swapped for rice vinegar (one-for-one ratio), but avoid balsamic as it overpowers the glaze.
The glaze can be made 2 days ahead and stored in the fridge. The cooked pork keeps for 3-4 days in an airtight container. Reheat gently to avoid drying out the meat. For optimal texture, bring the pork to room temperature before cooking.
Why You’ll Love This Recipe
- One Pan Wonder: I toss everything in a single dish and let the oven do the work—pork, pineapple, and that sticky brown sugar glaze practically cook themselves.
- Sweet & Tangy Magic: The brown sugar caramelizes with the pineapple juice, and the soy sauce adds this deep umami punch that makes every bite ridiculously good.
- Weeknight Hero: Honestly, it’s my go-to for busy Tuesdays—fancy enough for company but unfussy enough for a school night.
- Lunch the Next Day: The leftovers? Even better cold, sliced thin over rice or in a wrap. I’ll be real: I make extra just for this.
Step-by-Step Instructions for Pineapple Pork Tenderloin
Master this method for a perfectly tender dish with a glossy, sweet-savory glaze every time.
Step 1: Season and Sear the Pork Tenderloin
Pat the 1.5 lb Pork Tenderloin dry with paper towels to ensure a proper sear. Season all sides generously with 1 tsp Salt and 0.5 tsp Black Pepper. This creates a flavorful crust and prevents the meat from sticking to the pan.
Heat 1 tbsp Olive Oil in a large oven-safe skillet over medium-high heat until it shimmers. Add the pork tenderloin and sear for 3-4 minutes per side until it develops a golden brown crust on all surfaces. Remove the pork from the skillet and set it aside to rest on a plate.
Step 2: Create the Pineapple Glaze Base
In the same skillet, reduce heat to medium. Add the 2 cups Fresh Pineapple, 0.5 cup Pineapple Juice, 0.25 cup Brown Sugar, 3 tbsp Soy Sauce, and 1 tbsp Apple Cider Vinegar. Stir to combine and let the mixture simmer for 5 minutes.
The pineapple will soften as the liquid reduces slightly, creating a fragrant, syrupy base. Use a wooden spoon to scrape up any browned bits from the bottom of the pan—these add depth of flavor to the glaze.
Step 3: Infuse with Aromatics and Thicken
Stir in the 3 cloves Garlic Cloves, 1 tbsp Fresh Ginger, and 0.25 tsp Red Pepper Flakes. Cook for 1-2 minutes until the garlic and ginger become fragrant. Be careful not to let the garlic burn, as it can turn bitter quickly.
In a small bowl, mix 1 tsp Cornstarch with 1 tablespoon of water to create a slurry. Pour the slurry into the skillet and stir to combine. Simmer for an additional 2-3 minutes until the glaze thickens enough to coat the back of a spoon.
Step 4: Finish Cooking the Pork in the Glaze
Return the seared pork tenderloin to the skillet, spooning the glaze over the top to coat it evenly. Reduce heat to medium-low, cover, and let it cook for 10-12 minutes. Turn the pork occasionally to ensure it is thoroughly coated and cooked through.
The pork is done when an instant-read thermometer inserted into the thickest part reads 145°F. The glaze should be glossy and thick, with the pineapple pieces softened and infused with the savory, sweet flavors.
Step 5: Rest and Garnish for Serving
Transfer the pork tenderloin to a cutting board and let it rest for 5-10 minutes. This allows the juices to redistribute, ensuring the meat remains tender and moist when sliced.
Slice the pork into 1-inch thick medallions and arrange on a serving platter. Spoon any remaining glaze from the skillet over the top. Garnish with 0.25 cup Fresh Cilantro and additional diced pineapple if desired. Serve immediately while warm.
Pro Tips For Making Pineapple Pork Tenderloin
- Sear First, Simmer Later: I learned this the hard way—start by searing the pork tenderloin in a screaming hot pan for 2-3 minutes per side to lock in juices, then lower the heat to simmer in the pineapple mixture. Skipping the sear leaves you with bland, pale meat.
- Use Ripe Pineapple: After using underripe pineapple once and getting a tart, fibrous mess, I now wait for fruit that yields slightly to pressure and smells sweet at the stem. It makes a real difference in the sauce’s flavor.
- Don’t Boil the Sauce: Resist the urge to crank the heat when reducing the pineapple juice, brown sugar, and soy sauce—keep it at a gentle simmer, or the sugar will caramelize too fast and turn bitter.
- Slice Against the Grain: My grandmother swore by this, and she was right: after cooking, slice the tenderloin into 1-inch medallions against the grain for the most tender bite, especially when serving with the pineapple topping.
Essential Equipment for Pineapple Pork Tenderloin
Oven-Safe Skillet
An oven-safe skillet is non-negotiable for this recipe. I swear by my Lodge cast iron—it goes from stovetop to oven seamlessly and develops that perfect sear. A 12-inch skillet gives the pork plenty of room to brown without steaming.
Instant-Read Thermometer
Pork tenderloin cooks quickly, so an instant-read thermometer is your best friend. I use a ThermoWorks Thermapen for accuracy. Aim for 145°F internal temperature—this ensures juicy meat without overcooking. 🌡️
Without one, you risk either undercooked pork or dry, overdone meat. The difference between 140°F and 150°F is just a few minutes but makes all the difference.
Wooden Spoon
A wooden spoon is perfect for scraping up those flavorful browned bits when making the glaze. It won’t scratch your skillet like metal utensils can. I keep a bamboo spoon just for deglazing—it’s become my lucky charm for sauces.
Cutting Board
Use a large cutting board with a groove to catch juices when resting the pork. I prefer bamboo or maple for their durability. The groove is a game-changer—it keeps your counter clean while the meat rests for that crucial 5-10 minutes.
Mixing Bowls
A set of nested mixing bowls makes prepping the glaze ingredients a breeze. I use stainless steel for the slurry—it’s easy to clean and won’t absorb odors. Having a few sizes on hand means you can prep everything before the pork even hits the pan. 💛
Nutrition Facts
Frequently Asked Questions
Can I use canned pineapple instead of fresh?
Yes, canned pineapple in juice (not syrup) works well. Just drain it thoroughly to prevent a watery glaze. The texture will be slightly softer, but the flavor remains delicious.
How do I prevent the pork from drying out?
Don’t overcook it! Pull the pork at 145°F internal temperature and let it rest for 5-10 minutes. The juices redistribute, keeping it moist and tender.
Can I make the glaze ahead of time?
Prepare the glaze up to 2 days ahead and store it in the fridge. Reheat gently before adding the pork to avoid curdling the sugars.
What sides pair well with this dish?
Try coconut rice or roasted sweet potatoes. The sweetness complements the glaze, while steamed greens add a fresh contrast.

Trained in classic French technique but raised on slow-cooked ribs and spicy rubs, she blends culinary skill with smoke and soul.
- Recipe for Boneless Pork Chops in Cast Iron Skillet: Sear and Baste to Juicy Perfection - October 3, 2026
- Recipe for Boneless Cross Rib Roast: Slow-Roasted Beef with Herb Crust - October 3, 2026
- Hamburgers in Sauce Recipe Crock Pot: Slow-Cooked Savory Delight - October 3, 2026