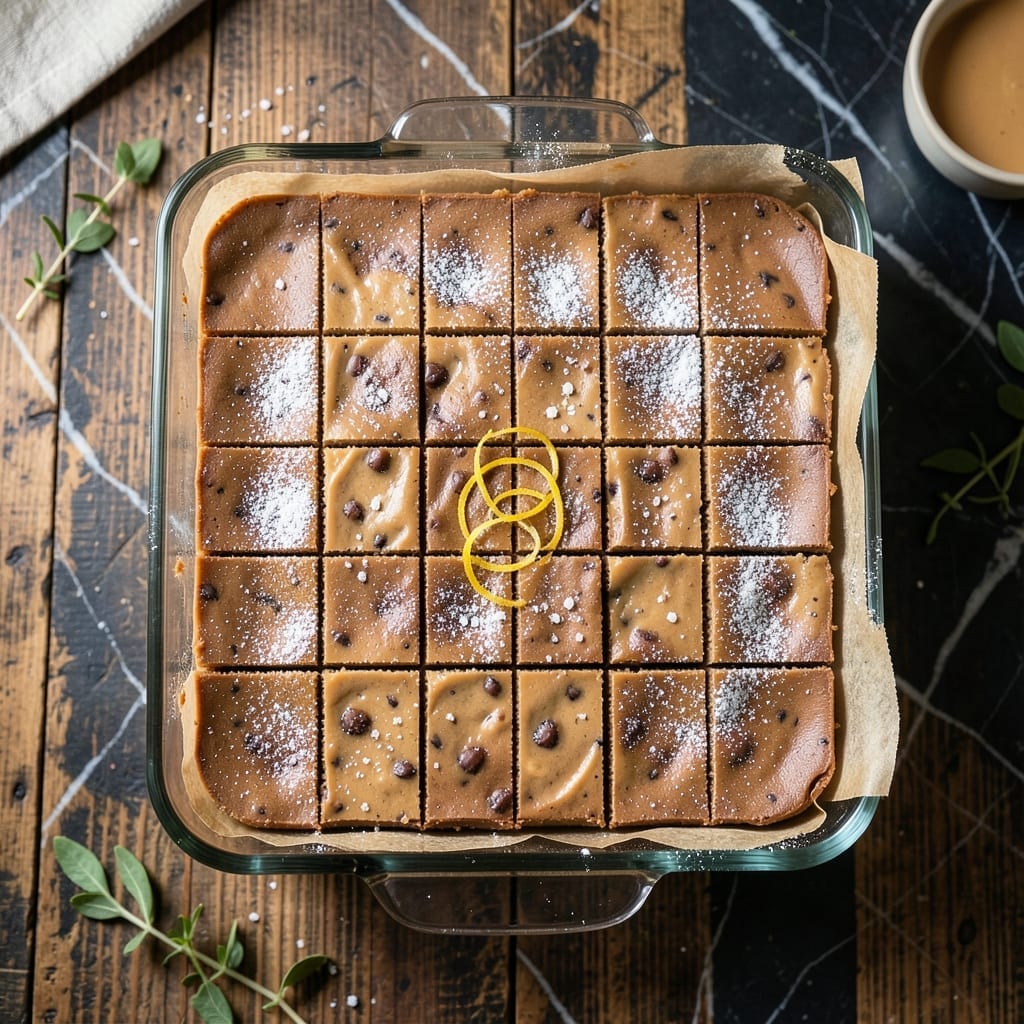
This no-bake treat delivers creamy perfection with minimal effort. A classic combination of peanut butter and chocolate creates a rich, indulgent fudge that sets beautifully in the fridge.
I’ve refined this method to ensure smooth texture every time. With just a few ingredients and no oven required, it’s the ideal solution for satisfying sweet cravings quickly.
Ingredients for Pioneer Woman Peanut Butter Fudge
A handful of pantry staples transform into this decadent, no-bake delight with ease.
| Ingredient | Amount | Notes |
|---|---|---|
| Creamy Peanut Butter 🥜 | 1 ½ cups | Smooth, unsweetened preferred |
| Semi-Sweet Chocolate Chips 🍫 | 2 cups | High-quality for best melt |
| Unsalted Butter 🧈 | ½ cup | Cut into small cubes |
| Powdered Sugar 🍚 | 3 cups | Sifted for smooth texture |
| Vanilla Extract 🌿 | 1 tsp | Pure extract recommended |
| Kosher Salt 🧂 | ½ tsp | Fine grain preferred |
| Heavy Cream 🥛 | ¼ cup | Full-fat for richness |
| Marshmallow Fluff ⚪ | 1 cup | For light, fluffy texture |
[recipe_ingredient_scaler]
The peanut butter is the foundation here. Jif or Skippy work reliably, but natural peanut butter (the kind without added sugar) gives a purer flavor. Whole Foods has great organic options if you’re avoiding additives. For the chocolate, Ghirardelli or Guittard chips melt smoothly—avoid cheap brands that seize up. The butter should be real unsalted; margarine won’t set the same way.
No marshmallow fluff? Mini marshmallows melted with 1 tbsp milk gets you close. Need a dairy-free version? Swap the butter for coconut oil and the cream for coconut cream. The powdered sugar can’t be substituted (liquid sweeteners throw off the texture), but organic brands blend more smoothly. Skip the salt if your peanut butter is already salted.
This fudge keeps 10-14 days in an airtight container at room temperature, though it’s best within the first 5 days. For longer storage, freeze for up to 3 months—thaw overnight in the fridge before serving. Cut into squares only after fully set to avoid crumbling.
Why You’ll Love This Recipe
- No-Fuss Mixing: I just dump everything in one bowl—peanut butter, chocolate chips, the works—and stir. Honestly, it’s almost too simple.
- Rich & Creamy: That combo of creamy peanut butter and melted chocolate chips? It’s like a dessert hug in every bite.
- Gift-Worthy Treat: I package these in little tins for teachers, neighbors, or last-minute hostess gifts. Between us, they always disappear fast.
- Stays Fresh: This fudge keeps for over a week in the fridge, so I can make a big batch and snack on it all week long.
Step-by-Step Instructions for Pioneer Woman Peanut Butter Fudge
This no-bake method ensures a silky, melt-in-your-mouth texture with minimal effort.
Step 1: Prepare the Chocolate Base
Line an 8×8-inch baking dish with parchment paper, leaving an overhang on two sides for easy removal. In a medium microwave-safe bowl, combine the 2 cups Semi-Sweet Chocolate Chips and 0.5 cup Unsalted Butter, cut into small cubes.
Microwave in 30-second intervals, stirring between each, until fully melted and smooth. This gradual approach prevents scorching. The mixture should be glossy and free of lumps. Stir in the 1 tsp Vanilla Extract and 0.5 tsp Kosher Salt until fully incorporated.
Step 2: Create the Peanut Butter Mixture
In a separate large bowl, use an electric mixer to beat the 1.5 cups Creamy Peanut Butter and 1 cup Marshmallow Fluff on medium speed for 1-2 minutes until smooth and fluffy. The mixture should lighten slightly in color and texture.
Gradually add the 3 cups Powdered Sugar, ½ cup at a time, mixing well after each addition. Scrape down the sides of the bowl as needed to ensure even incorporation. The result should be a thick, spreadable consistency.
Step 3: Incorporate Heavy Cream and Combine Layers
With the mixer still running on low speed, slowly pour in the 0.25 cup Heavy Cream until fully combined. The mixture will become slightly more fluid but should still hold its shape. This step ensures the fudge remains rich yet spreadable.
Pour the melted chocolate mixture into the peanut butter bowl. Using a silicone spatula, gently fold the two together until just combined—avoid overmixing to maintain distinct ribbons of chocolate and peanut butter.
Step 4: Set and Chill to Perfection
Transfer the mixture to your prepared baking dish, spreading it evenly with the spatula. The top should be smooth with no air pockets. Press plastic wrap directly onto the surface to prevent a skin from forming as it chills.
Refrigerate for at least 2 hours, or until the fudge is firm to the touch. For best results, let it set overnight. The fudge is ready when a knife inserted in the center comes out clean and the edges pull away slightly from the pan.
Lift the fudge out using the parchment overhang and cut into 1-inch squares on a cutting board. Store in an airtight container in the refrigerator for up to 1 week.
Pro Tips For Making Pioneer Woman Peanut Butter Fudge
- Melt Slowly: Use low heat when melting the chocolate chips and butter together—rushing it with high heat can make the chocolate seize up. I learned this the hard way after my first batch turned into a grainy, clumpy mess.
- Sift the Sugar: Powdered sugar clumps fast, so sift it before mixing into the peanut butter. After ending up with little white specks in my fudge, I finally started doing this every time.
- Don’t Overmix: Once the powdered sugar is incorporated, stop stirring—overworking the mixture can make the fudge too dense or greasy. Sounds weird, but it works.
- Use Fresh Vanilla: Skip the imitation stuff and use real vanilla extract for a deeper, richer flavor that actually changes the outcome. My grandmother swore by this, and she was right.
Dietary Considerations for This Dish
Gluten-Free Friendly
This recipe is naturally gluten-free, making it perfect for anyone with celiac disease or gluten sensitivity. All ingredients, from creamy peanut butter to chocolate chips, should be certified gluten-free to avoid cross-contamination. I always double-check labels, especially on marshmallow fluff and powdered sugar. 💪
Dairy-Free Adaptation
For a dairy-free version, swap the unsalted butter for coconut oil and replace heavy cream with full-fat coconut cream. Ensure your chocolate chips are dairy-free—Enjoy Life brand works well. The texture remains smooth, though the flavor will have a subtle coconut note.
Vegan Considerations
To make this fully vegan, use the dairy-free swaps above and replace marshmallow fluff with a vegan alternative like Dandies marshmallows melted with a splash of plant milk. Earth Balance makes a great vegan butter substitute. The fudge will set similarly but may be slightly less creamy.
Nut-Free Alternative
For those with nut allergies, use sunflower seed butter instead of peanut butter. SunButter is a reliable brand. Note that the flavor will differ slightly, with a more earthy taste. Ensure all other ingredients are processed in nut-free facilities to avoid cross-contamination.
Lower Sugar Option
To reduce sugar, replace 1 cup of powdered sugar with ½ cup powdered erythritol or monk fruit sweetener. The texture may be slightly less smooth, but it’s a great option for those watching their sugar intake. I find Lakanto blends well in this recipe.
Diabetic Tips
For diabetic-friendly fudge, use the lower sugar option above and ensure all ingredients are sugar-free. Lily’s sugar-free chocolate chips work well. Portion control is key—enjoy small pieces as an occasional treat. The fudge will still be rich and satisfying without spiking blood sugar. ✨
Nutrition Facts
Frequently Asked Questions
Can I use natural peanut butter instead of creamy?
Natural peanut butter works but may separate slightly. Stir it well before measuring and expect a slightly oilier texture. For best results, stick with creamy peanut butter like Jif or Skippy.
Why does my fudge turn out grainy?
Graininess usually comes from powdered sugar that wasn’t sifted or melted chocolate that seized. Always sift your powdered sugar and melt chocolate in 30-second intervals, stirring between each.
How long can I store this fudge?
It keeps for 10-14 days in an airtight container at room temperature. For longer storage, freeze for up to 3 months and thaw overnight in the fridge before serving.
Can I make this without marshmallow fluff?
Yes! Melt 10-12 mini marshmallows with 1 tablespoon milk to replace the fluff. This substitution maintains the light texture while being just as easy to incorporate.

Trained in classic French technique but raised on slow-cooked ribs and spicy rubs, she blends culinary skill with smoke and soul.
- Recipe for Boneless Pork Chops in Cast Iron Skillet: Sear and Baste to Juicy Perfection - October 3, 2026
- Recipe for Boneless Cross Rib Roast: Slow-Roasted Beef with Herb Crust - October 3, 2026
- Hamburgers in Sauce Recipe Crock Pot: Slow-Cooked Savory Delight - October 3, 2026