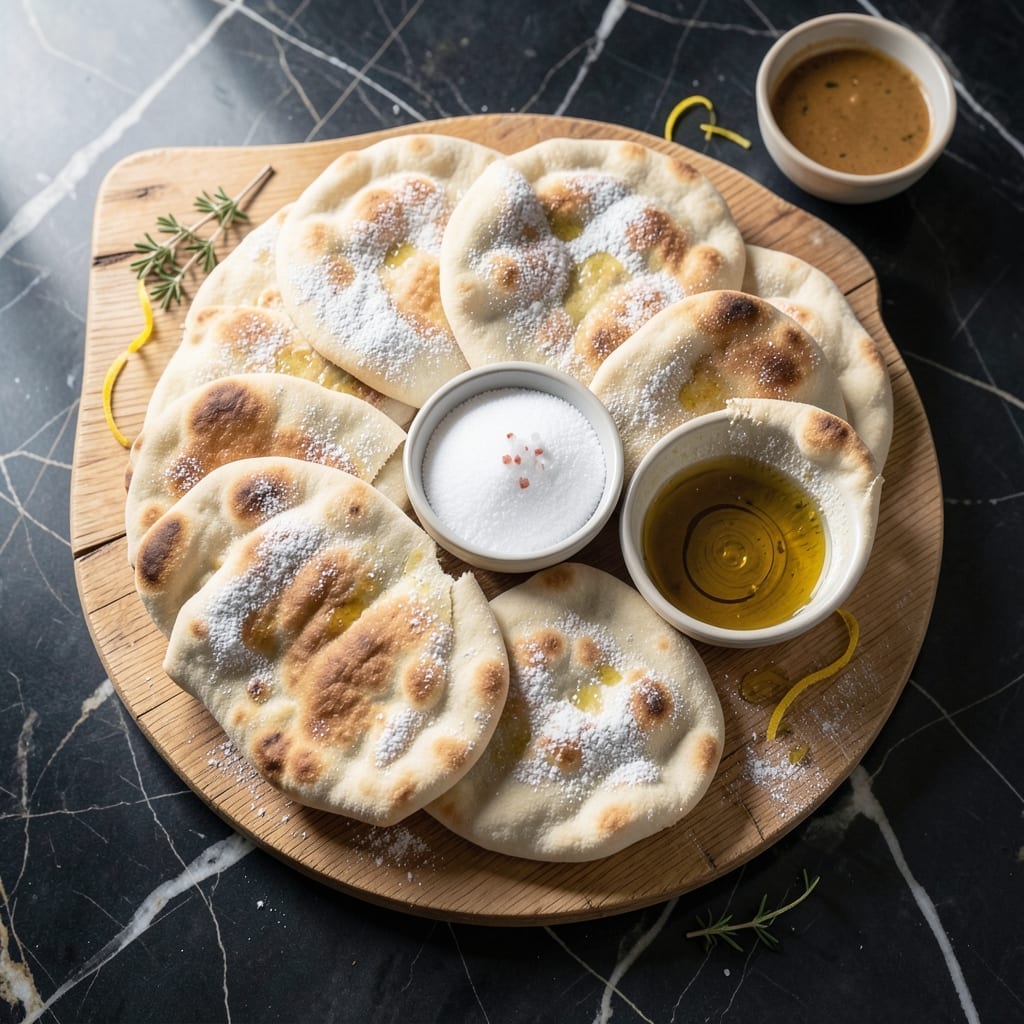
I developed this no-yeast pita bread after years of testing flatbread recipes in home kitchens everywhere. The secret lies in using baking powder for lift, creating soft and pillowy results without waiting for dough to rise.
This method requires just a few pantry staples and comes together in minutes. The dough rests briefly to relax the gluten, ensuring it rolls out thin and even without springing back.
Each piece puffs beautifully in a hot skillet, forming that signature pocket perfect for stuffing. The texture is tender yet sturdy enough to hold your favorite fillings.
Between you and me, these taste even better than traditional yeasted versions. The process is streamlined for weeknight cooking reality.
Ingredients for Pita Bread Recipe No Yeast
Pantry staples and a few minutes are all you need for this quick flatbread.
| Ingredient | Amount | Notes |
|---|---|---|
| All-Purpose Flour 🌾 | 3 cups | Plus extra for dusting |
| Baking Powder 🧂 | 2 tsp | Ensures proper lift |
| Salt 🧂 | 1 tsp | Fine sea salt preferred |
| Olive Oil 🫒 | 2 tbsp | Extra-virgin for richness |
| Warm Water 💧 | 1 cup | About 110°F, not boiling |
| Granulated Sugar 🍚 | 1 tsp | Optional for slight sweetness |
| Cornstarch 🌾 | 2 tbsp | For extra tenderness |
[recipe_ingredient_scaler]
The flour is non-negotiable here. King Arthur or Bob’s Red Mill all-purpose gives the best texture—avoid bread flour, it’s too tough. Baking powder is doing all the lifting, so check the expiration date (old leaveners = flat bread). I grab mine from Whole Foods bulk bins when I’m restocking, but any grocery store brand works fine. Warm water should feel like bathwater, not scalding.
No all-purpose flour? Bread flour plus 1 extra tbsp cornstarch gets close. Out of baking powder? Baking soda plus cream of tartar (1:1 ratio) in a pinch. Olive oil can be swapped for melted coconut oil if you want a neutral flavor. The sugar is optional but balances the salt—skip if you prefer savory. Cornstarch makes them extra tender, but omit if you don’t have it.
Dough rests 10 minutes max—longer and the baking powder loses steam. Store cooked pitas in a towel-lined basket for 2 days or freeze for 1 month. Reheat in a dry skillet to restore that fresh-off-the-griddle puff.
Why You’ll Love This Recipe
- Ready in 20: No yeast means no waiting—just mix, roll, and cook while the oven heats up.
- Olive Oil Magic: The olive oil gives it that rich, slightly crisp edge that store-bought pitas just can’t match.
- Meal Prep Hero: I make a batch on Sunday and they reheat beautifully for lunches all week.
- Pantry Staples: All-purpose flour, baking powder, salt—things I always have on hand, so it’s a last-minute lifesaver.
Step-by-Step Instructions for No Yeast Pita Bread
Here’s the method. Simple, fast, and it delivers perfect flatbread every time.
Step 1: Combine Dry Ingredients for Even Distribution
In a large mixing bowl, whisk together the 3 cups All-Purpose Flour, 2 tsp Baking Powder, 1 tsp Salt, 1 tsp Granulated Sugar, and 2 tbsp Cornstarch until fully incorporated. I always sift the baking powder first to prevent any lumps that could create uneven lift in your bread.
The cornstarch is the secret here—it tenderizes the gluten, giving you that soft, pillowy texture without yeast. Make sure all ingredients are evenly distributed throughout the flour before adding any liquids. This prevents pockets of concentrated baking powder, which can leave a bitter taste.
Step 2: Create the Dough with Warm Water and Olive Oil
Make a well in the center of your dry ingredients and pour in the 1 cup Warm Water and 2 tbsp Olive Oil. Using a wooden spoon, gradually incorporate the flour mixture into the wet ingredients until a shaggy dough forms. The water should be warm to the touch but not hot—about 110°F.
Once the dough comes together, switch to kneading by hand right in the bowl. The dough should be slightly sticky but not wet. If it’s too sticky, add a little more flour, 1 tbsp at a time. Knead for 5-7 minutes until smooth and elastic. You’ll notice the texture transforms from rough to silky as you work it.
Step 3: Rest the Dough for Optimal Texture
Cover the bowl with a clean kitchen towel and let the dough rest at room temperature for 20-30 minutes. This resting period allows the baking powder to activate and the gluten to relax, making the dough much easier to roll out.
Don’t skip this step—it’s what gives your pita that tender, easy-to-chew quality. While waiting, lightly flour your work surface and divide the dough into 4 equal portions (since this makes 4 servings). This ensures each pita bakes evenly and at the same rate.
Step 4: Roll and Cook the Pitas
On your floured surface, roll each portion into a ball, then flatten into a ¼-inch thick circle. Use a rolling pin to create an even 6-7 inch round. The thickness is crucial—too thick and they won’t puff properly; too thin and they’ll dry out.
Heat a large skillet over medium-high heat until very hot. No oil needed here. Place one pita in the dry skillet and cook for 1-2 minutes per side. You’ll see it start to bubble and puff dramatically—that’s how you know it’s working. Flip when the bottom is lightly spotted with golden brown and the pita has puffed fully.
Transfer to a clean towel and cover to keep warm while you cook the remaining pitas. The steam trapped by the towel keeps them soft and pliable.
Pro Tips For Making Pita Bread Recipe No Yeast
- Heat the Pan First: Get your skillet screaming hot before adding the dough—medium-high heat for at least 3 minutes. I learned this the hard way after my first few pitas came out dense and pale.
- Measure Baking Powder: Use 2 teaspoons per cup of flour, no more. After one batch tasted like chalk, I finally realized that too much baking powder leaves a bitter aftertaste.
- Roll Evenly Thin: Aim for ¼-inch thickness when rolling the dough. Any thicker and the pitas won’t puff properly; any thinner and they’ll burn before cooking through.
- Cover While Resting: Let the dough rest for 10 minutes under a damp towel before shaping. Sounds weird, but it works—this keeps the surface from drying out and makes rolling much easier.
Perfect Pairings for This pita bread recipe no yeast
Mediterranean Fillings
Stuff these with ½ cup hummus, ¼ cup sliced cucumbers, and 2 tbsp crumbled feta for a classic Greek-inspired meal. I love adding kalamata olives and a sprinkle of oregano for extra Mediterranean flair. The soft texture holds up perfectly to these bold flavors. 🌟
Breakfast Creations
For morning meals, fill with scrambled eggs, avocado slices, and a drizzle of hot sauce. The pita’s mild flavor lets the fillings shine. I often add crumbled bacon or sautéed spinach for extra substance.
Dessert Options
Transform these into a sweet treat by filling with Nutella and sliced strawberries. A dusting of powdered sugar adds a finishing touch. The slight sweetness from the sugar in the dough pairs beautifully with chocolate.
Middle Eastern Feast
Create a falafel pita with 3-4 falafel balls, lettuce, tomatoes, and a drizzle of tahini sauce. I prefer whole wheat pita for this, but your no-yeast version works just as well. The sturdy texture handles all the fillings without tearing. 💫
Simple Snack Idea
Cut into wedges and serve with baba ganoush or tzatziki for dipping. The warm pita pairs especially well with these cool, creamy dips. I often make extra for snacking throughout the week.
Nutrition Facts
Frequently Asked Questions
Why does this recipe use baking powder instead of yeast?
Baking powder provides instant leavening without waiting for dough to rise. It creates a quick chemical reaction that makes the bread puff beautifully in just 1-2 minutes of cooking. Perfect for busy weeknights.
Can I make these ahead of time?
Cooked pitas stay fresh wrapped in a towel at room temperature for 2 days. For longer storage, freeze for up to 1 month. Reheat in a dry skillet to restore softness.
What’s the secret to getting them to puff?
Roll the dough ¼-inch thick and cook on medium-high heat in a very hot dry skillet. The high heat creates steam inside, making the bread inflate dramatically. Don’t flip too early!

Trained in classic French technique but raised on slow-cooked ribs and spicy rubs, she blends culinary skill with smoke and soul.
- Recipe for Boneless Pork Chops in Cast Iron Skillet: Sear and Baste to Juicy Perfection - October 3, 2026
- Recipe for Boneless Cross Rib Roast: Slow-Roasted Beef with Herb Crust - October 3, 2026
- Hamburgers in Sauce Recipe Crock Pot: Slow-Cooked Savory Delight - October 3, 2026