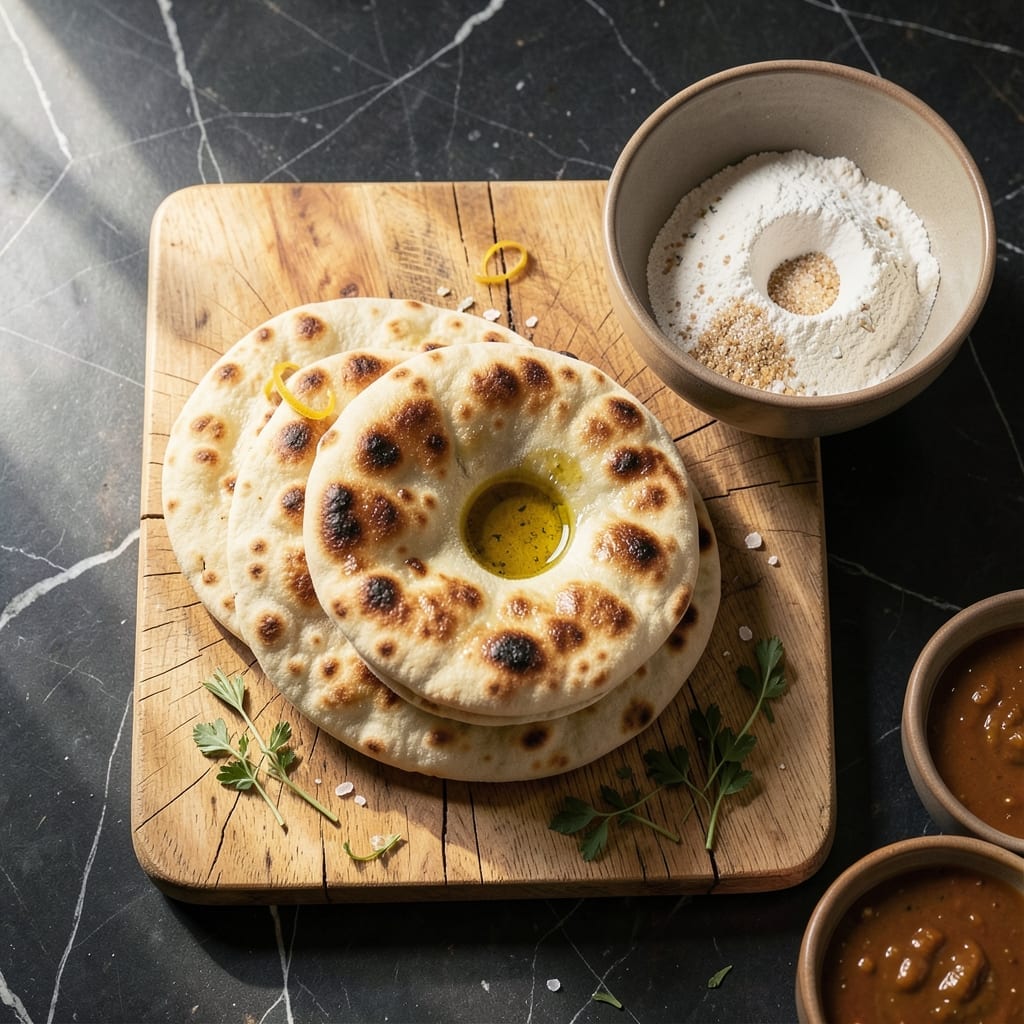
This yeast-free pita bread delivers fluffy results with a simple baking powder rise. No waiting for dough to proof means you can have warm flatbreads ready in 20 minutes.
Mix the dough, let it rest briefly, then roll and cook in a hot pan. The result is soft pitas that puff slightly and stay tender for days.
Ingredients for Pita Bread Recipe Without Yeast
Seven simple ingredients, no yeast, no waiting. Fluffy pitas in minutes.
| Ingredient | Amount | Notes |
|---|---|---|
| All-Purpose Flour 🌾 | 2 cups | Plus extra for dusting |
| Baking Powder 🧂 | 2 tsp | Fresh for best rise |
| Salt 🧂 | ½ tsp | Fine sea salt preferred |
| Olive Oil 🫒 | 2 tbsp | Extra-virgin for flavor |
| Water 💧 | ¾ cup | Warm, about 110°F |
| Granulated Sugar 🍚 | 1 tsp | Optional for slight sweetness |
| Plant-Based Yogurt 🥛 | ¼ cup | Unsweetened, for tenderness |
[recipe_ingredient_scaler]
The flour is the foundation here. King Arthur or Gold Medal all-purpose work great—nothing fancy needed. Baking powder loses potency over time, so check the expiration date (or do the vinegar test: a spoonful in hot water should bubble vigorously). Warm water helps activate the baking powder for that quick rise. I always use extra-virgin olive oil for that subtle fruitiness that makes these taste special.
No plant-based yogurt? Unsweetened almond milk plus 1 tsp vinegar works in a pinch. Out of baking powder? Baking soda plus cream of tartar (1:2 ratio) gets you close. The sugar is optional but adds a nice golden color. Want them crispier? Roll the dough thinner. For extra softness, brush the cooked pitas with melted vegan butter.
Dough rests 10 minutes before rolling—don’t skip this. Cooked pitas stay soft for 3 days in a sealed bag at room temp. Freeze stacked with parchment between layers for up to 1 month. Reheat in a dry pan or microwave wrapped in a damp towel.
Why You’ll Love This Recipe
- I’ll be real: it’s just flour, baking powder, salt, oil, and water—nothing extra to buy.
- No Yeast Needed: I love that I can skip the waiting around for dough to rise—just mix, rest 10 minutes, and cook.
- Rich Olive Flavor: The olive oil gives it this warm, slightly fruity depth that store-bought just can’t match.
- Pocket-Free Perfection: Honestly, it’s flat and sturdy—ideal for dipping, wrapping, or scooping without the fuss of traditional pita pockets.
Step-by-Step Instructions for No-Yeast Pita Bread
Here’s the method I use to make soft, pillowy flatbreads without waiting for dough to rise.
Step 1: Mix the Dry Ingredients
In a large bowl, whisk together the 2 cups All-Purpose Flour, 2 tsp Baking Powder, 0.5 tsp Salt, and 1 tsp Granulated Sugar until evenly combined. I like to sift the flour first to prevent lumps in the finished pitas.
This step ensures your leavening agent is evenly distributed so each flatbread rises uniformly. The sugar adds just a hint of sweetness, but you can omit it if you prefer a more neutral flavor.
Step 2: Add Wet Ingredients and Form the Dough
Make a well in the center of the dry ingredients and pour in the 2 tbsp Olive Oil, 0.75 cup Water, and 0.25 cup Plant-Based Yogurt. Use a wooden spoon to stir everything together until a shaggy dough forms.
The yogurt adds tenderness and helps create that signature soft texture. You’ll notice the dough comes together quickly—no need for a stand mixer here. If it feels too sticky, add a sprinkle of flour; if too dry, add a splash of water.
Step 3: Knead Until Smooth
Turn the dough out onto a lightly floured surface and knead for 5-7 minutes until it becomes smooth and elastic. I press the heel of my hand into the dough, then fold it over and rotate a quarter turn, repeating until it’s no longer sticky.
You’ll know it’s ready when the dough springs back slowly when poked with a finger. This develops the gluten, which gives your pitas structure and chew. Don’t rush this step—proper kneading makes all the difference in texture.
Step 4: Rest and Divide the Dough
Place the dough in a lightly oiled bowl, cover with a clean kitchen towel, and let it rest for 20-30 minutes. This gives the gluten a chance to relax, making the dough easier to roll out.
After resting, divide the dough into 4 equal portions (since this makes 4 servings) and roll each into a ball. Cover them with the towel while you work to prevent drying out.
Step 5: Roll and Cook the Pitas
Heat a non-stick skillet over medium-high heat. While it warms, roll each dough ball into a ⅛-inch thick circle on a lightly floured surface. Don’t worry about perfect rounds—rustic shapes work fine.
Cook each pita for 1-2 minutes per side until puffed in spots and light golden brown. You’ll see bubbles form as the steam from the wet dough hits the hot pan—this is what creates those pockets. Transfer to a clean towel and cover to keep warm while you cook the remaining pitas.
Pro Tips For Making Pita Bread Recipe Without Yeast
- Heat the Pan First: Crank your skillet to medium-high and let it get screaming hot before adding the dough—I learned this the hard way after my first few pitas came out pale and sad.
- Measure Baking Powder: Use exactly 2 teaspoons per 2 cups of flour, no more. Too much and your pitas will taste bitter; too little and they won’t puff.
- Skip Cold Water: Sounds weird, but it works: use room temperature or slightly warm water to help the baking powder activate properly.
- Roll Evenly: Aim for ¼-inch thickness when rolling out the dough. Any thinner and they’ll burn; any thicker and they won’t puff up right.
Wine and Beer Pairings for This pita bread recipe without yeast
Light Beer Pairings
These flatbreads shine with crisp, refreshing beers that complement their soft texture. A German Pilsner like Warsteiner cuts through any richness with its clean, slightly bitter finish. I also love a Mexican Lager such as Modelo Especial for its light body and citrus notes. 🍺
Wheat Beers
For something with more body, try a Hefeweizen like Weihenstephaner. The banana and clove esters in the beer enhance the subtle sweetness of the pitas. The effervescence also helps cleanse your palate between bites.
Non-Alcoholic Options
Sparkling water with a squeeze of lemon or lime works beautifully, especially if you’ve added sugar to the dough. I also recommend mint iced tea—the herbal notes pair wonderfully with the warm, slightly earthy flavor of the bread.
Wine Pairings
A chilled Sauvignon Blanc from New Zealand offers bright acidity and citrus flavors that balance the bread’s mild taste. For red wine lovers, a light Pinot Noir like Meiomi provides subtle berry notes without overpowering the dish. 🍷
Rosés and Sparkling
Dry rosé from Provence delivers crisp, clean flavors that won’t compete with the pitas. For celebrations, a Prosecco adds a fun, bubbly element that’s light enough to let the flatbreads shine.
Nutrition Facts
Frequently Asked Questions
Why use baking powder instead of yeast?
Baking powder creates a quick chemical reaction, eliminating the need for rising time. It produces a slightly different texture but still delivers soft, fluffy results in 20 minutes.
Can I make these ahead of time?
Yes! Cooked pitas stay soft for 3 days in a sealed container. For longer storage, freeze with parchment between layers for up to 1 month.
What if my dough is too sticky?
Add flour 1 tbsp at a time while kneading until smooth. Avoid adding too much or the pitas will become dense. Resting the dough for 10 minutes also helps.
Can I use regular yogurt instead of plant-based?
regular yogurt works the same. The acidity helps tenderize the dough. Just ensure it’s unsweetened for best results.

Trained in classic French technique but raised on slow-cooked ribs and spicy rubs, she blends culinary skill with smoke and soul.
- Recipe for Boneless Pork Chops in Cast Iron Skillet: Sear and Baste to Juicy Perfection - October 3, 2026
- Recipe for Boneless Cross Rib Roast: Slow-Roasted Beef with Herb Crust - October 3, 2026
- Hamburgers in Sauce Recipe Crock Pot: Slow-Cooked Savory Delight - October 3, 2026